Quantcast
Channel: Diary of a Chain Stitcher
Viewing all 396 articles
Browse latest View live

Viscose Chambray Maxi Kalle Shirtdress

$
0
0
I'm slowly working my way through the entire Closet Case Patterns collection as I appear to be able to find a place for all the designs in my life and wardrobe! Each time I make one I realise I like it even more than I expected. The process of making each one reveals just how clever and well thought out the cutting and construction is. I must admit I didn't think the Kalle Shirtdress was my kind of thing when it was first released but I've since seen many versions in person and online that have swayed me to give it a try and now I can't believe I didn't make it sooner.

Diary of a Chain Stitcher: Sand Washed Viscose Chambray Closet Case Patterns Maxi Kalle Shirtdress

Abolaji in particular has posted a few beautiful versions on her Instagram, especially this lengthened plaid version. I adore how she has really made the pattern her own with fabric choices and styling. I took inspiration from her and decided to go almost maxi length with mine and maximise the glamour! It is quite an oversized style which I was hesitant about (being fairly petite sometimes these oversized looks can really swamp me) but the fabric I had in mind had a slippery drape and I knew would skim the body rather than overwhelm it so I felt fairly confident.

Diary of a Chain Stitcher: Sand Washed Viscose Chambray Closet Case Patterns Maxi Kalle Shirtdress

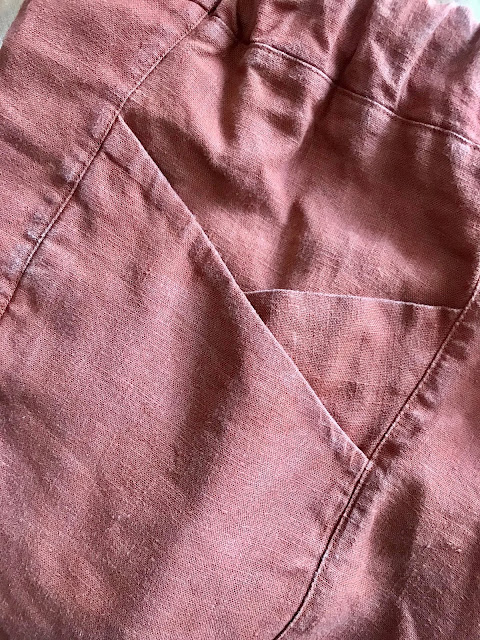
It is hard to capture how wonderful this fabric is in a photo. I picked up a coupon of this stunning viscose in Paris Tissus in Montmartre when I was in Paris this time last year. It was on the corner just where you turn off of Boulevard de Rochechouart onto Rue d'Orsel where the main drag of shops is. There were big bins of coupons to rummage through all at bargain prices. I paid no more than 10 Euros for 3 metres so still have a sizeable chunk left. The weave and colour looks like a classic chambray but has the fluid, liquid movement of the softest viscose and has the most beautiful buttery, sand-washed texture. A great imitation of a fairly weighty sandwashed silk. It is not particularly fine which gives the garment an kind of expensive feeling weight. It is a true delight to wear and a voluminous garment like this which allows it to move and billow is the perfect match.

Diary of a Chain Stitcher: Sand Washed Viscose Chambray Closet Case Patterns Maxi Kalle Shirtdress

That movement did make the fabric a little tricky to work with as it liked to shift about. The hardest part was probably cutting and making sure everything stayed on grain. I cut almost everything out on the floor which is carpeted and can be really useful to keep slippery fabrics like this in place. It is a little tricky to get things laying out smooth to begin with as the carpet grips onto the fabric but once you've got everything straight it will stay put. I used lots of pins within the seam allowance to ensure accurate cutting.

Diary of a Chain Stitcher: Sand Washed Viscose Chambray Closet Case Patterns Maxi Kalle Shirtdress

Once I had the pieces cut the sewing up was pretty straightforward and I was surprised by how quickly this came together for a shirt. Perhaps my practice making quite a number of shirts now is paying off! I like that this design is contemporary and unique but still incorporates a number of classic shirt elements with front placket, collar stand, breast pocket and back that has a central pleat into the yoke. I love constructing all these little details and really enjoy all the top-stitching too. The sand-washed texture of the fabric made it a lot easier to sew than cut as it grips on to itself slightly and stays put as it feeds through the machine. It also responded well to heat and holds a neat pressed edge which always makes those fiddly bits so much easier. I think half the work of sewing is a the ironing board sometimes. Putting in the effort there to shape and mould the fabric and get things just so results in a much more professional looking garment.

In terms of the instructions and techniques used, as usual with Closet Case Patterns I could tell that careful choices had been made to enable you to get the best finished garment possible. The yoke is cleanly finished with the burrito method, the sleeves with cuffs and the front with plackets so the only seams you have to finish are the sides. You could do a flat felled or faux flat felled seam but I chose just to overlock mine and leave the seam plain.

Diary of a Chain Stitcher: Sand Washed Viscose Chambray Closet Case Patterns Maxi Kalle Shirtdress

I adore the bias tape facing around the hem. It is absolutely the best way to deal with finishing such a dramatic curve neatly. I was nervous about getting this looking tidy with such a shifty, slippery fabric but the method in the instructions is great and it helped that this fabric was nice and malleable around those curves. If you're struggling with getting bias facings to sit neatly I recommend under-stitching the first seam before you turn the bias to the wrong side. It was a revelation to me when I first did it and makes the following steps so much more straightforward.

Diary of a Chain Stitcher: Sand Washed Viscose Chambray Closet Case Patterns Maxi Kalle Shirtdress

The only aspect of the instructions I struggled with was the collar. I opted for the simple band collar rather than the turn down. A slightly different construction method to the standard is offered which actually does turn out great and is really simple when you understand it...but I just couldn't get my head around it with just the written instructions and illustrations in the pattern booklet. But I love trying out new techniques so persisted and luckily Closet Case Patterns write some fantastically detailed sew-alongs with colour photos of each step. Once I read this it made complete sense and I'm really pleased with the result. The method involves rolling the front edges of the shirt tightly up and sort of into the collar stand so you can stitch right the way around the front tip of the collar stand and part way along the join between collar and shirt before turning it through. To get neat topstitching around the curves I recommend reducing your stitch length for more control.

The buttons are from a big card of East of India buttons that my Mum gave me years ago and I have been slowly working my way through! I like how they look against the blue and I think the slight contrast of colour and sheen highlights the placket and lifts the dress a little.

Diary of a Chain Stitcher: Sand Washed Viscose Chambray Closet Case Patterns Maxi Kalle Shirtdress

I deliberated sizing down as I was concerned about feeling overwhelmed by fabric but stuck with my usual Closet Case Patterns size of 8. This is fine as it is but when making again I think I'll go down a size as I'm quite small in the shoulders and this is the main area for fitting. Thinking back to my Fiona Sundress perhaps the size 6 should be my starting point for CCP from now on. To lengthen the pattern I simply cut along the 'lengthen/shorten here' line and added in the length of an A4 piece of paper (29.7cm)! I'm really happy with this length as I won't be tripping over it and I think the curved shape of the hem looks better slightly off the floor than sweeping it.

Diary of a Chain Stitcher: Sand Washed Viscose Chambray Closet Case Patterns Maxi Kalle Shirtdress

I made this with my holiday in mind and am picturing myself swanning round a safari lodge on a balmy summer evening with beer in hand! I feel more comfortable in the dress belted but I think in the heat of a South African Summer I'm going to appreciate the breeze of wearing it loose! The beauty of the viscose fabric is that it is super breathable and should keep me cool despite the quantity of fabric. I'll definitely be making some cropped shirt versions of Kalle to pair with cropped trousers in the somewhat milder English summer. I don't often wear a shirt as the crisp tailored vibe doesn't feel right on me and neither does the feminine feel of a classic blouse. This design, for me strikes just the right balance between soft and sharp, casual and dressy.

Leaf Green Linen Sierra Jumpsuit

$
0
0
When Papercut Patterns released their Geo collection a few months back I didn't know which pattern to buy first! All six are gorgeous, contemporary styles and feature interesting shapes and pattern cutting. I'd already planned what handmade additions I wanted to make to my holiday wardrobe, but I couldn't resist adding a couple of these to to queue. First up the Sierra Jumpsuit which I made the short version of but can also be made with full length trousers.

Diary of a Chain Stitcher: Papercut Patterns Sierra Jumpsuit in Leaf Green Linen Rayon Chambray from The Fabric Store

I wanted to use a solid colour so the lovely design of the jumpsuit would be shown off and was instantly drawn to this fresh and vibrant leaf green linen/rayon chambray from The Fabric Store. The rayon in the blend gives it a slightly softer drape and smoother hand than their regular linens and the weave is slightly tighter and finer. I could not be happier with my choice to pair it with this pattern. Although you might think a fabric with a bit of weight and structure best for a jumpsuit something fairly fine is better suited to this as the bodice wants to wrap softly around the curves of the body and you don't want too much bulk around the waist.

Diary of a Chain Stitcher: Papercut Patterns Sierra Jumpsuit in Leaf Green Linen Rayon Chambray from The Fabric Store

Whilst thinking about the weight of fabrics it is important to consider this with the lining too. I almost self lined the front bodice pieces but noticed that the pattern suggested a voile which is super lightweight. This is absolutely the right suggestion to reduce bulk and keep a soft feel across the front despite there being two layers of main fabric and two layers of lining at points. The back has an interfaced facing in the main fabric as you want a little more structure here to balance things out. In the interest of using up my stash I chose some white cotton lawn for lining the front bodice pieces which worked out great in terms of weight but on reflection it would have been better if I had used a matching green. Unless I tie the front very carefully white lining wants to peek out at the top and bottom of the wrap where the fabric folds into the tie.

Diary of a Chain Stitcher: Papercut Patterns Sierra Jumpsuit in Leaf Green Linen Rayon Chambray from The Fabric Store

The bias binding used to finish the raw edge of the facing and front lining is a lovely touch if you enjoy beautiful insides. I considered making matching out of the left over chambray but then remembered this fun floral bias I've had in my stash for years! I only had about 1.5m for it and it has never found the right project until now. It makes me really happy every time I put it on.

Diary of a Chain Stitcher: Papercut Patterns Sierra Jumpsuit in Leaf Green Linen Rayon Chambray from The Fabric Store

I thoroughly enjoyed this project and found myself completely absorbed in it as the design is unique and the construction method wasn't one I could second guess. I had to follow all the instructions carefully to make it work (rather than going off piste with my own preferred methods as I often do nowadays) and I really enjoyed the challenge of trying something completely new. This is something I have noticed before with Papercut Patterns and really like. They push the boundaries and their patterns often involve interesting and unusual cutting and construction.

I really liked the pocket construction. They are not put together quite like a regular side seam pocket and sit slightly in front of the seam rather than in it. I much prefer how these wear in a trouser as this construction makes the pocket bags fall to the front where thy should be. The in seam method is great for a skirt but I've noticed on my tartan Ailakki Trousers the pocket bags often go for a walk and things start to look misshapen despite bar tacks to keep things in place.

Diary of a Chain Stitcher: Papercut Patterns Sierra Jumpsuit in Leaf Green Linen Rayon Chambray from The Fabric Store

I'm very pleased with my invisible zip and how everything matches up smoothly. The other side seam isn't quite so satisfying as I feel like the finishing around the opening in the side seam for the tie is a little messy inside. It looks great from the outside but where you have to clip the seam allowances to get everything to lay flat you end up with some messy edges and there are quite a lot of seam allowances intersecting in one area. Something I'll give some thought to next time as I'd love to make a full length version of this.

Diary of a Chain Stitcher: Papercut Patterns Sierra Jumpsuit in Leaf Green Linen Rayon Chambray from The Fabric Store

The last couple of times I've used a Papercut pattern I've gone for a PDF download but this time I treated myself to a print copy in their Black Friday sale. It is so worth the extra expense for the beautiful packaging which includes illustrated instructions printed on to the pattern sheets in a little booklet for you to assemble yourself. The layout of their instructions mean the explanation of each step is fairly brief but I find the process broken down into small enough steps that it doesn't get confusing. If you are beginner used to indie patterns which take you step by step through inserting the zip including tips and tricks don't expect that here. I definitely don't think a pattern company should be required to do that and I think the Papercut instructions are thorough and plentiful.

Diary of a Chain Stitcher: Papercut Patterns Sierra Jumpsuit in Leaf Green Linen Rayon Chambray from The Fabric Store

I cut the size XS and graded out to a size S at the hip. To be honest Papercut sizing doesn't particularly suit me, I fall across numerous sizes and I should have remembered that I'd probably have to do a bit of work to get the fit spot on. I sewed this up straight out of the envelope and the fit isn't fantastic but luckily because of the wrap bodice and tie around the waist it is quite a forgiving style in this respect. It is definitely wearable as it is but next time I'll probably go down a size at the bust and waist and up a size at the hip. The bodice feels quite roomy, which I think is partly due to it being too long on me. Taking a bit off the shoulder would probably sort out most issues, raising the armhole a little and probably preventing a bit of the gaping along the back neckline too. This is probably something I could go back in and do to this one when I get back to London. The waist isn't so much of a problem because of the tie but to tie it so it feels secure I have to pull it so tight that some of the bodice starts coming through the gap in the side seam. The shorts are definitely just a fraction too snug across the hip so the pockets are pulling open and there are a few drag lines on the upper seat. I should have noticed when looking at the measurements (as finished measurements are handily included) that there is quite a small amount of ease included in this area compared to a lot of other pattern companies.

Diary of a Chain Stitcher: Papercut Patterns Sierra Jumpsuit in Leaf Green Linen Rayon Chambray from The Fabric Store

The fit is fairly relaxed but still cut to be flattering resulting in a comfortable outfit that due to the unique design feels really trendy and stylish. I love a practical yet chic jumpsuit and want to fill my wardrobe with them! I can see me getting a lot of wear out of this one throughout London summers when I'm running around town in 30 degree but still have to turn up to a meeting looking presentable. 

May Indie Pattern Update!

$
0
0


The pattern releases have been coming thick and fast throughout May, I've been struggling to keep up! There are some absolutely gorgeous new releases plus sneaky peeks of upcoming patterns to tempt you. I must admit I've already bought and sewn a couple of the new patterns in this list, they were so irresistible! Taking part in Me-Made-May has really fired up my sew-jo as I've identified gaps in my handmade wardrobe. Plus the change of seasons always makes me more motivated and excited about sewing new and different things. I just wish I had more time to sew them all! I'll crack on with the good stuff you came here for...


New Pattern Companies!


New Patterns


  • Jennifer Lauren Handmade released the Pippi Pinafore which is a more feminine take on the popular overall dress. The dress is partially lined with an a-line skirt and patch pockets but the best feature is the fitted bib which comes with multiple cup size options making this style more accessible to curvier ladies!
  • New from Closet Case Patterns are the Jenny Overalls and Trousers! These are a modern take on the vintage workwear trend with a wide cropped leg and ultra high rise. I'm particularly taken by the shorts variation and may be changing my summer sewing plans yet again!
  • The two new patterns released with this month's edition of Seamwork Magazine by Colette Patterns were dresses! I must admit I'm incredibly tempted to sew up the Lane Dress which is a figure flattering column dress for knits with waist ties. I might just have the perfect fabric in my stash! The Amber Dress is a contemporary take on a peasant style sundress with gathered tiered skirt.
  • Style Arc kicked off the month with two new oversized shirt patterns. The Phoebe Overshirt is a classic mens style with a statement double cuff but I particularly like the seam lines and swing shape of the Martha Overshirt. The way the short sleeves and pointed side panels grow out of the yoke is a really interesting feature. Mid-month they released the Fifi Woven Pant and Flick Knit Top.
  • I'm not usually one to impulse buy a pattern on release but thats exactly what I did with the new Myosotis Dress which is part of the new collection from Deer & Doe. Here's my version; that swinging boho style is what I want to wear all summer long! The other two designs are pretty stellar too; the Narcisse Pants have a classic high-waisted wide leg cut and the Nénuphar Jacket is a kimono style which I would absolutely wear both variations of.
  • This month started with a big flurry of beautiful, well designed new patterns. The Decades of StyleTLC 107 Kaftan is no exception. Its a dramatic pullover design with pockets and waist ties that thread through inside to give definition at the waist.
  • The joy continued with the new Hilo Dress from Friday Pattern Company who continue to produce some really unique and wearable designs. This is a flowing bohemian knit dress with a layered bodice and the option to make with a super low scooped back.
  • Mood's first free pattern download release of the month was to celebrate Star Wars day! The Delta Cosplay is a mens style based on Hans' jacket. Their second cosplay release was Enif inspired by Deadpool. They also released the Nolana Jeans, Oak Jacket, Piper Shorts, Orchid DressPhoenix Swimsuit (with on trend off shoulder ruffle) and their first maternity pattern, The Olea Shirt. The top portion of the Petunia Romper has caught my eye; love that wrap front and cut out combo.
  • New from Designer Stitch is the Eden Jumpsuit which offers a lot of style choices with a cropped or short leg, sleeveless or cold shoulder sleeve and the option to make as a simple wide leg trouser with elasticated waist.
  • Schnittchen released the Anoush Pants and Shorts. The main feature of these are the unique large curved pocket openings which curve around the hips to the back. They also released the Carmen Shirt and Dress which is either hip or maxi length with double ended darts for shaping through the back. The on trend cold shoulder look is created by the wide ruffle running across the chest and continuing into sleeves.
  • The new releases from DG Patterns this month included the Dana Top, Chelsea Top and Micaela Top and Dress. Micaela is a sporty knit tee with hem vents, Chelsea a tiered pussy bow style and I think I might give Dana a whirl, I love the boxy wrap style and the way it ties at the hip.
  • The Danube Jean Skirt is the lastest design from Itch to Stitch and is a beautiful fitted denim skirt with all the classic jeans style features and side slits. Kennis always creates such classy timeless designs and this is a true wardrobe staple for all ages. She also released the Nottingham Top which is a satisfying, speedy to sew t-shirt with knot detail at the centre front hem.
  • Dessine Moi Un Patron released the Ivy Skirt which is a tiered maxi skirt. I really like the proportions of this and the way it skims the hips then flares out dramatically. Got my eye on that for summer! 
  • The Phoenix Blouse is the latest release from Hey June Handmade. I love this, particularly with the 3/4 length bell sleeves. It appeals to the part of me that loves a bit of bohemian summer style and it could be a real winner with the jeans in my wardrobe.
  • Colette Patterns released the Gwen Dress and Camisole. Its a simple slip style with french finished princess seams and side vents along with the option to add a flounce to the straps. As with all their patterns going forward this is a PDF only release.
  • Thread Theory released their next menswear pattern; the Sayward Raglan. A classic mens raglan tee that promises to be a speedy sew...might this encourage some of us to do a bit more sewing for the men in our lives?! This is the first in a number of new designs coming from them
  • Daughters of Style launched two new designs this month; the Winona Shirt is an oversize style with overlapping back and shirttail hem and the Liv T-Shirt and Dress is a sweatshirt style with long sleeves gathered on to a dropped shoulder.
  • The Sew Over It PDF pattern release of the month was the Lucia Top. It features an off the shoulder frill around the neckline and has long sleeves which is a great pairing I've never thought of. This would look great made in different fabrics for a casual or dressed up look.
  • The new James Knit Pant from Fresh Press Patterns promises the look of a trouser but the comfort of a legging! The design features a tailored straight cut, centre front invisible zip fastening and contoured waistband. 
  • The Hérens Bathrobe and Robe is new from Opian Patterns and is a really cute and practical design. The robe features a curved hem, inseam pockets and (my favourite feature) little pleats at the shoulders. I love the neat yet relaxed fit of this, Chloé has hit on a great balance.
  • The latest release from CocoWawa Crafts could be just the dress my summer wardrobe needs! The Honeycomb Shirt & Dress features a centre front button placket and small stand collar but my favourite design element are the little bow ties which pull the waist in at either side.
  • Merchant & Mills released the Gyo Top & Dress which is a Japanese inspired asymmetrical design which would look gorgeous made up in a linen, double gauze or seersucker for summer.
  • New from Pier and Palace is the Pico Wrap Dress. Jumping onboard with the wrap dress trend they take inspiration for theirs from the Japanese kimono which shows clearly in that beautiful wide obi belt. I also really like the angled armholes and centre front hem.
  • Cashmerette launched the Ipswich Swimsuit which like all of Jenny's patterns is designed with plus-sized ladies in mind. The suit features supportive straps and the option to add a pretty incredible looking underwired foam swim bra and boning along with the choice of one piece or bikini.
  • Wardrobe By Me released two new patterns this month. The first is the Summer Skirt which is a wrap style and features two ruffle options plus a contoured waistband, elasticated at the back for comfort. They also released the Classic T-Shirt which would be perfect for that nineties crew neck and jeans look.
  • Made by Rae released Jade which is a knit top with multiple mix and match sleeve and neckline options. There's either a boat neck or ballet neckline to choose from and elements of this can be mixed with her Isla pattern for even more mileage.
  • New from Waffle Patterns is the Pine Yoke Blouse. The design is semi-fitted with a front a back yoke with box pleat beneath. I like the button back fastening and option to make with a high collar or round neck.
  • How To Do Fashion launched their No.13 Paris pattern which is an absolutely gorgeous 1960s wiggle dress design with asymmetrical features. So chic!
  • The York Pinafore is the latest release from Helen's Closet. It has a lovely cocoon shape and scooped sides and offers two choices of length, neckline and pockets which you can mix and match to create your perfect style.
  • There is a new free pattern available from In The Folds for Peppermint Magazine. This time it is a gorgeous pair of Wide-Leg Pants which feature a fly front, pockets and a shaped waistband.
  • DP Studio released their fourth collection of patterns. The Spring/Summer 2018 Collection is of their usual unique style and includes this fab workwear inspired jumpsuit, a beautiful strapless dress, versatile shirtdress and fashion forward jeans amongst many others. Make sure to check out the line drawings to really appreciate these. I'm about to cut out a pattern from one of their earlier collections so will let you know how I get on!
  • The Tabor V-Neck is the latest release from Sew House Seven and it is a t-shirt, crop top and sweater for all seasons! It has a few different hem styles, sleeve styles and necklines to choose from. My favourite is the combination of deep v-neck with wide band an a dropped shoulder.
  • True Bias launched the Yari Jumpsuit which has a relaxed fit with cute little straps with d-rings at the sides to cinch it in at the waist. It has four views including sleeveless and small extended sleeves plus shorts or a tapered leg. I think it could be a great match for some soft chambray I have in my stash!
  • Ploen Patterns released the Astrid Skirt which is a really cute little button up flared style. It looks great in the crisp striped fabric they picked for the sample. Available in 12 sizes in PDF format.
  • New from Green Style Creations is the North Shore Swimsuit. The pattern includes a one piece cutaway swimsuit and a bikini option with an incredible amount of variations to choose from. There are six front styles and sizes back styles to mix and match for the top and four bottom options with different levels of coverage. A great purchase if you need a lot of swimwear.
  • 5 out of 4 Patterns released the Stella Romper (which also comes in a girls version for those of you who sew for the little ones in your life!). This relaxed little number with off the shoulder ruffle neckline can be made as a one piece or separate tank and shorts.
  • Last but by no means least The Maker's Atelier released The Sun Dress just this morning! This is a relaxed, breezy style for super hot days and features a curved drawstring hem with scooped back neckline.


Pattern updates and expansions


  • The Tailoress has been working on updating a few of her patterns over the last month. Her dog clothing patterns (Jasra Tee and Toby Jumper) have an improved, less bulky fit and the Sabrina Swimsuit now features slimmer ties with a slightly different placement and fit.


Sew-alongs, Tutorials and Online Courses


  • Megan Nielsen has been running a thorough sew-along for her new Ash Jeans. So useful for all those little construction elements of jeans sewing that will be new to many, including the dreaded fly front! Her samples are beautifully made so I have been keeping my eyes peeled for new tips.
  • Thread Theory have posted a speedy sew-along for their new mens Sayward Raglan. A great one for beginners looking to pick up tips on sewing with knits, especially those looking to branch out with their first menswear project! 
  • Helen from Helen's Closet will be running a sew-along in June for her Suki Kimono pattern to coincide with being the chosen pattern for the month for project #sewmystyle.
  • Alongside the release of her new Ipswich Swimsuit, Jenny from Cashmerette has launched 'Swimsuit Making for Curves'; an online course formed of video tutorials guiding you through the process of sewing your own supportive swimsuit.


Upcoming!


  • I am SO excited to say that a new pattern is on the way from Closet Case Patterns...and its going to be named after me! I couldn't believe it when Heather Lou told me and am a bit blown away that she'd think of me for one of her patterns. She gave away on Instagram that the Fiona will be a fitted dress and from what I've seen it looks like it will be a beauty! 
  • The Basic Bikini Wells Bay is being tested by Halfmoon Atelier. It looks lovely and simple in a chic scandi way from what we can see so far!
  • Ensemble Patterns are testing the Perkins Shirt, Tunic and Dress which makes a feature out of the raglan sleeves with a tie back and open yoke details.
  • The next issue of Smyly Magazine will come with a free jumpsuit pattern including three different versions. You can find some preview pictures on Instagram; I love the combination of tapered leg and relaxed wrap bodice.
  • Soon to come from Making Patterns Fly will be a halter neck top design. It features really cute gathering and ties at the neckline and would look gorgeous in a breezy muslin or lawn for summer.
  • Pilot Patterns are a new British independent pattern company launching soon. Their first pattern looks like it will be the Lily Lucy Dress which features flutter sleeves
  • Afternoon Pattern Company are currently testing their upcoming new design; the Sparrow Wrap.
  • By Hand London are working on their next pattern, Eloise. From what I've seen on Instagram it looks like a dress with a ruffled hem and dramatic sleeves; I can't wait to see more!
  • Charlotte Kan is currently testing the Parsec Leggings pattern which promises to be a speedy sew for four-way stretch fabrics and has three inseam lengths.
  • The next Lila & June pattern is going to be for a summer button down dress. I love the wine red linen and waist tie detail of the sample that we've seen peeks of so far!


Other Exciting News


  • Scroop Patterns have been working on releasing their patterns in paper format and the first two are now available! The Rilla Corset and Ngaio Blouse paper patterns are avaiable exclusively through Wearing History at the moment.
  • The Wearable Studio launched the first 'semi-printed' version of their patterns. The pattern pieces are mailed out to you but the instructions are still sent digitally; saving on paper but avoiding the hassle of assembling a PDF is a win win! The Franki Top is now available to purchase in this format.
  • There's a new indie sewing book in town and it is a collaboration between four European pattern designers; Atelier Charlotte Auzou, C'est moi le patron!, Orageuse and Pauline Alice. Robes includes eight new dress sewing patterns, two from each designer. I really adore the Garance from Orageuse and am wondering if I can find the time to sew it up before my next press night! The book is currently only available in French.
  • The Deer & DoeMélilot Shirt is the latest in their pattern line to be released in PDF format. I was very impressed with their PDF when I used it for the Myosotis dress recently. 
  • Louise from Atelier Louise who released a couple of gorgeous sandal patterns last year has launched a new business called Create Space Adelaide. Her sandal patterns and lots of  information about shoe-making are now available on that site and Etsy shop and there are patterns for making headwear and other accessories set to be released in the future.
  • The Fable Dress from Vesta Patterns is now available in printed format. Their PDF version has also been updated to include copy shop format options.


I'm off to get straight back on my machine, all I want to do is sew at the moment and I'm squeezing it in whenever I can! If your sewing motivation needs a bit of a kick here's your daily dose of indie sewing inspiration from the online community...


  • Katie's midi length Inari Tee Dress inspired one of my own sewing projects this month which you may have spotted on my Instagram as it has made a couple of Me-Made-May appearances! All of Katie's choices are spot on here; fabric, length and the slight slimming of the design through the side seams.
  • When you get dressed in the morning do you ever wish you could wear something that is currently in pieces on your sewing table? I've had that relationship going on with the Persephone Pants for about three weeks now! This white pair by Lisa from Tessuti and actually the other washed denim pair in the same blog post have got me really inspired.
  • I could not pull off this look but Sallie is doing it with aplomb! She made the perfect textured fabric choice to show of the gathered yoke details of her Petula blouse from Republic du Chiffon. Look at that beautiful shoulder!
  • Another pattern I really should have taken a closer look at before is the Mimi G Jessica Dress which Bianca has made a stunning version of. Love her fresh fabric choice and how the midi length works with the style of the bodice.
  • Helen's version of the Myosotis Dress is absolutely beautiful in a crisp floral print. I've got a bit of pink printed rayon lined up for my second iteration of this pattern and seeing this has tempted me to try out this view...although it will be hard to resist the beautiful ruffles!

Silk Double Georgette Kimono - Zero Waste Sewing

$
0
0
Elbe Textiles are one of my favourite indie pattern discoveries of last year. They produce women's, mens and unisex patterns (I love Lauren's thoughts on gendered clothing in modern western society) alongside a few accessory designs. Their designs have a chic, modern, minimalist vibe and are effortlessly wearable. Just what I need in my life. Their samples are all made up in lovely tactile natural fibres and I'm drawn to their sustainable sewing ethos.

Diary of a Chain Stitcher: Elbe Textiles Zero Waste Kimono in Silk Double Georgette from The Fabric Store

A few months back owner Lauren posted a tutorial for a Zero Waste Kimono Pattern and it was the first thing I thought of when I realised I needed a lightweight cover-up for my holidays. Zero waste sewing (using up every scrap of your fabric for a project) is increasingly drawing my attention. I hate waste and I'm sure a lot of you, like me have been appalled to learn more over the last year about the impact of the clothing industry and waste from it on our planet and the people on it. How I can change my own sewing consumption and practices has been on my mind a lot recently. I get frustrated when patterns over estimate the required yardage on the envelope, leaving a hard to use up 1/2 to 3/4 of a metre left over. I have often taken to laying out my pattern pieces before purchasing fabric to see how much I really need and am delighted when I come across fabric stores where you can purchase in quantities of 10cm rather than half or whole metres. This is a simple thing that more stores should do to reduce waste.

Diary of a Chain Stitcher: Elbe Textiles Zero Waste Kimono in Silk Double Georgette from The Fabric Store

In zero waste pattern cutting working within the confines of using all the fabric you have can produce some really wonderful creative designs! What I love about this kimono tutorial is that you can easily adapt it a little to use up smaller pieces of various scrap fabrics and end up with a bit of a patchwork design. In the tutorial sample you can see they have used a contrast fabric for the bands to beautiful effect. I might have something to use all those left over half metres for after all! Lauren is currently working on a zero waste dress pattern which you can find sneaky peaks of on Instagram.

Diary of a Chain Stitcher: Elbe Textiles Zero Waste Kimono in Silk Double Georgette from The Fabric Store

I do have to hold my hands up and admit that because I wanted a slightly different kimono to the one in the blog post the garment I've made is not strictly zero waste. But in the interests of sustainability I did put all scraps to good use! I had a large piece left at the end of the fabric which was full width I hemmed it on all four sides to make a beautiful sarong. Also, as I wanted the ombre-type print to run down my garment I had to cut my body down the length of the fabric rather than on the cross as instructed in the tutorial. Cutting my hem and sleeve bands alongside this left me with a long 12cm strip which I hemmed to use as a headscarf which is proving immensely useful in the heat.

Diary of a Chain Stitcher: Elbe Textiles Zero Waste Kimono in Silk Double Georgette from The Fabric Store

This stunning 100% silk printed double georgette is from The Fabric Store. I don't often sew with georgette because it is sheer and I don't like to have to wear a slip. However, the double weight version is much more opaque whilst retaining all the gorgeous qualities of a regular georgette. In fact the added weight seems to enhance them. It is still slightly translucent and I wouldn't want to use it for a dress or skirt without lining but it is well suited to a top or lightweight jacket like this. The item listing on the website describes it as fluid and that it is! It has the most wonderful movement like liquid and using it for a loose fitting garment like this with limited seams really allows it to billow and show off. What I really do like about georgette as opposed to some silks is the matte slightly crepe finish.

Diary of a Chain Stitcher: Elbe Textiles Zero Waste Kimono in Silk Double Georgette from The Fabric Store

The more I've sewn the less print I seem to work with but this lovely non-descript abstract design is right up my street. The pattern is screen printed which gives the colour a wonderful density that is slightly stronger on one side than the other. I initially thought I would make a dramatic full length kimono as in the tutorial; how beautiful would that have been with the drape and print of this beautiful textile?! But ultimately decided that a jacket length was going to be much more practical and useful in the wilds of Southern Africa. Plus the tutorial is for fabrics 140cm wide.

Diary of a Chain Stitcher: Elbe Textiles Zero Waste Kimono in Silk Double Georgette from The Fabric Store

To make a shorter version I simply omitted the wide bands at the hem of the robe and reduced the length of the neck band appropriately. I had ordered 3 metres of the silk and had one metre left to make my sarong so if you'd like to make a short version like me you'll need 2 metres of narrow width fabric. If your fabric is wider you may be able to cut more creatively and get away with less. I let the repeat of the print down the length of the fabric dictate the length of my main body piece. I wanted the band of black to cross the body at the same height front and back. As the front and back of the kimono are one piece that sits over the shoulders my shoulder line needed to be the mid point between two black bands. My finished kimono is 85cm long from shoulder to hem.

Diary of a Chain Stitcher: Elbe Textiles Zero Waste Kimono in Silk Double Georgette from The Fabric Store

The kimono is really simple to put together, lots of straight seams, and would be a great project for a beginner as there is no fitting involved. The front band and cuffs are cleanly finished with topstitched wide bands which I really like. One thing I will say is that as I had such lovely delicate fabric to work with I wanted to use french seams but that proved problematic with the triangular 'gusset' pieces at the underarm. Things got a little messy there but I got there in the end and as always french seams turn out to be worth the hassle. If making again in a fabric suited to french seams I would omit the under arm triangles.

Diary of a Chain Stitcher: Elbe Textiles Zero Waste Kimono in Silk Double Georgette from The Fabric Store

I'm delighted with my kimono and really enjoyed the process of making this. Cutting out rectangles of fabric to create a garment from felt so free and creative. I'd love to play around with the concept a bit more. Expect a summer wardrobe made of squares and rectangles!

Faux Suede Ulysses Trench

$
0
0
I fell in love with the Ulysses Trench when it was released by Victory Patterns months ago and for some reason couldn't get the idea of making it up in faux suede out of my head! It has taken me quite some time to actually get around to making it partly because I had trouble finding the fabric I wanted and mainly because my fears over working with such a different fabric took a while to overcome! I tried sewing a suede skirt years ago when I hadn't been sewing long and it was a complete disaster. I was similarly expecting hours of playing around on the machine trying to get it to sew more than one layer at a time neatly but thanks to my new Brother Innoiv-is F420 my fears were unfounded!

Diary of a Chain Stitcher: Dusky Pink Faux Suede Ulysses Trench

I spent a long time looking for the fabric as I didn't want faux suede with stretch but the slightly weightier non-stretch kind. I had in my mind that I was looking for a berry or rust colour but couldn't find it anywhere, even after ordering samples online. I ended up being quite taken with this dusky purple/pink which I came across in Classic Textiles on Goldhawk Road. It perhaps a fraction lighter in weight than what I was looking for but that actually worked out for the best and the drape is a dream match for the waterfall front.

Diary of a Chain Stitcher: Dusky Pink Faux Suede Ulysses Trench

I originally thought that using faux suede I'd want to use slightly different finishes to the pattern instructions, particularly for the pockets and rear overlay which are lined. However this faux suede is quite fine and sewed up much like a mid-weight woven fabric despite being more dense. Lining turned out to be the best way to get a nice clean finish and I'm pleased I went with it as I'm not sure the belt loops (which are actually part of the rear overlay and the reason why I fell so hard for this pattern!) would have turned out so nicely. The visible seam allowances are all finished with bias binding which you make from your lining fabric...but I got lazy and ordered my binding from The Fabric Store! This is made of a Liberty Tana Lawn called Belmont Ivy and they also stock the same fabric by the metre so it matches my lining! The ultimate sewing cheat. Buying the binding ready made saved me so much time. Their bindings are so easy to work with.

Diary of a Chain Stitcher: Dusky Pink Faux Suede Ulysses Trench

For a coat, and quite an involved project with lots of elements, this was surprisingly speedy to make. Once I had all the pieces cut out and prepped I had it pretty much finished in a day! This was definitely helped a huge amount by my Brother sewing machine which is packed with lots of features which shave time off here and there; each little bit really adds up over the course of a project like this.
As well as being super fast to thread when I was switching between black for the binding and lilac for the main sewing the knee lift in particular is my new favourite thing. It allows you to line everything up under the foot super accurately using both hands rather than having to release one hand to lower the presser foot with the lever. I wouldn't have had it on my list of essential features but in combination with the thread cutting button it noticeably speeds things up. This magic little function pulls the thread tails through to the back of the fabric and leaves two short little tails. So much faster than reaching for your scissors at the end of ever seam and a game changer for someone like me who likes to pin multiple pieces and seams and then sew them all production line style. It is possible to set the machine to backstitch and cut the threads automatically but I'm sticking with using the button while getting used to the machine! For basting or anything you want a longer thread tail for there is still a manual thread cutter on the side of the machine.

Diary of a Chain Stitcher: Dusky Pink Faux Suede Ulysses Trench

This was the first time I had sewn with faux or real suede and I was nervous about it as it behaves so differently to a lot of other fabrics. I was expecting problems with skipped stitches and fabric sticking and shifting as it ran through the machine but the F420 handled it like a dream. The machine produces such neat, even stitches. Even on a potentially tricky fabric like this! The only change I made to the regular stitch settings was to reduce presser foot pressure slightly on thicker areas as I didn't want to mark the fabric. I chose a size 80 microtex needle so it was super sharp but still had a bit of heft to push through the suede. I used the regular machine foot and had no trouble, but if your fabric is sticking you could try the Teflon coating foot to help your project glide through. If I had problems I was going to first try my walking foot but didn't need to. I know some sewers keep there walking foot on their machine all the time and mine has certainly got me out of a sticky situation or two but I find it quite hard to sew accurately with the reduced visibility created by attaching that chunky piece of kit to your machine. I prefer to save it for when I've got real shifty fabric issues and use the functions of the machine itself to handle everything else. Looking at the photos there are a couple of areas along the longer seams where things aren't perhaps hanging as well as they could but I think it is less noticeable in real life.

Diary of a Chain Stitcher: Dusky Pink Faux Suede Ulysses Trench

The worst thing about the faux suede was it wanting to stick to itself when you lay the pieces out to pin seams. Ironing was surprisingly no problem at all. I had a press cloth to hand but discovered directly applying a medium heat with no steam softened up and smoothed out the fabric a treat! No unwanted sheen or weird markings. However because you can't use a high heat it is difficult to get nice crisp pressed edges and corners and I think I would have got a better result on areas like the pocket flaps and epaulettes if using a traditional woven fabric. Topstitching is essential to achieve a nice clean edge with faux suede and the needle up/down button on the machine helped hugely with the accuracy of this on all the small elements which require sharp corners. I could effectively sew one stitch at a time until I was right at the point where I wanted to pivot.

Diary of a Chain Stitcher: Dusky Pink Faux Suede Ulysses Trench

Speaking of accurate stitching, I'm slowly getting used to the markings on the needle plate and presser feet and what the seam allowance is when the needle is in different positions. This pattern uses a variety of seam allowance sizes throughout so it is important to follow the instructions carefully instead of assuming you know the correct technique. 3/8" is used quite a lot, the marking for which I found quite hard to see on the machine as it is kind of hidden when using the regular presser foot. I got used to it with practice though. When topstitching I used the central groove on the presser foot to line my seam/fabric edge up with.

Diary of a Chain Stitcher: Dusky Pink Faux Suede Ulysses Trench

The pattern is a dream. The instructions are excellent, incredibly thorough with clear illustrations. Each part of the process is broken down into lots of little steps at that means that each element (even sewing the vent) feels straightforward and like it comes together without much effort. The instruction booklet is quite overwhelming at first glance because of it's size and detail but quite a lot of the steps are to do with the binding as the whole process of four separate steps is repeated each time a seam needs binding. I think being more detailed rather than less is a good thing and this is definitely a project you could take your time over and tackle one little step at a time. I definitely recommend taking your time sewing on the pockets and pocket flaps as getting these looking nice on the outside with even topstitching is important, but as there is no lining you can also see this stitching inside your coat! Using faux suede forced me to slow down too. I didn't want to unpick anything as it would leave permanent little holes.

Diary of a Chain Stitcher: Dusky Pink Faux Suede Ulysses Trench

The only thing I did differently to the pattern instructions was to leave the collar and front edge un-hemmed as the faux suede doesn't fray. I may go back and hem this later though as I think I could do with reducing the size of the waterfall a touch. It feels a little overwhelming on me. I did hem the bottom of the coat to give it a bit of weight and also enclose the bottom edges of the interior binding neatly. I love the effect of the binding and the fact that when you apply it the pattern cleverly tells you to end it before the hem allowance of the body and sleeve to reduce bulk when you turn it up. Little touches like this told me the pattern had been really well thought out and that the company really knows their sewing!

Diary of a Chain Stitcher: Dusky Pink Faux Suede Ulysses Trench

I adore the fact that this is a real timeless style but features some subtle and clever contemporary design elements. In particular the angled pockets and belt running through loops in the the back overlay really elevate this coat. The resulting project feels very elegant. Classic, yet modern and unique without being over-designed.

Diary of a Chain Stitcher: Dusky Pink Faux Suede Ulysses Trench

I wish I hadn't let my apprehension of possible fabric problems put me off of tackling this project for so long. I enjoyed every step of making it and am delighted with the finished garment. It has given me the confidence to try out some more unusual fabrics and make the most of my machine's features. Any suggestions as to what I try next?

Sewing Activewear on the Brother Innov-is F420

$
0
0
If, like me, you're attempting to get back into or perhaps start a regular exercise routine this year you might be intrigued by the idea of sewing your own activewear. Once you've got the hang of sewing knits there's nothing to stop you doing so. It can be a lot of fun working with fabrics and techniques you might not need for sewing everyday clothing and you don't even need an overlocker. I've sewn a fair bit of it in the past but desperately needed some warmer running leggings to encourage me to get out there on cold winter mornings.

Diary of a Chain Stitcher: Sewaholic Pacific Leggings sewn in merino from The Fabric Store on the Brother Innov-is F420

I resorted to an old favourite pattern to make these; the Pacific Leggings from Sewaholic. I have about three pairs of these that have been going strong for a couple of years. I love the seam lines and the shape of the waistband sits really comfortably plus they have the practical bonus of a zip pocket at the rear. My other pairs are great for summer running and carry me through into slightly chillier weather but I needed a pair for frosty mornings so chose this lovely thick merino blend double faced fabric in black from The Fabric Store.

Diary of a Chain Stitcher: Sewaholic Pacific Leggings sewn in merino from The Fabric Store on the Brother Innov-is F420

These leggings were one of the first projects I tackled on my new Brother Innov-is F420 machine and it was a great way to get to grips with the stretch stitches it offers. I've always sewn knit fabrics on a regular machine before finishing seam allowances with my overlocker as I like the aesthetic of the overlocked stitches but find my sewing more accurate on the regular machine. It was a real treat to have a plethora of stretch stitch options to choose from rather than just a shorter/longer, wider/narrower zig zag! I tested out a variety on scraps of my fabric before I began and chose to use a combination of stitches throughout the project.

Diary of a Chain Stitcher: Sewaholic Pacific Leggings sewn in merino from The Fabric Store on the Brother Innov-is F420

I used the no.16 overcasting stitch on seams which could be finished together, such as the inside and outside leg seams. After testing all this stitches this one appeared to have the greatest amount of stretch in the stitch and responded well to being stretched around the leg and also along the seam as the leggings are pulled on. What I particularly love about this option is the stitching is not visible from the right side. With a zig zag, particularly a wide one, the gaps between stitches can look quite obvious when the seam is stretched out but this has a completely smooth finish like a straight stitch or what you might expect from an overlocked seam.

Diary of a Chain Stitcher: Sewaholic Pacific Leggings sewn in merino from The Fabric Store on the Brother Innov-is F420

The seams to construct the waistband and zip pocket need to be pressed open to reduce bulk and for these seams I chose the no.7 triple straight stitch. This stitch looks like a thick straight stitch but is created by the needle going back and forth sewing three straight stitches next to each other. This back and forth motion gives the stitch some stretch in the same manner as a zig zag. It isn't super stretchy but perfect for these shorter seams which need some give and a lot of strength. The final stitch I used was the no.12 three step zig zag stitch to attach the elastic. The manual that came with the machine handily lists all the stitches and the purposes they are best suited to and recommend this stitch for the job.

I love that the machine picks the optimum stitch width and length automatically for each stitch but you can still adjust them if you want. When you do change the automatic settings it is easy to remember what these originally were if you want to go back as these are highlighted with a dark box on the screen as you scroll through the options.

Diary of a Chain Stitcher: Sewaholic Pacific Leggings sewn in merino from The Fabric Store on the Brother Innov-is F420

One thing I will say about sewing with stretch stitches on the Innov-is F420 is that it has taken me a little while to get used to which stitches the seam allowance guide on the needle plates is accurate for. They are correct to follow when the needle is in the left hand position but if you move it to the centre or use one of the zig zag or decorative stitches this won't be an accurate guide anymore. The other thing to get used to is which stitches sew a backstitch and which stitches sew a reinforcing stitch on the spot when you press the reverse button. I've been carefully testing each stitch on a scrap and checking this and the seam allowance before I begin! Now I'm finding my favourite stitches and using them regularly I'm getting used to it. I've used pretty much only one machine for the last 7 years but the motions of using this new machine have become instinctive and automatic surprisingly quickly!

Diary of a Chain Stitcher: Sewaholic Pacific Leggings sewn in merino from The Fabric Store on the Brother Innov-is F420

This merino is quite a thick fabric with a surprising amount of stretch but resilient recovery so I'm looking forward to working with some fine and drapey knits to see how the machine and stitch selection handles those. This particular fabric has a nylon underside so combined with the breathability of merino is a great choice for sports clothing. The dense structure and spongy quality makes it completely opaque even when stretched and it has proved to be a great choice for a supportive pair of work out leggings. You could technically use either side of the fabric as the right side but I used the smooth, nylon side as the wrong side as it felt nicer against the skin. Also this side gets a bit of a shine to it when stretched and I prefer a matte look on the exterior of my activewear. The pure merino side has more of a texture with an interesting almost slubby finish.

Diary of a Chain Stitcher: Sewaholic Pacific Leggings sewn in merino from The Fabric Store on the Brother Innov-is F420

I used Maderia Aeroflock thread (similar to woolly nylon) in the bobbin to aid stretch in the seams. I've found my knit seams to be so much stronger since I've started using this thread, particularly helpful with close fitting activewear which sees a lot of strenuous use and washing. No popped seams on these yet! I find it works best when used in the bobbin for twin needle top-stitching. Which by the way this machine does a treat! For once I had no problems with tension and the detachable horizontal spool holder makes setting it up quick and easy. You actually select the twin needle function on the screen to do it which is great as the machine reminds you when you are not set up correctly to move on.

The success of this project and addition to my activewear wardrobe has certainly encouraged me to run a bit more. Although I must admit the desire to need and therefore be able to sew more activewear is what is motivating me the most! 

Printed Rayon Crepe Roscoe Blouse

$
0
0
Diary of a Chain Stitcher: True Bias Roscoe Blouse in Rayon Print from The Fabric Store

I've lost my motivation for sewing and blogging since I returned from my travels. Initially partly because of jet lag and a post holiday cold and then partly because of being so busy with work. Usually when I'm so busy I'll find 30 minutes here and there to work on something but what I really needed to kickstart my sewjo again was a good chunk of sewing time. I finally managed to carve out a few hours last weekend after a little cutting time one evening in the week and luckily had picked just the project to get my creative juices flowing again.

Diary of a Chain Stitcher: True Bias Roscoe Blouse in Rayon Print from The Fabric Store

This Roscoe Blouse from True Bias was an absolute dream to sew. It caused me no trouble but has some interesting little details which were nice to get absorbed in. I even enjoyed my least favourite sewing task (gathering), of which this blouse has plenty! It feels like it comes together really quickly because of the lovely raglan sleeves, which are always much quicker than setting in a traditional sleeve.

Diary of a Chain Stitcher: True Bias Roscoe Blouse in Rayon Print from The Fabric Store
Breeze showing off the volume and movement of the top!

This is the blouse version of the pattern, which also has a tunic and midi length. I'm planning a midi length version next which I think I'll wear belted. I love Kelli's sense of style and find it difficult to resist many of her patterns. I don't know why it has taken me so long to sew this one when it so perfectly nails that cross between easy to wear bohemian and sleek contemporary style. I cut the size 4 (which matches my bust and waist size for reference) and it does feel quite voluminous on my fairly petite frame and I'm wondering if I would have benefitted from sizing down or perhaps shortened it a little to balance out the proportions better. But I am really enjoying the slightly longer length paired with skinny jeans. It is equally as great tucked into my favourite high waisted trousers, my first pair of Megan Nielsen Flint Pants which are easily the most worn handmade garment in my wardrobe.

Diary of a Chain Stitcher: True Bias Roscoe Blouse in Rayon Print from The Fabric Store

The finishing techniques are well thought out and I really liked the way the neckline slit is cleaning faced to begin with and then the ties are added within the binding. This neckline slit is actually the only thing I might change on my next version as it feels quite deep on me and can be a little exposing as it moves around! I feel like I need to tie the the bow up tight to close the slit whereas I'd quite like to leave it loose or open. I can't see that anyone else has been plagued by a similar issue so it could be  because I'm quite short in the body, particularly the upper chest so next time I'll shorten the slit by an inch or so for modesty.

Diary of a Chain Stitcher: True Bias Roscoe Blouse in Rayon Print from The Fabric Store

The sleeve length and width of cuff is great. They have enough drama but yet don't get in the way as they finish mid forearm and the opening is big enough to push up above the elbow if needs be. I love the sleeves on my Dove Blouse but sometimes they are not the most practical! They have a habit of turning off my touch sensitive electric hob while I'm stirring a pot!

Diary of a Chain Stitcher: True Bias Roscoe Blouse in Rayon Print from The Fabric Store

I've never been a huge fan of stitching in the ditch which is how the bound edge of the neckline and cuffs are finished so I opted to edge-stitch my binding. I was in the mood for not pushing myself too hard and using techniques I knew I could get to turn out well! I think this still looks really neat and tidy and am pleased with the results, inside and out. If I was making myself a luxury version of this top in a delicate silk I'd definitely turn to Kelli's suggestion in the instructions to hand stitch these areas.

Diary of a Chain Stitcher: True Bias Roscoe Blouse in Rayon Print from The Fabric Store

My fabric is from The Fabric Store who have a gorgeous collection of viscose/rayon prints and colours at the moment. I was originally going to use this mustard part diamond print for this project. Unfortunately there wasn't enough of it left when I placed my order but I actually think this worked out for the best. While the mustard would have been glorious and very seventies (Debbie made an amazing two piece cami and skirt set out of it) I'd have to be in the right mood to wear such a dramatic bold blouse and I think this slightly more subtle print is more 'me' and be worn on a more regular basis. I was drawn to this five dot rayon crepe as my back up choice because of the unique block printed style. Each motif has a slightly uneven density of print which gives a hand painted look to the fabric but it is in fact screen printed. The navy is nice and rich and the motifs just the right size for garment sewing. I like that the colours are quite neutral and easy to wear; the finished top works so well with many other garments in my wardrobe and is going to be easy to style year round.

Diary of a Chain Stitcher: True Bias Roscoe Blouse in Rayon Print from The Fabric Store

I ordered 2 metres as the fabric requirements in the pattern suggested I would need it but I could have got away with less of a fabric this wide. I probably could have squeezed it out of 1m50 but would get 1m 70cm to be on the safe side. A lightweight viscose/rayon is perfect for this pattern because it is quite diaphanous and moves beautifully. The volume of this style requires a lightweight fabric with drape and movement. The gathering will look thick and puffy in anything too substantial and you want the fabric to flow around the body rather than stick out in a boxy fashion.

Diary of a Chain Stitcher: True Bias Roscoe Blouse in Rayon Print from The Fabric Store

I didn't realise until I had finished this how much I needed tops like this in my wardrobe. Tops which can be both dressy or casual depending on how you style them or which worked tucked into high waisted trousers and skirts or loose over a slimmer leg. I love it. I can see a summer of shorts, skirts and boho blouses coming right up!

Diary of a Chain Stitcher: True Bias Roscoe Blouse in Rayon Print from The Fabric Store

Paprika Linen Palisade Shorts

$
0
0
Diary of a Chain Stitcher: Papercut Patterns Palisade Shorts in Paprika Heavyweight Linen from The Fabric Store

One of my most worn pieces in my handmade holiday wardrobe, certainly whilst I was in Africa, I didn't have time to document before I left. They are another design from the Papercut Patterns' new collection and are again effortlessly wearable but a unique style with interesting design details. These are the Palisade Shorts which can also be made as tapered trousers. I've had this heavyweight paprika linen from The Fabric Store in my stash since last summer as I originally had them in mind for a pair of shorts using the True Bias Lander Pants pattern or possibly the Tessuti Esther Shorts but once I saw this new release I couldn't resist.

Diary of a Chain Stitcher: Papercut Patterns Palisade Shorts in Paprika Heavyweight Linen from The Fabric Store

I really put these shorts through their paces whilst travelling and I ran out of time to get them photographed beforehand so what you're seeing here is far from new! They've had a few hard washes a tumble dries in shared laundry facilities at campsites in Africa which isn't usually how I care for my linen and that combined with wearing on long hikes and dusty safari drives in the heat of the sun has really started to wear the linen in. It is faded and softened in spots and I love how it is showing its age. All my previous makes in linen from The Fabric Store have retained their rich colours well so I'm putting the slight fade of these down to the strenuous wear and rigorous laundry.

Diary of a Chain Stitcher: Papercut Patterns Palisade Shorts in Paprika Heavyweight Linen from The Fabric Store

At first glance these could appear to be a very simple pair of elasticated waist shorts but on closer inspection they have lots of well thought out features. Firstly, the faux fly. It would have been easy to eliminate this feature on these shorts and just go for a flat centre front seam, or even just topstitch the shape of a fly on the front as it serves no practical purpose. But I like that a fly is actually semi-constructed so you have a fold of fabric as you would covering a regular fly. It adds interest and a slightly more professional looking finish plus is more interesting to construct.

Diary of a Chain Stitcher: Papercut Patterns Palisade Shorts in Paprika Heavyweight Linen from The Fabric Store

Secondly I really like that the elastic and therefore ruched portion of the waistband only runs around the back and sides and the front of the shorts is kept flat. Much more flattering, particularly when using a potentially bulky bottom weight fabric. The only thing I'd do differently construction wise next time is to sew a line of stitching through the centre of the elastic from end to end to prevent it from twisting and folding, which this width of elastic really wants to do when left free inside a casing like this. It was a bit of a nightmare to sort out when it came out of the tumble dryer.

Diary of a Chain Stitcher: Papercut Patterns Palisade Shorts in Paprika Heavyweight Linen from The Fabric Store

What I love about Papercut designs is that the design details often have a practical function; like these INCREDIBLE pockets! Nearly every sewist I know loves a pocket and these shorts have huge ones the full width of the side panel. Not only are the pocket bags very generous in size but they are in fact two pockets in one. The criss cross of layers visible on the outside create two separate bags. Wonderful for keeping things safe while on safari let me tell you, but panic did ensue a couple of times when my hand couldn't locate my phone when I reached in...and it was in the other pocket bag!

Diary of a Chain Stitcher: Papercut Patterns Palisade Shorts in Paprika Heavyweight Linen from The Fabric Store

So lets talk about the screamingly obvious thing about the fit of these when you look at the front on photo...they're pretty baggy in the crotch area! I believe they're designed to be worn higher on the waist I think but they don't feel quite right there. I could tighten the elastic to they sit more snuggly but I think it is the bulk of the gathering that makes me want to push them down on my hips. To wear them like this I could do with shortening the front crotch a bit, the back rise is fine. The volume in this area means they are potentially erring on the nappy-like side of things, especially when I sit down and all that room in the front crotch becomes even more obvious. However, having said that, on holiday I didn't really care so much about how they looked but did care a lot about how comfortable they were and I think the fact that they were worn so regularly speaks for itself.

Diary of a Chain Stitcher: Papercut Patterns Palisade Shorts in Paprika Heavyweight Linen from The Fabric Store

After my experience with the Sierra Jumpsuit coming up a little small on the lower half I cut the size S and graded out to between the S and M at the hip to give myself a little extra wiggle room across the seat. I don't think I really needed the extra space in this style and the waist came out a little large, as to be expected as the measurement suggested I was closer to the XS in this area. It was easily rectified by tightening the elastic slightly.

Diary of a Chain Stitcher: Papercut Patterns Palisade Shorts in Paprika Heavyweight Linen from The Fabric Store

Another great project that I really enjoyed making from Papercut Patterns. I think now I'm not working to a deadline I could definitely benefit from making a toile of their styles to get the fit just right and remembering that they tend to come up a little long on 5ft3 me.  After two projects I'm still not quite done with their Geo collection though; I've got my eye on the Meridian Dress next! 

Waxed Cotton Desmond Backpack

$
0
0
The project I have to share with you today has been on quite the adventure with me over the last couple of months! This is the Desmond Roll Top Backpack from Taylor Tailor and I have definitely tested my workmanship and the pattern to the full, using it almost every day when travelling around Southern Africa and the Philippines. The picture below is at Victoria Falls and further down is another of the pack in use at Blyde River Canyon in South Africa  It has also been with me on boat trips and hikes including to the top of the second highest waterfall in the world! Now I am home it is in daily use again travelling around London for work and it has proved to be a great backpack for all purposes.

Diary of a Chain Stitcher: Taylor Tailor Desmond Backpack in Waxed Cotton from Cloth House

I chose a lovely warm red waxed cotton from Cloth House on Berwick Street and all the hardware and webbing straps I bought in a kit from Guthrie & Ghani. I'd spotted these kits at the Knitting & Stitching Show in October but been too indecisive about it to buy on the day. Luckily when I emailed them they still had a couple left! The kit is fantastic as it saves a lot of time searching for the correct findings and webbings in the colours and finishes you want. It also includes a 15% discount off the PDF pattern. Taylor does sell hardware kits for the pattern in his online shop too but they ship from the US. It certainly isn't a cheap project once you've assembled all the hardware and the waxed cotton wasn't cheap at £18/m but it was all 100% worth it for a backpack which I love and have been getting so much use out of.

Diary of a Chain Stitcher: Taylor Tailor Desmond Backpack in Waxed Cotton from Cloth House

I saved some pennies on the lining and made use of some plain black quilting weight cotton from my stash and fused it with mid-weight woven interfacing to thicken it up. I was questioning how important the mid-weight recommended choice of lining was but you really will benefit from the extra strength and structure and it will make those interior pockets nice and sturdy. I really liked the shape of the interior back pocket piece which has angled sides rather than just being a regular rectangle. This means that wen you sew it on to the rectangular markings you end up with a three dimensional shape and a roomier pocket. Very clever.

Diary of a Chain Stitcher: Taylor Tailor Desmond Backpack in Waxed Cotton from Cloth House

When I'd completed this project I really felt like I'd put my recently acquired Brother Innov-is F420 through its paces! The coating of wax on the fabric makes it very dense and tough and in some areas the layers of fabric got quite thick so your machine needs a bit of oomph to get through it but mine coped beautifully. I started out with a size 90 universal needle following recommendations online but ended up going with a size 80 microtex needle as the larger size was making quite unsightly holes where it punched through. The sharp point of the microtex needle seemed to pierce through the waxed fibres more cleanly. Speaking of unsightly holes, if you are working with wax cotton you want to avoid unpicking anything if you can! I had to in a few places and those holes won't go away! I struggled to get pins through the fabric and worried about holes so resorted to clips for the majority of construction.

Diary of a Chain Stitcher: Taylor Tailor Desmond Backpack in Waxed Cotton from Cloth House

The instructions are detailed and thorough and made complete sense. Despite it being my first backpack I didn't feel lost at any point. Assembly was fairly straightforward but I wouldn't recommend it as a beginner project as it is quite lengthy and involved and some aspects are a little fiddly, especially using heavier weight fabrics which can be tricky to manoeuvre. The most complicated elements were topstitching the edges of the three dimensional front pocket in place neatly and the straps. The straps I made more challenging for myself as my stiff fabric choice made them really difficult to turn through. I'd also opted to add batting inside the straps to give them a little padding which made turning impossible! In the end I gave up and unpicked my stitching around the straps. The holes from the stitching gave me a nice clear line to follow and press under the raw edges so I could place the strap pieces wrong sides together with the batting sandwiched in between and edge stitch them closed. The finished straps are definitely not my neatest sewing but they work! I'd highly recommend adding the padding if you are intending on carrying a bit of weight around in your pack and sort of wish I had added two layers of batting instead of one on full day hikes when my pack was heavy.

Diary of a Chain Stitcher: Taylor Tailor Desmond Backpack in Waxed Cotton from Cloth House

I love that the instructions give you a nice clean finish which is also super strong! The band along the top of the backpack is a good example of this. It serves the dual purpose of concealing the top end of the straps and all the extra lines of reinforcement stitching whilst adding a bit more strength. I didn't need to finish the edges of the wax cotton as it doesn't fray. The instructions only have you finish the edges of the patch pocket pieces as all the other raw edges are concealed within the lining. I finished the ends of webbing which would be concealed within the seams with fray check and the other ends I turned in twice and stitched. This particular webbing frays like crazy.

Diary of a Chain Stitcher: Taylor Tailor Desmond Backpack in Waxed Cotton from Cloth House

As there were only a couple of hardware kits left I didn't get a choice of colour of webbing and findings. I'm really happy with how the black and brass finish looks in combination with the wine red anyway! Switching between purple thread for the exterior and black for the webbing and webbing was a bit of a pain but luckily the F420 is really fast to thread. Everything in the hardware kit is top quality and the notions are all Prym brand. Initially the fact that the sliders are 30mm wide rather than 25mm like the rest of the kit irked me a little as they looked big on the webbing straps but actually that extra width is really useful when tightening and loosening to adjust the strap length.

Diary of a Chain Stitcher: Taylor Tailor Desmond Backpack in Waxed Cotton from Cloth House

A wonderful feature of the waxed cotton is the way it marks and wears. My backpack is now looking really quite weathered in a beautiful way! It had a few flaws in it when I bought it and now has a lot more scrapes and discolouration in it. It has a lovely beaten vintage look which compliments the style of the backpack. I absolutely adore the design, both aesthetically and practically. It has loads of pockets (three external, four internal) and the only thing I wish I had done differently was to check the size of the exterior side pockets before construction and make them a little larger. They are just a fraction too small to hold my water bottle. The interior pockets are really useful to keep small things that would easily be lost in the roomy interior. It is a good size for a laptop and it can be rolled up fairly small or kept quite big. I felt like the roll top makes it really secure and safe but it does also make it quite fiddly to get into in a hurry! I was a little concerned that my fabric choice was going to end up too structured for the roll top but it holds a nice shapely roll and softens up nicely with a bit of use. It won't stay as crisp as you find it on the roll! You definitely need something with a bit of structure for this design to hold the nice boxy bottom shape out and give the front zip pocket shape.

I didn't set out to make my bag waterproof but the combination of the waxed cotton and the roll top design does a great job of keeping everything inside dry...even at Victoria Falls where we got drenched in 'upwards rain'! You could easily make a fully waterproof version of this bag with a properly waterproof fabric and waterproof seam tape. Closet Case Patterns have some great tips on this in a post for their Kelly Anorak pattern.

Diary of a Chain Stitcher: Taylor Tailor Desmond Backpack in Waxed Cotton from Cloth House

There are quite a few features of the Innov-is F420 which help with the accuracy of your stitching and these were exceptionally useful for sewing all the tight corners on this and getting topstitching to finish neatly in the right places. I like to have the speed of the machine it cranked up to high speed for long straight lines like the side seams but turn it right down slow for curved edges like the bottom of the straps. The pedal is nice and sensitive so you can get a good variety of speeds and control going on. Being able to control the speed of the reverse stitching really helped too as there is a lot of sewing back and forth over your stitching for reinforcement. On this machine if you press the reverse button it will sew a single backwards stitch. If you press and hold the button it will very slowly slow a line of reverse stitches. If while you are holding the button down you put your foot on the pedal it will sew at the usual speeds but backwards!

Diary of a Chain Stitcher: Taylor Tailor Desmond Backpack in Waxed Cotton from Cloth House

I loved putting this bag together as it was so different to what I usually make and working with wax cotton was a new experience too. I am so pleased I took the time to make just the backpack I wanted rather than buying one. It was a really enjoyable project which I highly recommend if you're looking to make something a little bit different. 

Striped Cotton Zadie Jumpsuit

$
0
0
Do you ever see a new pattern release and feel like it was just made for you? When I first spotted the Zadie Jumpsuit (the latest design from Paper Theory) I felt like it was a garment that should already be in my wardrobe. I love that it has got buckets of style, lovely unique design features, is effortlessly wearable and practical for my lifestyle too. I know jumpsuits aren't for everyone but I am a HUGE fan and they are genuinely amongst some of the most worn garments in my wardrobe (see evidence here, here, herehere and here). So much so that I am more than happy to put up with the hassle of using the toilet!

Diary of a Chain Stitcher: Paper Theory Zadie Jumpsuit in Hairline Stripe Indigo Cotton Twill from The Fabric Store

The fabric is this Hairline Stripe Cotton Twill in Indigo from The Fabric Store. It is completely dreamy fabric to work with and wear. I adore the workwear vibe of this fabric with the combination of deep inky blue and fine stripe. adore the workwear vibe inky blue and hairline stripe. When I first saw this fabric online I instantly saw it as a traditional French workwear jacket like the Julien Chore Jacket from Ready To Sew but had to admit to myself that there probably isn't a place for one of those in my wardrobe. I was very excited when I realised I could use it for this jumpsuit instead! It was a pattern and fabric match made in heaven. When the fabric arrived it was a lighter weight of twill than I imagined which is great as it gives a bit of movement to the jumpsuit and despite it's soft hand it retains a bit of crispness which works well to emphasise the lovely cut of those legs. I would never have worn this cut of clothing a few years ago but now it is absolutely what I feel happiest in. A wide leg and semi fitted bodice...with pockets of course.

Diary of a Chain Stitcher: Paper Theory Zadie Jumpsuit in Hairline Stripe Indigo Cotton Twill from The Fabric Store

Since I first saw it the online sewing community seems to have fallen for this pattern big time. Every new version I've seen has made me like it even more. I was frustrated not to have the time to sew this up straight after the pattern releases but actually having to wait and read some reviews has paid off and saved me making a muslin! A lesson in patience and not diving head first into a new project perhaps. Quite a few people have mentioned feeling like the suit was too long through the crotch. Being fairly short at 5ft 3" and with a short body I took a gamble after measuring the pattern pieces and shortened both the bodice and crotch by 3/4" each at the lengthen shorten line. I'm so pleased I did. The waistline and those wrap ties now sit just at the point I want. I think I could actually stand to loose a little more length form the crotch as there is some room in the rear but I do like a bit a freedom to move around!

Diary of a Chain Stitcher: Paper Theory Zadie Jumpsuit in Hairline Stripe Indigo Cotton Twill from The Fabric Store

This style is designed to be worn oversized and while I like the look I was wary of my petite frame being overwhelmed in fabric, preferring a slightly neater fit at least on the top half. After analysing the finished garment measurements which are helpfully thorough in these instructions I opted to cut one size down from my measurements, the size 8. I deliberated going down to a 6 but I'm glad I didn't in the end as I wouldn't want this style to look fitted. I've had a bit of trouble fitting wrap fronts in the past and feeling exposed but this feels incredibly secure and modest without being overtly so. I think the key in a wrap is getting the bodice length right.

Diary of a Chain Stitcher: Paper Theory Zadie Jumpsuit in Hairline Stripe Indigo Cotton Twill from The Fabric Store

I've seen a few people on social media asking for fit help on this garment because of creasing around the armholes. For me, this is just the way this grown-on style of sleeve sits and in a fabric with a bit of body and crispness like this cotton it is always going to happen. It doesn't bother me one bit! I've always had a pretty relaxed attitude to fitting and my general attitude is that if it looks as good as something you'd buy in the shops (both in terms of fit and finish, and to be honest it is usually better) that is plenty good enough.

Diary of a Chain Stitcher: Paper Theory Zadie Jumpsuit in Hairline Stripe Indigo Cotton Twill from The Fabric Store

For a jumpsuit it is a pretty speedy and straightforward project. I had it sewn up in about 4 hours at the weekend without rushing. The construction is remarkably straightforward, the most fiddly element being applying the binding to the curvy front edge. My life was made considerably easier by the fact that I was using a sturdy cotton which pressed well. A nice steamy press is certainly your friend in getting this to look neat and tidy! If you're struggling in a trickier fabric I would recommend breaking down the application of the binding into smaller steps. The pattern instructions have you assemble and press the bias strip and then simply slide it over your raw edge before stitching through the whole thing in one fell swoop. You could if you liked open up the binding and stitch it to the wrong side of the fabric first, before folding it over and stitching it in place. That might give you more control around the curves and is the method I am most used to seeing in pattern instructions.

Diary of a Chain Stitcher: Paper Theory Zadie Jumpsuit in Hairline Stripe Indigo Cotton Twill from The Fabric Store

The only part of the instructions I got a little confused about was basting the ties in place before attaching the binding. Now I've done it once I understand but it made no sense to me to begin with and I felt this step could have used a better diagram, additional notch or more explanation. On first try my ties ended up basted on to point upwards instead of towards the sides! When you first sew them on it looks like they are pointing in the wrong direction but once the binding is applied you fold them back over the binding and secure in place.

Diary of a Chain Stitcher: Paper Theory Zadie Jumpsuit in Hairline Stripe Indigo Cotton Twill from The Fabric Store

I absolutely love the construction of this jumpsuit; the way it is put together and finished. It is really unique which makes it both fun to make and wear. The slit in the side seam for the tie to pass through is easy to finish in a clean and sturdy fashion and I don't feel like I've got a big hole exposing my side once done up. Throughout the process I was questioning how the area below the waist and the bound edges could possibly be finished neatly without risk of exposure but it sort of came together well without me really having to think about it. If you're not using an overlocker to finish your seams you'll probably want to go back in and extend your crotch seam stitching up to the top edge of the binding once you've applied it as that will help that area sit right. It is a little unusual to have that volume of fabric in that area but I got used to wearing it very quickly. I love the effect of the fold here. It reminds me of wrap front fisherman's trousers or a pattern from the Japanese Pattern Magic books!

Diary of a Chain Stitcher: Paper Theory Zadie Jumpsuit in Hairline Stripe Indigo Cotton Twill from The Fabric Store

The weather here in London seems to have taken a turn back to the chiller and damper side of things which is frustrating as this is about all I want to wear right now. That combination of feeling so comfortable you forget you've even got clothes on yet wearing clothes so cool you get compliments at every turn is a rare one. If you follow along with my Me-Made-May on Instagram you might get bored of seeing this soon! Speaking of Me-Made-May, I now wear mainly handmade most days so my goal for the month is to actually whittle down my wardrobe to garments I really love and get a lot of wear out of. It is hard to admit sometimes that a sewing project hasn't turned out quite the way you hoped after all the time, energy and expense put into it and even harder to part with them. I'd like to spend some time this month refashioning, repairing and altering pieces in my handmade wardrobe to give them a new lease of life. I'm also going to try and get rid of the things I'm genuinely not going to wear anymore and need ideas of how to do this in a way that feels good! I'm considering giving some away to family and friends, donating to charity, possibly a little Instagram de-stash/sale and making use of H&M's textile recycling scheme.

Are you choosing to join in with the Me-Made fun this month? And if so how?

Maroon Crepe Evie Bias Skirt

$
0
0
Hello readers, it has been a while! An extremely busy few months of long hours at work has left me with limited time to sew and often little motivation to do so. When I have been sewing I've had two quite big projects to work on (more on these soon!) which has seen my sewing output dwindle considerably. The project I'm sharing with you today is actually quite a quick make which I finished before my sewing slump but it has seen a considerable amount of wear since then!

Diary of a Chain Stitcher: Tessuti Evie Bias Skirt in Maroon Polka Dot Polyester Crepe from The Fabric Store

This is the Evie Bias Skirt from Tessuti and I'm not sure what possessed me to make it as it is quite a departure from my every day style of late! I think I kept seeing gorgeous versions on Instagram and as I've only had great experiences with Tessuti patterns previously this tempted me to give it a try. It is such an easy to wear shape and dresses up or down well too. The only slight niggle I have with it is that I don't love the bias cut over the tummy area so pick and choose my days when I feel happy wearing it!

Diary of a Chain Stitcher: Tessuti Evie Bias Skirt in Maroon Polka Dot Polyester Crepe from The Fabric Store

The fabric is this Little Square Poly Crepe from The Fabric Store...yes a polyester! I'm usually wary of buying polyester online as often it can feel quite nasty and be unpleasant to work with but I fell in love with this print when I spotted it in the New Arrivals section a few months back and I trust the quality of fabrics from The Fabric Store in general. I was very happy with it when it arrived. Yes the hand isn't as smooth or pleasant to touch as a viscose but the drape is glorious and it works for the shape of this pattern well as it retains a bit of weight. You don't want anything too fine that might hang a bit limply; although I am considering a version in silk chiffon lined with a fine crepe as I think this might have a nice frothy effect.

Diary of a Chain Stitcher: Tessuti Evie Bias Skirt in Maroon Polka Dot Polyester Crepe from The Fabric Store

At first glance it looks like a classic white polka dot print and in this colour it has a real 1940's vibe to me. However, on closer inspection the polka dots are actually little squares which gives the print a contemporary twist. I've been wearing a lot of this warm wine colour over the past season and adore it. The simple shape of the skirt is a great blank canvas to showcase beautiful fabric, although if you are considering using a print remember that it is cut on the bias so a directional print will end up on a diagonal. I love that this turned my print from a regular regimented polka dot into something a little more interesting. The bias cut means you need a little more fabric than you think for a simple looking skirt. The pattern recommends 1.65m for my size and I needed it. If you're the type of person, like me, who pretty much always assumes that pattern companies suggest a lot more fabric than really necessary and never follows the pattern cutting layout, it is worth noting that Tessuti are quite economical with their quantities.

Diary of a Chain Stitcher: Tessuti Evie Bias Skirt in Maroon Polka Dot Polyester Crepe from The Fabric Store

I have hardly sewn anything on the bias before and even then just the odd panel rather than a full garment so I was quite nervous about the pattern pieces stretching out, particularly around the waistline. I was really careful with my pattern pieces after I had cut them, keeping them laid flat. Tessuti patterns often use tear away Vilene for stabilising seams but I've never got any to hand so I switched out that step for regular stay stitching along the waistline and zip opening. I did this before I did anything else. I left the skirt to hang for a while before hemming as I expected it to drop unevenly but I had no trouble and simply hemmed it as it was without trimming anything off

Diary of a Chain Stitcher: Tessuti Evie Bias Skirt in Maroon Polka Dot Polyester Crepe from The Fabric Store

The pattern comes with two options for finishing the waistline; either with a narrow scallop edged elastic or a bias facing. I opted for the bias facing as I've never been a huge fan of an elasticated waist and I wanted to avoid anything about this style clinging as far as possible. I really liked the method for attaching the bias tape which has you turn it over and stitch it twice to conceal the raw edges rather than fiddling around with trying to turn everything under in one swoop. On this version the skirt is fastened with an invisible zip and hook and eye at the side seam which is nice and clean.

Diary of a Chain Stitcher: Tessuti Evie Bias Skirt in Maroon Polka Dot Polyester Crepe from The Fabric Store

The hem is finished with a narrow hem although there's also instructions to create a raw hem with linen. I don't do a narrow hem very much but loved sewing this and the resulting effect. For a polyester this crepe presses and holds a crisp edge very nicely. Everything about the chosen finishing techniques for this feels delicate and classy which is something I've noticed with a lot of Tessuti patterns. I like their way of sewing.

Diary of a Chain Stitcher: Tessuti Evie Bias Skirt in Maroon Polka Dot Polyester Crepe from The Fabric Store

I cut the size 8 which is a tad larger than my waist measurement and it fits like an absolute glove. There is a little room around the waist but for me that equates to the perfect amount of wearing ease to feel comfortable in this style. The finished garment measurements indicate no ease and for me personally that is too snug. The pattern is described as being drafted to flatter the body and I have to agree. I love the cut around the waist and hips and the a-line shape has just the right amount of flare to it. The midi length trend has never seemed that wearable to me being petite; I've always wound up shortening things but for some reason in a bias cut like this I love it. It is quite a short midi but I think I've accidentally found my ideal length; I need a bit of leg on show to balance my proportions.

Diary of a Chain Stitcher: Tessuti Evie Bias Skirt in Maroon Polka Dot Polyester Crepe from The Fabric Store

This skirt paired with a Nikko Top and ankle boots has been my go-to outfit over the last few months when I want to feel a little dressed up and ladylike. I'm on the hunt now for a fabric to make a summer version in to pair with tees and pumps for day and strappy sandals by night.

Denim and Copper Hampton Jean Jacket

$
0
0
Diary of a Chain Stitcher: Denim and Copper Alina Sewing & Design Co Hampton Jean Jacket

I love sewing outerwear. I'm not sure if it is the challenge of a big sew and complex techniques or the thought that this garment will be one I can get endless wear out of but I just love it. I have loved every minute of sewing this Hampton Jean Jacket and already know it is going to be one of the most worn items in my handmade wardrobe.

Diary of a Chain Stitcher: Denim and Copper Alina Sewing & Design Co Hampton Jean Jacket

The pattern is from Alina Sewing & Design Co and it was my first time using a pattern from them. I cannot emphasise enough how impressed I was with both the instructions and pattern itself. Considering what a lengthy project this is, the instructions are packed with detail and advice without seeming overwhelming and the illustrations are all clear and helpful. There wasn't a single moment when I found myself scratching my head over the next step and the end result is beautiful. The pattern is well thought out and packed with detail which produces a true classic denim jacket. I love that all four front pockets are functional and the addition of elements like the back tabs on the waistband elevates the design to the next level. I can't think of anything else I'd add, there is even a hanging loop. I particularly love the seaming on the front and how the breast pocket sits within that which is highlighted by the double lines of topstitching.

Diary of a Chain Stitcher: Denim and Copper Alina Sewing & Design Co Hampton Jean Jacket

Speaking of topstitching, I'm really proud of how mine turned out. It is one of my favourite sewing techniques as I think it makes a garment look more professional and I enjoy doing it. The pattern does include instructions on how to flat fell your seams but also recommends a faux flat felled seam, particularly in areas with a lot of layers of the denim. I went with the faux flat fell as I thought I would get a tidier finish on the outside with this method and also for speed. To faux flat fell a seam you finish the seam allowances together (I overlocked mine) then press to one side and topstitch twice.

Diary of a Chain Stitcher: Denim and Copper Alina Sewing & Design Co Hampton Jean Jacket

I was hesitant about using topstitching thread as I had some trouble with it snarling up when I made my Ginger Jeans and have tended to avoid it since. Then I picked up a tip on Instagram about using Gutermann Extra Strong thread instead and it has changed my life! It is a fraction finer than top-stitching thread and I actually prefer the less bulky effect once sewn. I encountered much less tangling of thread on the rear side than I had before, although that might partly be down to the machine. I chose this lovely coppery tone thread (Col. 448) to match the copper buttons from Prym I had picked out. Hammering those buttons in at the end is always a tense moment as you don't want to do irreversible damage to your garment in the final moments but not as tense as I felt sewing the final bits of topstitching! I messed up one of the buttonholes and had to unpick (never fun) and then realised I was running out of top-stitching thread! A particularly stressful game of thread chicken ensued and I couldn't believe it when I finished with less than a metre of thread left. In case you were wondering one 100m reel of Extra Strong thread is JUST enough for this jacket, allowing for a few mistakes!

Diary of a Chain Stitcher: Denim and Copper Alina Sewing & Design Co Hampton Jean Jacket

There are some fairly tricky elements involved that seem a little daunting but the instructions guide you through no problem and I enjoyed the opportunity to work with some nice stable denim. I've had this denim in my stash for a while now and can't remember if it came from Mood Fabrics or The Fabric Store. It is a nice sturdy mid-weight denim with a rich inky colour that is slightly more blue than shows up in photos. The copper thread and buttons show up so beautifully against it. I love it looking crisp and new as it is but also can't wait to see how it wears in and softens up.

Diary of a Chain Stitcher: Denim and Copper Alina Sewing & Design Co Hampton Jean Jacket

I was uneasy about tackling the welt pockets on the front of the jacket as they are so visible with contrast topstitching and are also one of the first things you sew. I haven't sewn a huge amount of welt pockets and need to build up my confidence and skill but am really pleased with these ones! The method is a little different to those I have sewn before but I didn't question it and followed the instructions to the letter, taking particular care to sew the sides accurately to achieve a nice clean rectangular opening. A large chunk of the instructions are given to the welt pockets, breaking them downing small steps. I thought they were brilliant. To line the pockets I used scraps of cotton ikat left over from my Tofo Summer Jumpsuit.

Diary of a Chain Stitcher: Denim and Copper Alina Sewing & Design Co Hampton Jean Jacket

Whilst part of me can't believe I haven't sewn a denim jacket before now (it such a wardrobe staple and sewing achievement!) I'm pleased I didn't attempt it before I had my shiny new Brother Innov-is F420 machine. Whilst I adored my very basic Janome the process of making this would have been a lot more challenging and a lot less enjoyable. When working with layers of denim as thick as this I would have had to hand crank through a lot of it to the detriment of my topstitching. If you're struggling to get your machine going on the edge of a particularly thick area of fabric you can fold up another piece of fabric or card to put under the back of the foot and level things out. Think about it like the machine trying to sew up hill, it is much easier to run on the flat!

Diary of a Chain Stitcher: Denim and Copper Alina Sewing & Design Co Hampton Jean Jacket

I was particularly nervous about the instructions to sew very visible bar tacks through quite thick areas of fabric as my old machine did not get on with these at all. This Brother machine was an absolute trooper and has produced a beautiful finish. There are a couple of areas on the long ones at either end of the welt pockets where there is a little wobble but that was operator error rather than the machine. I assumed that as the layers were so thick the garment might need a little encouragement through the machine and as the stitching is so dense it is hard to judge whether it is moving cleanly through the machine or not. I should have trusted the machine and left it to it's own devices because it was doing just fine without me! This machine does have a setting to sew bar tacks to a given length but I chose to use the zig zag stitch on a 2.5mm width and 0.4mm length.

Diary of a Chain Stitcher: Denim and Copper Alina Sewing & Design Co Hampton Jean Jacket

Another thing the machine needed no help with was buttonholes. I love, love, love the one step buttonhole on this machine. So quick and easy, it even tidies and cuts the thread for you. I also love that the machine comes with the choice of several styles of buttonhole. For this project I went with a keyhole shape with a bar tack on the end for extra strength in this tough fabric (stitch setting no.64 if you're interested!). It looks so professional I am delighted. I do recommend that you try out a couple of buttonholes on a scrap piece of fabric first so you can get used to the placement and check the size.

Diary of a Chain Stitcher: Denim and Copper Alina Sewing & Design Co Hampton Jean Jacket

The most difficult part for me was surprisingly the simple task of top-stitching around the armhole. As it is right towards the end of the process you are dealing with a lot of fabric and weight at that point. I found as I moved the jacket around to allow me access around the armhole as I sewed sometimes the fabric shifted slightly under the foot so my topstitching is a little less even in that area than elsewhere. I'm being really pernickety thought! I was thinking I should have increased the pressure of the presser foot at this point to hold the garment in place but perhaps I should get into the habit of keeping the needle down. There is a function on this machine to finish stitching with it down so I could have just turned that on in hindsight...I'm not used to all these bells and whistles!

Diary of a Chain Stitcher: Denim and Copper Alina Sewing & Design Co Hampton Jean Jacket

The only element I wasn't sure about the construction method for was the back tabs on the waistband as interestingly the pattern pieces aren't that shape but are square once sewn together and you have to poke the top corners inside to create the point. I thought it would be difficult to achieve a nice sharp and even point and then was concerned about the bulkiness of this area when sewing the buttonhole. But it turned out really nicely and my machine had no problems. I do infect think the extra bulk helps hold a nice crisp shape and you eliminate the risk of frayed edges if you trim and turn through that point too aggressively.

Diary of a Chain Stitcher: Denim and Copper Alina Sewing & Design Co Hampton Jean Jacket

The only thing I would potentially change about the jacket is the length of the sleeves. I think they look a touch long (not unusual for me) but then again I quite like long sleeves for warmth on outerwear. I'm more than happy with the fit and length overall, although it isn't as tailored or cropped as I might have previously chosen. However, I think this slightly boxy cut has a contemporary feel and is ideal for my current wardrobe. It is going to look great with cropped trousers or slung over summer dresses. I cut the size 6 which matches my measurements and whilst I could have gone down a size for a snugger fit I think this is perfect as it will layer well over sweaters on chilly evenings.

Diary of a Chain Stitcher: Denim and Copper Alina Sewing & Design Co Hampton Jean Jacket

I am incredibly happy with this project and glad I took my time over it. I knew it was going to be a big sew so it took me a while to get started on it as I felt like I wanted a good clear day of sewing which over the last few months has been non-existent. I constructed the jacket in small stints in the evenings which actually prevented stupid mistakes when I got tired. I think there is always at least one mistake or element that you wish you could have done better on any project but the slow pace and care I put into making this has produced sewing I'm incredibly proud of. This pattern is a great one to sew in small bursts as there are lots of little elements that you can tick off so you still feel satisfied at the end of each session. Approaching it in small chunks makes it feel less overwhelming. Sewing this has taught me how much you can achieve in limited amounts of sewing time and that you don't need a whole day or weekend to try and sew something start to finish.

Diary of a Chain Stitcher: Denim and Copper Alina Sewing & Design Co Hampton Jean Jacket

This project also cured my recent sewing slump. I've been working so much over the last few months that when I have had time at home it has been hard to motivate myself to sew. I'd always thought a quick and satisfying tee or camisole project is best to kickstart the sew-jo as you can achieve that satisfaction of a completed project quickly. However, I so enjoyed every step of making this that I couldn't wait to get back to my machine and sew some more! Looking at the result achieved with this machine I can't wait to sew a pair of jeans now. Next on the list is a pair of Megan Nielsen Dawn Jeans in dark denim.

Diary of a Chain Stitcher: Denim and Copper Alina Sewing & Design Co Hampton Jean Jacket

A Very Special Bridesmaid Dress

$
0
0
I have got a very special project to share with you today. My bridesmaid dress for my Mum's wedding back in May. I was really excited about making it, but knew it could turn into quite a stressful project and a real sewing challenge. It was a big deadline to meet and I knew because of my work schedule I was going to have very limited time to put towards it. So, as much as I would have liked to make a complex and challenging gown, I kept the design and construction simple and focused instead on finding some really beautiful fabric.

Diary of a Chain Stitcher: Beaded Silver Bridesmaid Dress - BHL Elisalex Dress & Emmeline Tee

Mum had only a few requests. That all three of us bridesmaids (my sister, step-sister and I) wore floor length dresses and that they were a neutral colour (in the end we all ended up in shades of grey, Mum's favourite!). Once my sister had bought her dress Mum also asked if we could all have some beading on the bodice too. I slightly panicked as that meant my simple project was likely to get considerably more involved and complicated!

Diary of a Chain Stitcher: Beaded Silver Bridesmaid Dress - BHL Elisalex Dress & Emmeline Tee

However, I managed to stop the beading from becoming too time consuming by constructing that part entirely separately to the main dress. I could have underlined the beaded chiffon with the crepe backed satin and sewn up those pieces into a fitted bodice but that would have involved unpicking all the beads from around the seam line/seam allowances and then sewing some back on to fill in any gaps after construction. Much too fiddly for this time-poor seamstress! To save unpicking and hand sewing any beads I assembled the whole top by hand. This may sound equally time consuming but there weren't too many seams and I thoroughly enjoyed a morning of hand sewing at my kitchen table!

Diary of a Chain Stitcher: Beaded Silver Bridesmaid Dress - BHL Elisalex Dress & Emmeline Tee

I used The Little Tailoress Emmeline Tee pattern for the beaded top. I've made this previously and really like the clean lines and easy to wear style. I used view 3 which has very small grown on sleeves, rather than the raglan or cuffed sleeve. As I hadn't made this version before and I wanted it to fit quite neatly but still pull on over the head I made a quick muslin to check the size. I used a remnant of some lovely blush heavy viscose from Fabrics Galore that I had in my stash and now wear the muslin all the time!

Diary of a Chain Stitcher: Beaded Silver Bridesmaid Dress - BHL Elisalex Dress & Emmeline Tee

Having the muslin was really useful as I could put it on over the dress once that was made to check how it sat over the bodice and also get the length of the top just right. I wanted the hem to sit right on the waistline of the dress. I didn't want the waist seam to show but I thought hitting at the narrowest point of my body would be the most flattering. I toyed with the idea of keeping the centre back of the top open and fastening it at the nape with a single button and loop but I wasn't sure what the dress would look like peeking through that opening and had a feeling that everything might end up a little busy and messy at the back there.

Diary of a Chain Stitcher: Beaded Silver Bridesmaid Dress - BHL Elisalex Dress & Emmeline Tee

Keeping the back closed meant I only had the shoulder and side seams to sew, then the neckline, armholes and hem to finish. To assemble the seams I used a small backstitch and then hand overcast the seam allowances to finish them and caught them as delicately as possible to the shell at the same time. This is a technique I picked up in Claire Shaeffer's Couture Sewing Techniques; I love that book! I did the same to finish my hems and tried to keep my stitches as small and even as possible in case they showed through to the right side but they are happily pretty much invisible amongst the beading.

Diary of a Chain Stitcher: Beaded Silver Bridesmaid Dress - BHL Elisalex Dress & Emmeline Tee

The neckline is bound with bias binding in the original pattern instructions and I made up some slim binding in the fabric of the dress with the intention of finishing that way. However, when I laid it around the neckline it felt a little heavy alongside the chiffon and beading so I opted to just turn that edge under and hand finish it like the other hems. I made the neckline and armhole hems slim at 1/2" but used a full inch around the waist to give it a bit more weight.

Diary of a Chain Stitcher: Beaded Silver Bridesmaid Dress - BHL Elisalex Dress & Emmeline Tee

I spent a long time sampling and choosing fabric. I wanted my shade of grey to fit with the other dresses; to be different enough but not stand out. Lots of people said to us on the day that we must have spent ages finding the right shade of dress/fabric to compliment each other but actually we did it pretty much entirely independently! My step-sister lives in Paris so we didn't have the opportunity to see each other and our dresses in person before the day of the wedding! Mum got her dress first, then my sister and I did hold my fabric samples against both of theirs but took a guess at the shade of Laura's from a photo. Luckily I think they all work together beautifully.

Diary of a Chain Stitcher: Beaded Silver Bridesmaid Dress - BHL Elisalex Dress & Emmeline Tee

I knew the beading would be the trickiest thing to find (at least on a reasonable budget!) and I shopped around a lot before I found this little chiffon gem at Goldbrick Fabrics on Goldhawk Road. I loved that it wasn't too ostentatious and that the beading was delicate and fairly subtle. I originally sampled a paler colour of chiffon than this, although the beads were the same. But unfortunately when I went back to buy it they had none in stock. Goldbrick have pieces of all their fabrics hanging on racks which samples can be cut from from. Whilst I love that system for ease of browsing it has happened quite a few times that a fabric I've sampled they don't actually have in stock which is frustrating. Luckily this time it worked out for the best as I think I prefer this chiffon to the original.

Diary of a Chain Stitcher: Beaded Silver Bridesmaid Dress - BHL Elisalex Dress & Emmeline Tee

I thought the beaded fabric would be the star of the ensemble but in fact the fabric I used for the dress completely stole the show. It is an amazing crepe backed satin from Borovicks which I fell completely in love with after buying some in the wine colour for a dress for Sally Field in a show I costumed earlier in the year. It comes in a variety of colours and feels and looks like an expensive silk, for a fraction of the price! It has an amazing weight to it without compromising on the drape or movement and feels so luxurious against the skin. It is completely opaque and heavy enough not to require lining (a great time saver for me!) and is also washable (a good thing too as one of the waitresses managed to spill red wine on me!).

I almost used the matte crepe side of the fabric as the right side as it seemed a slightly better tonal match to the beaded chiffon and we had used the matte side for Sally's dress and it looked so rich and wonderful on stage. I'm so glad I didn't though and went the whole hog with satin on the outside! It felt so glamorous and that satin seems to glow. I don't feel like photos really do it justice as you need to see it move but the top photo when I'm walking gives you a good idea.

Diary of a Chain Stitcher: Beaded Silver Bridesmaid Dress - BHL Elisalex Dress & Emmeline Tee

I avoided any time consuming fitting problems and construction confusion by using a tried a tested bodice pattern. The By Hand London Elisalex. This is a classic princess seamed sleeveless bodice with scoop neckline. Having made this and many other princess seamed bodices before made the construction quite quick and simple. The fit on the finished bodice actually could be better but it is thankfully hidden by the top. I'm not sure if this is because my body shape has changed since I last made it years ago or that I am much more picky about my fitting nowadays! The only thing I'd really change though is to narrow the shoulders of the Elisalex bodice slightly as the neckline of the Emmeline is quite wide and as I moved around it would occasionally shift and the satin bodice would peek out of the neck. In hindsight I wonder if I would have been better using the BHL Kim bodice instead as this is a similar princess seamed shape but with a lower neckline with skinnier shoulder straps.

Diary of a Chain Stitcher: Beaded Silver Bridesmaid Dress - BHL Elisalex Dress & Emmeline Tee

I self lined the bodice rather than opting for a lining of a lighter weight to give it a bit more of a defined shape and structure without going as far as adding boning. I'm really pleased with my finishing and use of techniques like under stitching to get everything to sit just so. The matching of the waistline across the zip worked out spot on first time too!

Diary of a Chain Stitcher: Beaded Silver Bridesmaid Dress - BHL Elisalex Dress & Emmeline Tee

The skirt is a simple half circle skirt which I drafted from my measurements. I think a half circle is my favourite kind of skirt. I like the skim of the bias cut over the hips without the bulk of a gathered or pleated skirt around the waist. You get a nice dramatic swoosh with a half circle skirt too without being weighed down in fabric. Even doing a half rather than full circle made this full length dress quite the fabric eater! I think I had 3m and used the whole lot! I made the skirt as long as the fabric would allow and then hemmed it on my dress form once I'd left it to hang and drop for a couple of days. I chose the hem length when wearing the high sandals I'd be wearing on the day and opted to go a good inch or so off the floor to avoid a trip hazard - I was terrified of falling over as I walked down the aisle! I hand stitched the hem using a blind catch stitch to keep a clean finish on the right side.

Diary of a Chain Stitcher: Beaded Silver Bridesmaid Dress - BHL Elisalex Dress & Emmeline Tee

As well as enjoying the feeling of wearing a dress I had made myself in such gorgeous fabrics I felt SO comfortable in it all day. It was so nice to not have to feel self conscious or be aware of what I was wearing on a day like that and concentrate on just enjoying myself. The skirt was so great to swish around in and it held up to some fairly vigorous dancing too!! 

Liberty Print Well's Bay Bikini

$
0
0
This project is the one thing from my handmade holiday wardrobe wish list that I regret not getting finished back in January. I had the pieces all cut out but just ran out of time before we flew to South Africa. The pattern is the basic bikini Well's Bay from Halfmoon Atelier and I absolutely adore the clean and minimal aesthetic of it. The most exciting thing about the pattern is that it is completely reversible so you are effectively getting two bikinis in one! There are no fiddly fastenings to contend with as it simply ties at the back.

Diary of a Chain Stitcher: Half Moon Atelier Basic Bikini Well's Bay in Argyll Liberty Print Swim Fabric from The Fabric Store

The minimalist design is perfect for showcasing a special swimwear print which is exactly what I chose with this Argyll print swim fabric from the Liberty range at The Fabric Store. There are some amazing prints on their website and I have at least one more squirrelled away! What I love about them is the quality of the fabric base, which is dense and matte and also that the print retains it's vibrancy and clarity when stretched. I've used this print before previously on the inner bra of my Pneuma Tank and it is washing and wearing really well. Meghann recommends using a print for one side of the bikini and a plain for the other in the pattern instructions. For the plain I used some scraps of grey lycra I had in my stash from previous activewear projects, I think I got it from Mood Fabrics way back in the day.

Diary of a Chain Stitcher: Half Moon Atelier Basic Bikini Well's Bay in Argyll Liberty Print Swim Fabric from The Fabric Store

I veered away from the instructions and used the plain where she suggested print and the print where plain was recommended as I preferred the print and wanted the straps to match that side. Whilst I love the print side I'm not so keen on the grey side now it is finished as the straps look a little odd. Next time I'll stick to what is recommended! What I do really love about the contrast reversible side is how it slightly peeks out and defines the edges of the style. It looks really great where it ties at the back too.

Diary of a Chain Stitcher: Half Moon Atelier Basic Bikini Well's Bay in Argyll Liberty Print Swim Fabric from The Fabric Store

In one respect I am pleased that I waited until now to sew it up (not only to enjoy making it in my new sewing space!). Waiting has given me time to get to know my new machine; in particular explore all the stretch stitch options and work out which are my favourites! The Brother Innov-is F420 comes with a huge number of stitches, both decorative and practical. There are lots of stretch options from a regular zig zag to triple stitch and overcasting stitch. My preference so far is to use the triple stitch for any seams that need to be pressed open and the no.17 overcast stitch for any which will remain unpressed or can be pressed to one side together. The majority of this I sewed up using stitch 17 apart from attached the elastic with a fairly long and narrow zig zag.

Diary of a Chain Stitcher: Half Moon Atelier Basic Bikini Well's Bay in Argyll Liberty Print Swim Fabric from The Fabric Store

You can sew up this pattern entirely on an overlocker but with knits I prefer to assemble the garment on the machine, usually using the overlocker just to finish my seam allowances. I find my sewing to be more accurate that way. As this design is cleanly finished in order to make it reversible there was no need to finish the seams so I didn't even touch my overlocker. Proof that you don't need one to sew knits, swim or activewear! Both the top and the bottoms are bagged out and pulled through an opening in the side seam which made for a few worrying moments when I envisioned everything being sewn together incorrectly once I had pulled it through!


As the design is reversible it uses a few slightly different construction techniques to those I might have employed previously. This made the construction process really enjoyable, which is something I found with the other Halfmoon pattern I've tried too (the summer jumpsuit Tofo). To bag out the bottoms you sew the leg holes using the burrito method. This is a really fiddly job, particularly as you are attaching elastic at the same time. It took some patience and a little bit of skill handling stretch fabric and is the one element of construction which I would say gives the pattern the Intermediate sewing level with which it is labelled.

Diary of a Chain Stitcher: Half Moon Atelier Basic Bikini Well's Bay in Argyll Liberty Print Swim Fabric from The Fabric Store

The needle down function and sensitive speed control of the Innov-is F420 allow you to be really accurate with your sewing which is a great help when sewing tightly angled areas like the ends of the rear ties on the top. The pattern has a seam allowance of 1.5cm so I made sure to trim it all right down close to my stitching to reduce any bulk. With a bikini you definitely don't want any lumpy, bumpy seams showing through and to ensure a nice clean shape at the end of the ties grading is essential. To ensure even better stretch at the seams than the stitches provide I used Maderia Aeroflock thread in the bobbin which is similar to wooly nylon thread in that it has a small amount of stretch and is also soft to the touch. The machine has no trouble at all with using this thicker and fluffier thread.

Diary of a Chain Stitcher: Half Moon Atelier Basic Bikini Well's Bay in Argyll Liberty Print Swim Fabric from The Fabric Store

The only thing I'm not completely satisfied with is the fit of the bottoms as they are a bit snug. Meghann does warn in the instructions that the bottoms are quite low cut so it is worth thinking about that before cutting in to your fabric but it isn't so much the height of the waist that bothers me as the room in the seat and width-wise. They are particularly snug around the leg holes, although this is probably more due to my overzealous stretching of the elastic as I applied it than the cut of the pattern! As the elastic is stretched as you sew rather than pinned on in quarters I found it quite hard to judge how tight it needed to be and think I went a bit far, you can see that in how much they bunch up when not worn!

Diary of a Chain Stitcher: Half Moon Atelier Basic Bikini Well's Bay in Argyll Liberty Print Swim Fabric from The Fabric Store

I used narrow rubber swimwear elastic but Meghann includes instructions for elast-ish; a product of her own invention as she lives on a remote island where supplies are hard to come by! It is basically skinny strips of swimwear fabric used in place of the elastic. I'm wondering if this would have more give than the string elastic I had and so is a little more forgiving around the leg holes. I'm going to give it a try next time! I'll also either go up a size in the bottoms or use a smaller seam allowance. I cut the size 4 and the top is great as it is. Stretching the elastic tighter is good on the top as it fits snuggly and adds security, I might even stretch it a little tighter in future.


This is definitely a swim suit for sunbathing rather than too much activity as because of the ties I don't feel hugely supported in it (definitely best for small busts) but it is incredibly comfortable. I'm off to Valencia for the weekend soon and this is going to be perfect for lounging around on the beach. I've actually got a little bit of another Liberty Print swim fabric in my stash which I might try and get sewn up into a second Well's Bay before I go!

Wine Red Maxi Mayfair Dress

$
0
0
Diary of a Chain Stitcher: Maxi Nina Lee Mayfair Dress in Wine Red Jersey

I was incredibly excited about the Mayfair Dress when it was released by Nina Lee over a year ago and I snapped up a paper copy soon after release. For years I'd had this favourite style of French Connection dress that saw me through many summers; flattering, comfortable and seemingly suited for any occasion. I owned versions in various prints, colours and lengths but may favourite by far was a maxi length version. The previous summer I'd been wearing it with too many holes in to repair, hoping that the little purple, black and dusky pink print disguised them. It had been on its last legs for a while and sadly French Connection stopped making them a while before. I couldn't bear to throw it out so I couldn't believe my eyes when I spotted the Mayfair and realised it was almost an exact match. I could make my own replacement!

Diary of a Chain Stitcher: Maxi Nina Lee Mayfair Dress in Wine Red Jersey

Why then has it taken me so long to make one you may ask? I had a really hard time finding fabric that was going to live up to my expectations of this dress. The RTW version has been on such a pedestal in my wardrobe that I wanted to love any version I made just as much. The print and colours of the existing dress so suited me and various ways of styling it that I think part of me was hoping to find a print near identical but of course that was going to be too much to ask. Any prints I found which I quite liked were on too heavy, too fine, or too stiff of a jersey. Which is why I eventually opted for a solid. At least now I have a version of this dress to wear again and when the right print eventually comes along I can make another.

Diary of a Chain Stitcher: Maxi Nina Lee Mayfair Dress in Wine Red Jersey

I actually found this fabric in Valencia of all places when I was there for a girls weekend trip a few weeks ago. Pauline Alice recommend to me Julian Lopez in the city centre and what a treasure trove that place was! Four floors of fabric at various price points including traditional Spanish brocades on the top floor and a marvellous shopping experience. No one spoke a word of English and I speak no Spanish so it made for a rather hilarious game of charades getting fabric cut! I also have no idea about the fabric content. At first I thought it was a viscose jersey because of the lovely drape and movement but after sewing with it I now think there might be a bit of cotton in there too as it seems a little more stable than other viscose jerseys I have worked with.

Diary of a Chain Stitcher: Maxi Nina Lee Mayfair Dress in Wine Red Jersey

Choosing a soft and drapey knit is very important for this style. The gathering at the waist means you don't want anything to bulky and you want it to drape softly across the bust. I would shy away from a fabric that might potentially be clingy around the hips. This soft jersey is spot on and I knew as soon as I touched it that it had a similar hadn't and weight to my original dress. It was lovely to sew with and I had no trouble with the fabric stretching out as I sewed which can often be a problem with knits of this light weight and drape, particularly when using the twin needle around the hem and cuffs. It did want to curl up at the edges a bit but that was nothing a good press couldn't fix. It responded really well to a medium heat iron with some steam.

Diary of a Chain Stitcher: Maxi Nina Lee Mayfair Dress in Wine Red Jersey

I constructed the majority of this dress using the triple stretch stitch on my Brother Innov-is F420. Usually with knits I'll use a zig zag or one of the many other faux overlock stretch stitches. However, as this dress doesn't have negative ease (meaning the garment doesn't stretch around the body so the seams don't need to stretch too even to take the dress on and off) I opted for the slightly more resilient and slightly less elastic triple stitch. This is a great stitch if you want to press your seams open which this dress requires you to do in a few areas; the other stretch stitches generally catch the seam allowances together. I finished all the seam allowances on my overlocker as usual, just because I personally like a nice professional looking finish inside!

Diary of a Chain Stitcher: Maxi Nina Lee Mayfair Dress in Wine Red Jersey

I think my favourite thing about my Brother sewing machine is how accurately it enables you to sew! The adjustable speed and reverse button (which sews just the one stitch if pressed once and multiple if held down) mean you can stop at exactly the point you want with ease. I went into the menu and adjusted the settings to finish with the needle down each time I stopped sewing for this project. This made pivoting around the angled neckline seam a breeze and topstitching the waist tie on worry free.

Diary of a Chain Stitcher: Maxi Nina Lee Mayfair Dress in Wine Red Jersey

I found the instructions a little confusing in the way explanations of techniques were sometimes worded (but I was quite distracted keeping one eye on the puppy while I read them!). It is a fairly speedy and straightforward sew for a very elegant looking garment though. The trickiest part is attaching the collar/facing to the back of the neckline and shoulders using the burrito method; and is particularly fiddly when you are making the maxi version as you have so much fabric in the roll. If making the maxi I wouldn't recommend using a thick jersey as you will struggle at this point. I was very worried about catching some of the dress in my stitching along the edge of the roll but it turned out beautifully and I love the clean finish. Nina's tip to use the zipper foot to stitch this part accurately along the edge of the roll is great.

Diary of a Chain Stitcher: Maxi Nina Lee Mayfair Dress in Wine Red Jersey

I love the pleated detail at the back of the neck which creates the lovely soft drape of fabric over the bust. The fabric then gently gathers in at the front of the waist to emphasise the female shape. I also love the right angled seam where the collar meets the back at the shoulder. Very clever pattern cutting and I always enjoy sewing something a little different. Using a piece of clear elastic to gather the front (as well as stabilise those shoulder seams) is a really intersecting and useful technique. I thought attaching the waist tie as well as gathering the front evenly would be tricky but it was actually very straightforward thanks to the clear markings and measured piece of elastic. The elastic is sewn to the right side of the garment so that it is hidden between the shell fabric and the waist tie once that is attached. Despite the elastic being hidden the inside of the garment doesn't look particularly pretty in this area as you see the zig zag stitch for the elastic and then the topstitching for the waist tie either side. Speaking of the waist tie...this was the first project I've sewn in the company of my new puppy and she was very good apart from the moment when I found her all tangled up in the yet-to-be-attached tie!

Diary of a Chain Stitcher: Maxi Nina Lee Mayfair Dress in Wine Red Jersey

I cut a size smaller than the size chart suggested after measuring my favourite French Connection dress as I love the fit of that. This meant I cut the size 8. I don't think the size 10 would have overwhelmed me so I wouldn't say the sizing is necessarily over generous, I just prefer this slimmer cut and the similarity to my original dress. The only thing I would tweak next time is the size of the sleeves as they are a little snug around the arm. I don't think going a size up would have solved that problem so I think I'll just slash and spread the pattern piece to give me a little more room. At 5ft 3" I was surprised to find that the length was spot on straight out of the envelope. I like my maxi dresses skimming the ground but even if you don't if you're taller me I'd recommend adding some length to the pattern before you start. Nina is quite petite too so probably drafts on the short side!

Diary of a Chain Stitcher: Maxi Nina Lee Mayfair Dress in Wine Red Jersey

This has only just come off the sewing machine and is yet to have an outing but I'll report back on how it washes and wears on Instagram. I'll definitely be making more of these and am very excited to have this style of dress back in rotation again! The pattern also includes three quarter length and full length sleeves which I'm looking forward to trying for winter.

Diary of a Chain Stitcher: Maxi Nina Lee Mayfair Dress in Wine Red Jersey

Black Scalloped Lace Watson Bra

$
0
0
The garment I've got to share with you today has been a long time coming! Years in fact. Bra sewing has been on every project list for the year/season or goal setting challenge like #makenine on Instagram for quite some time. I'm not quite sure why but other garments seemed to continually jump ahead it in the queue. I think my delay was partly due to it being a project out of my comfort zone; when sewing time is limited and I'm tired it always seems easier to sew something that feels familiar and I can complete satisfactorily without too much thought. What is also really off-putting about bra sewing is gathering all those different supplies! What with different elastics, fabric, lining, hooks and eyes, straps and sliders I never felt like I had quite all the right matching bits and pieces for a bra. However, in the end I decided my first bra was never going to be perfect anyway so just dove on in there with what I had accumulated.

Diary of a Chain Stitcher: Black Scalloped Edge Lace Cloth Habit Watson Bra

My first bra is not perfect indeed but I'm actually very pleasantly surprised with what I've managed to make. I've wanted to make the Cloth Habit Watson Bra since it's release and thought it would be a good starting point as the stretch aspect makes the fit more forgiving and it doesn't involve underwires or too much structure. I've had this black stretch lace stashed away for absolutely ages and actually forget where I got it from beyond a stand at one of the Knitting & Stitching shows! It was quite narrow at 25-30cm wide and I had just enough to cut my pieces out of a metre. I fell in love with the Art Deco/early 20th century feel of the pattern in this lace and of course wanted to make use of the beautiful scalloped edge. However trying to incorporate the scallop was obviously going to make my first foray into bra making much more complicated as I was veering off piste!

Diary of a Chain Stitcher: Black Lace with Scalloped Edge Watson Bra from Cloth Habit

But my advice to beginner sewers is always to make exactly what you feel like and to make things you are excited about rather than things you think you should make because they are marked 'beginner'. You might not get great results first time but you'll put your all into making it work and learn a huge amount along the way. So ahead I went with the scallops! There's actually a great post on the Cloth Habit blog as part of the Watson Sew Along about how to cut a scalloped lace cup which involves slightly altering your inner cup pattern piece. I wanted to use the scallop along the lower edge of the band too so had a look at Lladybird's post about how she made and finished the edges on her lace version. To finish the lower edge I basted the power mesh and the lace pieces together as instructed then simply stitched the elastic to the inside above the scallop and trimmed away any power mesh beneath the elastic to leave a beautiful delicate scalloped edge. I used the wider picot elastic despite not being able to see the decorative edge as it was all I had to hand with the soft plush back. As I didn't turn that bottom edge in as instructed this left my back edge too wide for the hook and eye pieces so I had to trim down the top edge as advised in the instructions.

Diary of a Chain Stitcher: Black Scalloped Edge Lace Cloth Habit Watson Bra

I'm not loving the look of the clear elastic which I used to finish the inner edge of the cup. It needs an elastic here to stabilise it and prevent it stretching out over time but I couldn't use picot as recommended as I wanted to retain the scalloped edge. Perhaps if I'd had a narrower clear elastic I wouldn't mind as much? Lauren used a strip of selvedge from her power mesh which looks much better but as I was working with scraps I didn't have any selvedge left. Does anyone have any alternative finishes they can recommend? I'd also appreciate any advice on where you lingerie makers in the UK get your fabrics and notions from, particularly kits that contain everything you need as this would definitely encourage me to make more lingerie! Sewing Chest is great but I'd like to shop around for a bit more variety.

Diary of a Chain Stitcher: Black Scalloped Edge Lace Cloth Habit Watson Bra

The only thing I'm not happy about in terms of the scallop is where the cup meets the ring at the top. Because you've straightened out the front edge of your pattern piece and lined up the scallop so low points of the curve meet at the centre front you loose the narrowing of the cup at the top point and I ended up trying to pull quite a wide piece of scallop through the ring. It doesn't look terrible but isn't ideal. Next time I'd also cut longer pieces for the straps. I cut the recommended 18" after measuring myself but think I'd like a little more room for adjustment.

Diary of a Chain Stitcher: Black Scalloped Edge Lace Cloth Habit Watson Bra

For lining the cradle I used some fairly thick black power mesh I had left over from sewing activewear and as my lace is quite delicate I used it to line the rear band pieces too. The strap elastic, plush back picot elastic and hook & eye piece all came in a kit from Sewing Chest which again I've had for absolutely ages. The one missing piece of the puzzle were the sliders and rings which I got from MacCulloch and Wallis in the end because I happened to be nearby, but they do only stock black and white in two sizes. I definitely made my life easier by using black; trying to find all those elements to match in any other colour but white must be a nightmare and I'm no natural with a dye pot!

Diary of a Chain Stitcher: Black Lace with Scalloped Edge Watson Bra by Cloth Habit

I usually love doing really accurate sewing, particularly since I got my Brother Innov-is machine as it makes it so easy, but to begin with I found working with those tiny seam allowances quite frustrating. It took some patience, practice and a bit of time with the unpicker before I was achieving results I was happy with. Again I probably didn't make my life easy with this buy choosing such a fine lace for my first attempt! The bra uses 1/4" seam allowances throughout which makes sense for such small pattern pieces but is much smaller than I'm used too. It took me a while to figure out how to keep to that distance accurately as the markings for such small seam allowances are quite hidden on the machine. There is one before the bobbin cover and one behind the foot but no groove in the standard machine foot to line up with. I could have done with a marking on the bobbin cover and in hindsight could have used masking or washi tape to create a temporary one.

Diary of a Chain Stitcher: Black Scalloped Edge Lace Cloth Habit Watson Bra

I found stitching along the elastic, particularly where the strap elastic joins the back band in a curve quite difficult to keep in the right position and have had a bit of a wobble here and there. Hopefully practice witll make perfect with that one. I love that as the lace is black with a bit of texture you can't see the stitching in it at all. Very forgiving for those first time wobbles! I was nervous about inserting the cups correctly but that was actually really easy and I love the shape. I'm particularly proud of how neat and tidy the central tip of my cradle is where the two cups meet. I make full use of the needle up/down button when sewing tight little points and corners like this. Pressing this button rather than using the foot allows you to sew individual stitches so you can stop exactly at the point you want then pivot rather than accidentally going a stitch or two too far.

Diary of a Chain Stitcher: Black Scalloped Edge Lace Cloth Habit Watson Bra

Carmen gave me a great tip on Instagram to make sure I held my thread ends as I started sewing. One of the biggest problems I encountered was getting a seam started without the thread knotting up or fabric getting sucked down into the throat plate. My F420 sewing machine has a thread cutting function which means the bobbin thread is hidden in the machine after cutting the last seam you sewed. I found I needed to ignore this function and lift the presser foot and snip my own threads like I used too so I could leave two nice long thread tails and get my next seam started smoothly.

Diary of a Chain Stitcher: Black Scalloped Edge Lace Cloth Habit Watson Bra

I treated this as a bit of a wearable toile and sewed the whole thing on my machine for accuracy rather than risking mistakes with such fine seam allowances on the overlocker. The visible seam allowances inside are trimmed right down and topstitched so I don't really mind the finish. I also think the seam through the cup which is just lace is much less visible and bulky this way. My duck billed appliqué scissors where invaluable when it came to trimming down seam allowances in such delicate fabrics.

Diary of a Chain Stitcher: Black Lace with Scalloped Edge Watson Bra from Cloth Habit

I cut the 34D after measuring myself and following the pattern instructions which is different to my RTW size but I trusted the pattern and it has turned out pretty great. The band is slightly roomy and the centre of the cradle doesn't lay quite flat but I think this is more to do with the way I applied the elastic than the sizing of the pattern. I think I didn't stretch the plush back elastics enough (as the armhole gapes a bit too) and stretched the clear elastic too much as it bunches up a little! Working with the elastics and figuring out how tight to apply them as I sewed was probably the hardest part of this project and is something I hope will improve with more practice; I was getting more of a feel for it towards the end.

Diary of a Chain Stitcher: Black Scalloped Edge Lace Cloth Habit Watson Bra

The pattern was fantastic and I highly recommend it as a starting point for any beginner lingerie sewer. The sizing information is particularly good and I like that the PDF pages you need to print for each size are clearly listed (also that it is such a small pattern to assemble!). The instructions were thorough and well illustrated. I didn't find myself left feeling unsure at any point; which is saying something considering bra making felt so foreign to me when I started! I particularly appreciated the tips scattered throughout the instructions and also the inclusion of recommended stitch type, length and width when zig zagging. Thanks to Amy my bra turned out great!

Diary of a Chain Stitcher: Black Scalloped Edge Lace Cloth Habit Watson Bra

I expected bra sewing to rapidly become an addiction but can't say it is yet. I did enjoy the process and was amazed at how quickly and neatly it all came together once I got going but I feel like I've still got a lot to learn. I've got some white stretch lace for a second Watson but think I'd actually like to try a version in a plain mesh so I can finish all the edges as the pattern intends and work on my accuracy. Then I'd love to move on to more structured non stretch bras using the Orange Lingerie patterns as I have Norma's book already and think working through that could really help. I certainly won't be leaving it years before my second bra anyway!

Tencel Twill Zadie Jumpsuit

$
0
0
I haven't had time to blog much of late but I have been squeezing in bits and pieces of sewing when I can. I've got a few completed projects to share with you but this jumped the queue to be my final post of the year as I loved it so much after putting in the final stitches a few days ago. It seems appropriate to wrap up the year with this pattern as my first version remains a favourite in my wardrobe and is my most worn handmade garment of 2019! It is the Zadie Jumpsuit from Paper Theory made up in a glorious sand-washed tencel twill from Patterns and Plains.

Diary of a Chain Stitcher: Paper Theory Zadie Jumpsuit in Tencel Twill from Patterns and Plains

As I've previously made this pattern and reviewed it in depth here I don't have a huge amount extra to say other than that I love it just as much with sleeves and feel like I could comfortably wear this casual everyday with trainers or equally dressed up with heels. I took an inch off the length of the sleeves as they felt kind of in the middle of long and three quarter on me as they were. It feels sophisticated in that chic and understated way whilst still having an interesting contemporary cut and design details. I think it might become my go-to press night outfit! This is partly to do with the fabric choice which has the potential to feel much more glamorous than the cotton twill I used for my original version due to it's gorgeous soft texture, drape and sheen.

Diary of a Chain Stitcher: Paper Theory Zadie Jumpsuit in Tencel Twill from Patterns and Plains

I'd heard good things about tencel and seen some gorgeous projects popping up on Instagram using it. However, it is actually quite hard to come by here in the UK so it wasn't until I discovered that Patterns and Plains are stocking a selection of colours that I decided to take the plunge and try it.  They stock this 'Helsinki' sand-washed twill in seven rich colours (all of which I would happily wear and fit in to my current wardrobe so you can probably expect to be seeing quite a lot more of this fabric!) and also have the 'Trieste' modal, bamboo and tencel blend which I'm tempted to try. This is the new sage green colour which I'd say is slightly less green than you might expect, in some lights more of a grey with a hint of green but I absolutely love it!

Diary of a Chain Stitcher: Paper Theory Zadie Jumpsuit in Tencel Twill from Patterns and Plains

Tencel is a branded Oeko-Tex certified fibre that is made from wood pulp using environmentally friendly processes. The fibre production is more eco-friendly than cotton because it uses a 'closed-loop' process, reusing 99% of the water and solvents. Eco-friendly and a dream to work with and wear; what's not to love?! My usual go to fabric choice when sewing a garment that requires drape and movement is viscose and that is certainly more widely available, especially in prints. However, I'll certainly be putting tencel at the top of the queue from now on if I can find it in the right colour. it has the same amazing luxurious hand as a sand-washed silk (at a much more purse friendly price) combined with a weight, drape and opacity that makes it a match for so many different projects. I imagine there will be some variety in weight, weave e.t.c between different suppliers so would recommend ordering samples to see if it works for you.

Diary of a Chain Stitcher: Paper Theory Zadie Jumpsuit in Tencel Twill from Patterns and Plains
I'm really pleased with my finishing on this version

This is my first project using fabric from Patterns and Plains (which I received in return for a review after receiving some samples of the tencel colour range) and I was very impressed with the customer service, speed of delivery and quality of the fabric. The price is very reasonable for an eco-friendly quality fabric and they also offer a thread matching service which is always a plus point when ordering online. It means you can get started right away when the fabric arrives!

Diary of a Chain Stitcher: Paper Theory Zadie Jumpsuit in Tencel Twill from Patterns and Plains

I'd expect a fabric of this weight and fluidity to have a somewhat slippery feel but the sand-washed finish makes it buttery soft, sort of similar to a peach skin. This also makes it much easier to cut and sew as the surface of the fabric has a slight grip against itself so pieces don't shift around in the same was as might a satin or chiffon. There is still a risk of pieces stretching out and distorting, especially edges cut on the bias and curves so I would make sure to follow the instructions to stay-stitch the neckline of the bodice before adding your binding. The beauty of this jumpsuit is that the wrap lays nice and flat and secure across the bust, you don't want it stretched out and wobbly.

Diary of a Chain Stitcher: Paper Theory Zadie Jumpsuit in Tencel Twill from Patterns and Plains

Applying the bias around the curves of the front wrap is probably the trickiest part of making this jumpsuit (and the most time-consuming part turning through those long ties!). It's fiddly but nothing to put off an advancing beginner. If you're finding it hard I would recommend opening up the tape and stitching one side on first before folding it over and securing with a topstitch. The pattern instructions have you sandwich it over the raw edge and stitch in one go which can make it difficult to get a neat finish if you haven't had much practice with the technique. This tencel makes beautiful bias tape and I love the finished effect of the wrap.

Diary of a Chain Stitcher: Paper Theory Zadie Jumpsuit in Tencel Twill from Patterns and Plains

For anyone who hasn't read my previous post and is thinking about making this jumpsuit there are a couple of things I think it is important to bear in mind. I personally think that this style looks best when the waistline and ties sit at the natural waist and accentuate that. The pattern is drafted for someone 5ft 7 tall I believe and quite a few people have noted that it seems quite long in the body. I'm 5ft 3 and shortened the bodice by 3/4" and the crotch depth by 3/4" too and this feels just about right. You do need some depth in the crotch for ease of movement.

Diary of a Chain Stitcher: Paper Theory Zadie Jumpsuit in Tencel Twill from Patterns and Plains

The fluidity of this amazing fabric probably shows best in the flat photo. The way it hangs of the body and flows as you move makes this jumpsuit feel so elegant when you're wearing it. I might have to make a shorts version with short sleeves for summer in either the cinnamon or saffron colour!

Thanks to you all for reading and commenting over 2019! You really keep me inspired to sew and try new things. Merry Christmas and a very Happy New Year! 

Looking back at 2019

$
0
0
Happy New Year blog friends! The turn of the decade kick started my sew-jo and I’ve been on my machine as much as I can over the last couple of weeks. Now that I’ve got a few completed projects under my belt the motivator to blog again is kicking in too...though not so much the desire to get dressed up and take photos of myself! I thought it might be nice to start the year with a look back over the previous one. 2019 was a big year for me, in many wonderful ways. But one which saw sewing pushed down the list of priorities a couple of notches and I missed it. Looking back I think I sewed more than I realised but there are noticeably fewer additions to my handmade wardrobe than in previous years.

It is actually quite tricky to look back across what I made in the last twelve months as the limited time I had for sewing I wanted to spend actually sewing so this poor old blog became quite neglected. Something I hope to rectify in the coming months. I’ve had to rummage in my wardrobe to remind myself what I’ve been making! I do know that I started the year with a two week frenzy of sewing and scheduling blog posts, making extra pieces to add to a handmade holiday wardrobe. I spent most of January and February travelling in Southern Africa and then the Philippines for a wedding. I enjoyed the opportunity to work on some slightly different projects that would be suitable for camping in scorching National Parks and lounging on tropical beaches.

At Victoria Falls with my Desmond Backpack

The most successful thing I made for my trip wasn't actually an item of clothing! I made the Desmond Backpack from Taylor Tailor and absolutely love it to bits. It went everywhere with us on holiday and was the perfect size for all our day to day needs. It has then been used nearly every day of the rest of the year to cart around everything I need for work. Definitely one of my most used sewing projects and very enjoyable to make too. Other big handmade successes on holiday were the Summer Jumpsuit Tofo from Half-moon Atelier and this zero waste kimono cover-up from Elbe Textiles. We are off to Uganda for two weeks next week and I’m looking forward to sharing with you what I’ve made for this trip after reflecting on what else would have been useful last time.


Back in the UK in early March I kicked off what was going to turn into a very busy year of work for me. I work in the theatre as a freelance costume supervisor so move from production to production throughout the year. Over the last ten months I’ve supervised 6 shows and worked on the next series of The Great British Sewing Bee. Long hours and overlapping projects left me little time for sewing but seeing what the amazing costume makers we have on each production can do is very inspiring. Watching the sewers beavering away at the challenges in the sewing room certainly left me with itchy fingers to get back to my machine!


I did tackle a couple more complex and lengthy projects last year and they are definitely the ones I'm most proud of! I think my Hampton Jean Jacket might be my favourite thing I've ever made and it has already racked up a large number of wears. I can't wait for the weather to warm up so I can get this on my back again.


In May my Mum got married which was one of the happiest days of the year and my life. I made my bridesmaid dress using a combination of the BHL Elisalex bodice, the Emmeline Tee from The Little Tailoress for the beaded overlay and a self drafted half circle skirt. The dress was all about showcasing the fabrics really. The beaded chiffon for the top came from Goldbrick Fabrics and the AMAZING satin backed crepe for the dress was from Borovick Fabrics. I was so happy with how it turned out and loved wearing it.


My favourite patterns of the year were the Zadie Jumpsuit from Paper Theory and the Evie Bias Skirt from Tessuti. Both of which I've made twice and still have plans for more of! The Zadie is such a great unique, yet easy to wear design. I miss my first version of this when it is in the wash. I love patterns which have quite classic cuts but interesting design details to elevate the garment from the norm and Paper Theory seem to do this really well. I've just made their Olya Shirt which I can't wait to share. Another brilliant pattern. The Evie Skirt I just love for its versatility as well as the care Tessuti put in to their finishing techniques. I've worn both versions I've made so much right through all seasons of the year. It works with trainers and an oversized jumper for day to day yet effortlessly dresses up with some heeled ankle boots and a fitted turtleneck for evening.


Towards the end of the year I FINALLY made my first bra! I used the Cloth Habit Watson Bra pattern and whilst I can't say I fell in love with bra making I was really pleased with the result. More practice is needed but I'm looking forward to moving on to more structured bras with underwires. This project was part of my 2019 #makenine selection which I was so close to completing! Just two sleeves to go on my knitted jumper.


I also remade quite a few patterns I've used previously this year as the initial versions of them see so much wear! It was quite a satisfying way to use small amounts of sewing time as the projects weren't particularly taxing as I'd made them before and I knew the finished garment was going to be a winner. Most of them didn't make it onto the blog or Instagram as the only change from the first version was the fabric. I've been wearing a lot of True Bias Nikko tops this winter, the Basic Instinct Tee from Sasha at Secondo Piano has become my go to tee for warm weather and I made myself another Sew House Seven Toaster Sweater (#2) as my black version was getting worn nearly every day!

Ruby at 2 months 'helping' me assemble a PDF pattern!

In the summer I took the big step to move out of London to Dorking where I now live with my boyfriend and our six month old Shiba Inu puppy called Rhubarb (Ruby) who came home with us in August. You can expect to be seeing a lot of her in future blog photos! We love her to pieces but training her (and training her to leave my pins and fabrics alone!) has been very time consuming indeed and therefore rather detrimental to getting lots of sewing done. I'm settling in to these changes now and we are finding a nice balance of countryside walks and sleeping at my feet while I sew. Dog walking calls for a different wardrobe so I'm foreseeing my 2020 sewing being a mixture of the very practical (waterproof coat, t-shirts and jeans!) and the very impractical, things which are just fun to make and wear!

In my new sewing space in my totally impractical for dog walking Mayfair Dress

Over the course of the past twelve months I found myself enjoying sewing a little less because I had less time to do it and was therefore only managing to find time to work on the projects that I felt obliged to do because I had agreed to post a review/try out a new pattern/make something for someone as a gift. There should always be a place for sewing a fun and frivolous garment on a whim purely for the joy of making and wearing it. I always try to make careful choices with my sewing; whether that be pattern, fabric or whether I really need another of that particular type of garment in my wardrobe. But I also firmly believe in enjoying my hobby and sometimes that means throwing caution to the wind and trying something completely new and outrageous because you feel inspired to do so. I sew for enjoying the process of doing it and the therapeutic nature of creating rather than necessarily to reach the end and have a completed garment. I want to make sure I remember this going forward as sometimes feeling pressure to finish something and rushing the steps can take all the fun out of it. 2020 is going to be all about bringing the fun back into my sewing time!


Speaking of sewing fun I'm going to The Stitch Festival (formerly the Knitting & Stitching Show) at the end of February. There will be over 200 exhibitors selling craft supplies, 200 workshops to participate in and demonstrations and interviews with numerous craft stars. I have five pairs of tickets to giveaway! The tickets are valid Thursday 27th February to Sunday 1st March but if you would like to attend on the Saturday there will be a £5 supplement to pay. Head on over to my Instagram to enter. If you'd like to purchase more tickets you can use the code DIARYOF2020 to get £2.50 off standard advance adult tickets and £1 off concessions. The discount can be used for advance bookings only up to Wednesday 26th February and there will be a £2.20 fulfilment fee per transaction (£2.50 for posted tickets). I hope to see lots of you there!

Grey Chambray Fairfield Button Up Shirt

$
0
0
Diary of a Chain Stitcher: Thread Theory Fairfield Button Up Shirt in Grey Cotton Chambray

I made a few presents this Christmas including a double gauze Named Lahja dressing gown for my Mum, a Deer & Doe Sirocco jumpsuit for my sister (which I love and will definitely be making one for myself so expect a review of that pattern in future) and this shirt for my brother. I’ve made a fair number of shirts for men now (my first here about 5 years ago!) but thought it was worth posting this particular one as I used a different pattern which is very worthy of sharing. The previous shirts I’ve made have all been based on the Walden/Colette Negroni pattern and the pattern has required a bit of work to get the look I want; namely taking the pattern for a traditional collar with stand off of a RTW shirt and adding that and a classic front placket (following this shirt sew-along from Male Pattern Boldness) to replace the Negroni’s facing. As this was the first shirt I have made for my brother and I was therefore essentially starting from scratch I decided to take a look at other shirt patterns which might make my life a bit easier.

Diary of a Chain Stitcher: Thread Theory Fairfield Button Up Shirt in Grey Cotton Chambray

There quite a number more shirt patterns for men available than when I made my first shirt years ago but the clear choice for me to try first was the Thread Theory Fairfield Button Up. I liked that it is a very classic shirt style that can easily be made more or less casual/formal by fabric choice but also by tweaking the pattern details. You have the choice to add sleeve tabs to fasten the sleeves in a rolled up position, add a chest pocket and also whether to choose a centre back box pleat or long darts in the back for a more fitted silhouette. It has quite a contemporary neat cut without veering too far towards slim fit and actually includes patten pieces to make all sizes in a cut more suitable for someone with a fuller stomach which I think is a fantastic touch.

Diary of a Chain Stitcher: Thread Theory Fairfield Button Up Shirt in Grey Cotton Chambray

I would highly recommend this pattern as a starting point for anyone who hasn’t made a shirt before. The illustrated instructions are clear and thorough and guide you through many traditional shirt making techniques such as flat felled seams for a professional finish inside and the burrito method for assembling the back yoke. on how formal you want the shirt to be. For example you might interface both collar pieces and both stand pieces for a crisp, formal shirt but only one side of the collar and stand for a softer and more relaxed look. This impressive amount of detail continues throughout the instructions. You can tell that this pattern has been well researched and each construction technique considered and thought through.

Diary of a Chain Stitcher: Thread Theory Fairfield Button Up Shirt in Grey Cotton Chambray

The collar on this pattern is quite slim which is worth bearing in mind when choosing this pattern. For my brother it is exactly the kind of look I was after. In the instructions the collar is assembled using my preferred method which is from this popular tutorial from Four Square Walls. I find it so much easier to get a clean finish this way. A fairly quick and easy addition you can make to a more formal shirt (which I didn’t do here as this is for more casual wear) is to add slots for more collar stays to the under collar. If you’re interested in doing this I’ve got an old tutorial here.

Diary of a Chain Stitcher: Thread Theory Fairfield Button Up Shirt in Grey Cotton Chambray

What is interesting about this pattern is that there is no separate pattern piece for the front placket. It is drafted onto the front pattern piece and you create the illusion of a seam by sewing a sort of pin tuck right down the front. A very clever way to save pattern matching stripes or checks at the front. It was quite enjoyable to try a different way of doing things, although it was nice to realise when using tried a tested method for the collar and cuffs that these fiddly bits of sewing don’t faint me in the way they used to.

Diary of a Chain Stitcher: Thread Theory Fairfield Button Up Shirt in Grey Cotton Chambray

The thing I liked most about the Negroni pattern was the tower plackets on the sleeves. Every time I sewed them it amazed me how a bit of careful folding, pressing and stitching created those little contraptions! I’ve actually used the pattern piece and instructions for those tower plackets on various other projects over the years, I remember them working really well on the Grainline Archer Shirt instead of the binding. I was therefore delighted to see that the Fairfield includes tower plackets too! The method is slightly different but achieves a result just as good.

Diary of a Chain Stitcher: Thread Theory Fairfield Button Up Shirt in Grey Cotton Chambray

The fabric I used is a grey cotton chambray from John Lewis. I was initially looking for a heavier kind of brushed cotton for a casual winter shirt but couldn’t find quite what I was after. I’m actually really pleased that I ended up using the chambray as I think it puts the shirt in the smarter end of casual and hopefully this will mean my brother gets a lot of use out of it! The fabric was an absolute joy to work with, lightweight, crisp and presses like a dream. It made getting all those precise little shirt elements neat and tidy so much easier. I debated using white thread of the top stitching but eventually opted to keep it simple with a matching grey, reserving a little punch of white for the buttons.

Diary of a Chain Stitcher: Thread Theory Fairfield Button Up Shirt in Grey Cotton Chambray

I can’t really comment on the fit as I haven’t seen it on yet! Plus I didn’t measure my brother as I wanted the shirt to be a surprise. Luckily working in costume has made me pretty good at guessing clothing sizes! My brother assures me that it fits perfectly and as he is of quite average build and height I’d say the fit is true to size.

Diary of a Chain Stitcher: Thread Theory Fairfield Button Up Shirt in Grey Cotton Chambray

I’m so proud of the finishing on this shirt, all the top stitching and neat little corners that a project like this involves. I think it is definitely my best shirt to date and I’m eager to make more with this pattern. It was one of those projects that came together just the way it should; notches matching, seams aligning and no guesswork with the techniques. What are your favourite shirt patterns (male or female)? And do you have any shirt making tips to share?

Textured Rayon Wilder Top and Dawn Jeans

$
0
0
I (like the majority of half of the online sewing community it would seem!) fell in love with the Wilder Gown pattern from Friday Pattern Company when it was released last year. Bohemian and easy breezy chic with on trend gathered tiers, it was irresistible to image it sewn up in a plethora of different fabrics (and if you search #wildergown on Instagram you can see just that!). Despite wanting to make it and wear it right that second I was a little hesitant about what the high gathered neckline would look like on me. I'm quite petite and short in the shoulder with a bit of a bust so this kind of style is never a failsafe win in my book. After seeing it look wonderful on lots of different body shapes as it surged to popularity online though I thought it was worth a go. As the pattern for the full length gown is quite a fabric eater I decided to give the top a try first to check out that neckline before investing too much time and money in a dress.

Diary of a Chain Stitcher: Textured Rayon Wilder Top from Friday Pattern Company and Megan Nielsen Straight Leg Dawn Jeans

The month before I'd ordered a metre of this stunning rayon textured check from The Fabric Store on a whim (sadly now sold out but they have some other beautiful sheer textured fabrics in at the moment). I didn't have any plans for it but on rummaging through my stash it appeared to be perfect for a Wilder Top. It is really hard to capture the beauty and delicacy of this fabric on camera. For some reason it looks a lot more dense than it does in reality! In real life t has this gorgeous diaphanous quality with almost sheer sections running through the check. The texture is quite unlike anything I've come across before with those pronounced ridges running throughout. I think it is the bold scale of the texture which makes it so unusual. Despite the chunkiness of those textured stripes it is still really soft and drapey.

Diary of a Chain Stitcher: Textured Rayon Wilder Top from Friday Pattern Company

Size-wise the measurement chart puts my bust in a small and my waist and hips more in the medium. As it is a voluminous style from the bust down I cut the small which feels right. With oversized styles which I feel might overwhelm me I have a tendency to want to size down even further but I'm glad I didn't with this as it actually fits quite neatly across the shoulders and chest which balances out the volume beneath.

Diary of a Chain Stitcher: Textured Rayon Wilder Top from Friday Pattern Company

I really loved sewing this up. For a design which has a bit of interest and drama it is actually really fast and straightforward to put together. There is a centre front seam which makes cleanly finishing that neckline opening easy and raglan sleeves are so much quicker than a set in one! Threading the tie through the neckline probably takes longer than most of the other construction steps. I think the gathered neckline manages not to feel twee because of the depths that the designer has so carefully chosen. The inch depth of the frill at the top then the chunky inch thickness of the tie feels quite bold and modern. F.Y.I I've been really enjoying wearing this under a toaster sweater during winter with the frill just poking out of the neck!

Diary of a Chain Stitcher: Textured Rayon Wilder Top from Friday Pattern Company and Megan Nielsen Straight Leg Dawn Jeans

To squeeze the pattern pieces on to the small amount of fabric I had I shortened the bodice pieces ever so slightly (an inch at most). I am however really missing that extra bit of length as it doesn't like to stay tucked into my bottoms no matter how high waisted they are! If I'd had more fabric I would have actually liked to cut the dress version of the bodice which is a little shorter than the top and add a ruffled plum around the hem. Will have to save that idea for the next version! The limited amount of fabric I had meant I couldn't do any pattern matching along the raglan sleeve seams. The matching on all the other seams is a bit shoddy too as I approached it as a muslin I wasn't all that sure I'd like. Had I known how much wear I was going to get out of it I might have taken more care!

Diary of a Chain Stitcher: Megan Nielsen Straight Leg Dawn Jeans

The jeans are made using the Dawn Jeans pattern from Megan Nielsen. I've made the shorts version before but this is my first time making the full length jean. The pattern is incredibly versatile with 4 different versions to make and a bonus ebook with choices of zip, button and exposed button fly. There is a tapered leg, a straight leg, a wide leg and a short, plus lengths for tall, regular and cropped. I sewed up View B - the straight leg jean in a non stretch deep dark indigo denim from The Fabric Store. I've had a few pieces of denim in my stash for a while now so can't remember which exact one it is but I believe it to be about a 12oz one, so quite robust. From what I've seen it sews up great in non denim fabrics like linen too. What I love about this pattern is that it is a true classic cut of high waisted jean.

Diary of a Chain Stitcher: Textured Rayon Wilder Top from Friday Pattern Company and Megan Nielsen Straight Leg Dawn Jeans

As I've made and blogged this pattern previously I don't have much to add construction-wise but one thing I will say is that they fit like an absolute glove - straight out of the envelope! But that is almost too well in this very rigid denim! They are certainly taking some wearing in but (as I finished these back in December) after a couple of months I'm starting to feel them soften. No high kicks or bicycle riding in them for the time being though! I could have made them in a size up but I feel like the snug fit gives them somewhere to go as they age. If I made them the size up I think when they softened up and stretched out they'd end up too big and baggy really quickly. If you prefer a more relaxed fit with your jeans though I'd go ahead and size up.

Diary of a Chain Stitcher: Megan Nielsen Straight Leg Dawn Jeans

As I always do now, I used Gütermann extra strong thread for my topstitching rather than the thicker topstitching thread. I've always had problems with topstitching thread snarling up in the machine but have no problems whatsoever with the extra strong thread. It is slightly thinner which I prefer, it looks a bit more professional to me than chunky topstitching. I kept to a classic copper colour and matches my button and rivets to that (all of which came from my stash). I omitted the rivets on the rear pockets simply as i didn't have enough but like that I now get to show off those topstitched corners as I'm really proud of them! Does anyone have any tips on where to get interesting jeans hardware? I'm bored of using the same old buttons and rivets!

Diary of a Chain Stitcher: Textured Rayon Wilder Top from Friday Pattern Company and Megan Nielsen Straight Leg Dawn Jeans

I know a lot of you will be wondering how the pattern compares to the famous Ginger Jeans from Closet Case Patterns. It is actually quite tricky to compare the two as the Gingers are designed for stretch denim and the Dawns for rigid denim(non stretch). If you want a pair of jeans which are comfortable for most activities straight off the machine then I'd go for the stretch option but if you want a truly classic pair of non stretch jeans the Dawn's are a great choice. The rise of the Dawn is slightly higher than even the higher rise version of the Gingers and I personally love how that feels to wear. I love the pocket/tummy stay on the Gingers (larger pocket pieces which reach right over to the fly and effectively hold your tummy in!) but that would be easy enough to add in to Dawn. Both patterns have fantastically thorough and detailed instructions with clear illustrations. I personally found the Megan Nielsen fly construction method slightly easier to follow and get a neat finish on but that might just be because I've got a couple of years more sewing under my belt since I made the Gingers. Without that amazing sew-along from Closet Case Patterns I'm not sure I'd be able to finish a pair of jeans at all!

Diary of a Chain Stitcher: Textured Rayon Wilder Top from Friday Pattern Company and Megan Nielsen Straight Leg Dawn Jeans

I'm so happy to have another pair of handmade jeans in may wardrobe and feel like with each pair I'm getting better and better! I only wish I had time to sew more. My test version of the Wilder was a resounding success and (spoiler alert) I plunged straight in and made a gown version soon after. Will hopefully get some photos and get it on the blog soon.
Viewing all 396 articles
Browse latest View live