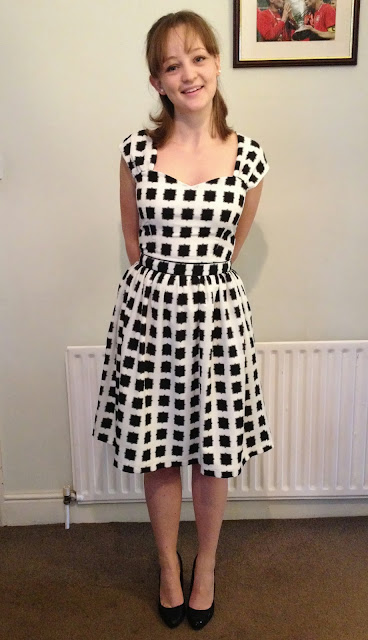
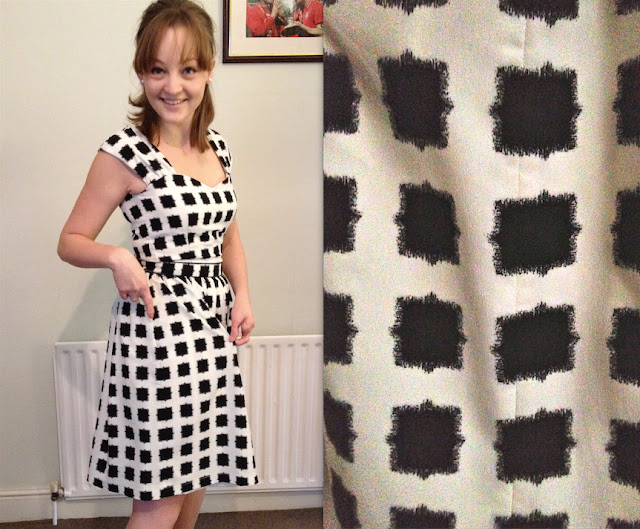
I'm finally catching up with blogging all the projects I finished a couple of months ago! I made this specifically to wear to a friend's wedding back at the end of September after my lovely boyfriend bought me the pattern for my birthday. We all know by now that I am a big fan of Sewaholic Patterns and I'd heard a lot of good things about the Cambie Dress so I couldn't wait to try it out!
![]()
I wasn't at all disappointed. It is again another beautifully drafted pattern by Tasia and I think the only thing I would change next time would be to shorten the sleeve pieces by inserting the gathered ends deeper into the gap between fashion fabric and lining during the final steps. It doesn't slip off the shoulders but feels a little loose at this point; I think I must just be short in the body here.
![]()
You may recognise the pattern of my fabric...it is in fact the negative print of the fabric I used for my Salme Playsuit in the summer. I LOVED the feel of the viscose I used for the playsuit so when I spotted this fabric amongst the jumble on my favourite market stall outside Rolls n' Rems in Lewisham I snapped it up! On closer inspection it was the same print but unfortunately not as silky to the touch. It's got a subtle crepe like texture and I have a feeling it's a poly blend but with it's weight and drape it worked fantastically for this dress and at about £5 for 3 metres I'm not going to complain! The lining is exactly the same fabric, bought from the same stall, just in a plain cream.
![]()
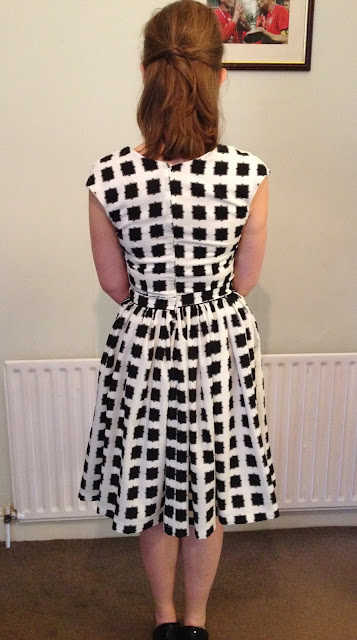
I've only fully lined one other dress (my Circle-Skirted Elisalex dress) which I attached to the bodice of the dress following the By Hand London instructions for lining the bodice. I was really pleased with how this turned out at the time but now I've tried the Cambie way I think I'll be doing it on everything! In fact I've seen quite a few other bloggers talk about using 'the Cambie lining technique' in a lot of their makes. Tasia's method involves attaching the lining after the invisible zip has been inserted into the main fabric and includes securing the lining to your zip using your regular machine foot rather than hand stitching afterwards. This way you get a lovely crisp, clean finish at the corners where your zip meets the neckline. I love it!
If you follow the instructions the entire finish of your dress will end up clean and crisp. I pinked all my seams for longevity but there would be no need to otherwise as all seams end up concealed. I also love the feature of using the fashion fabric as both sides of the waistband. Don't you think just that little hint of the outside inside livens up the lining beautifully?! I know no one will ever see it but I know it's there!
![]()
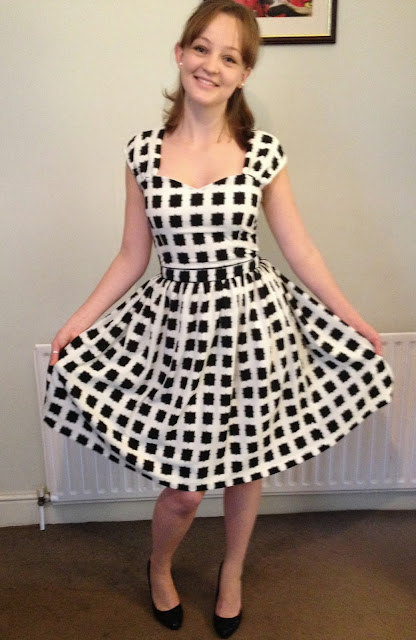
I chose to make view B of the pattern with the full skirt. I imagine view A is perfect for everyday wear but I wanted something a little bit special for the wedding which I could have some fun dancing in. Plus who doesn't enjoy the 1950's feel of a full skirt?! This skirt, fully lined and in this fabric is dreamily swishy and rustles nicely when I walk which makes it feel special.
![]()
I was concerned about the amount of gathering around the waist. I'd never made a skirt like this and can't remember having any similar in my wardrobe so was wary about adding bulk in this area. In a thicker fabric it might be a problem but I think the fact that there is a waistband of a good width around the narrowest part of your waist means you don't loose definition here, like you might if the gathered skirt was attached directly to the bodice.
![]()
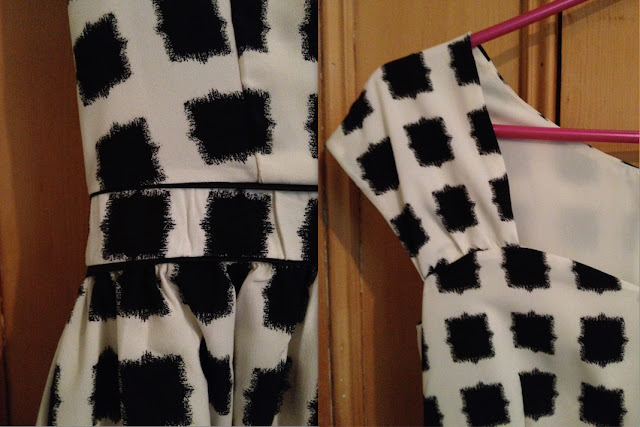
I used some black satin bias binding as piping along either side of the waistband to highlight that feature in amongst the print. I was going to add this along the top of the neckline and to edge the sleeves in the style of Winnie from Scruffy Badger Time's beautiful polka dot version. However, I was worried about achieving a smooth even finish around the sweetheart shape of the neckline and to be honest was running out of time to finish the dress so left it off. I'm pleased I did as I don't think in this dress it needs it. I might add piping here on a future version if I try out Tasia's tutorial for making the neckline straight.
I made an attempt at pattern matching (seeing as the shape of the skirt is so simple) and am generally pretty pleased with how it turned out and how the squares are laid out on the bodice. Just check out the pattern matching down the right hand side seam!
![]()
The left hand side seam is not quite so good however...
![]()
![]()
I wasn't at all disappointed. It is again another beautifully drafted pattern by Tasia and I think the only thing I would change next time would be to shorten the sleeve pieces by inserting the gathered ends deeper into the gap between fashion fabric and lining during the final steps. It doesn't slip off the shoulders but feels a little loose at this point; I think I must just be short in the body here.

I've only fully lined one other dress (my Circle-Skirted Elisalex dress) which I attached to the bodice of the dress following the By Hand London instructions for lining the bodice. I was really pleased with how this turned out at the time but now I've tried the Cambie way I think I'll be doing it on everything! In fact I've seen quite a few other bloggers talk about using 'the Cambie lining technique' in a lot of their makes. Tasia's method involves attaching the lining after the invisible zip has been inserted into the main fabric and includes securing the lining to your zip using your regular machine foot rather than hand stitching afterwards. This way you get a lovely crisp, clean finish at the corners where your zip meets the neckline. I love it!
 |
| The lovely clean finish along the zip makes me so happy! |

I made an attempt at pattern matching (seeing as the shape of the skirt is so simple) and am generally pretty pleased with how it turned out and how the squares are laid out on the bodice. Just check out the pattern matching down the right hand side seam!
The left hand side seam is not quite so good however...
You can't see it very well in that picture but down this side seam the tiles ALMOST match but their almost matching somehow seems to make it more obvious that they don't! It's all because I thought as the fabric was a little sheer and I could see the black squares through I could get away with cutting a double layer like usual instead of each pattern piece twice on a single layer as Lladybird recommends in her pattern matching tutorials. I thought if I made an effort to get the squares of both layers exactly matching as I looked through the fabric then both pieces would come out exactly the same but obviously things shift ever so slightly when cutting this way making the pattern matching ever so slightly off when sewn up.
I'm really pleased with the finished product and found it really satisfying to sew. Tasia I feel like you've improved my sewing skills yet again! Plus, in the style of Taracat...it's the perfect dress for dancing!
