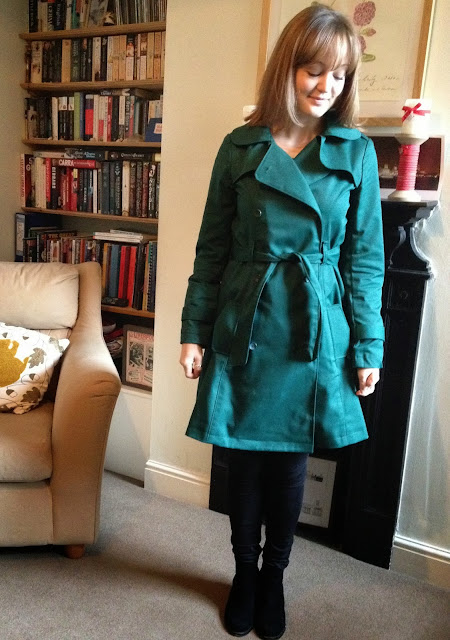
Tah Dah! I'm giving you warning this is going to be a long post with lots of photos but I'm not going to be cutting it down because I'm so SO proud of this make! It's the Sewaholic Robson Coat and definitely the best and most complicated garment I have sewn to date.

I can't believe I've actually made a coat! But first things first, a big part of this accomplishment is down to Tasia from Sewaholic's amazing drafting skills and instructions. I've always loved working with her patterns and in fact her Lonsdale Dress was the first dress I ever made so I knew if I could make any coat it was going to be this one with Tasia's guidance to hold my hand throughout. This pattern is a dream, not only do I love the design of it (including rounded collar and storm flaps), the construction process is genius and you end up with a beautifully finished coat inside and out without the need for lining. If you're tempted by the challenge of making a coat I think a lightweight style like this is a good place to start and I highly recommend this pattern in particular!
You do need a lot of supplies for making this coat so costs can add up but I still spent considerably less than I would have done buying one in the shops that will last as long as this, and even if it did add up to more it would be totally worth it! I used a rich green cotton twill from A-One fabrics on Goldhawk Road for a bargain £4.95/m. I bought 4 metres but I think if you are careful and are removing some of the length as I did you could get it out of 3.5. The fabric was an absolute dream to work with, pressed beautifully, went through the machine smoothly even at bulky points and as I've worn this every day since I finished it I can vouch for it holding up in the unpredictable UK weather.
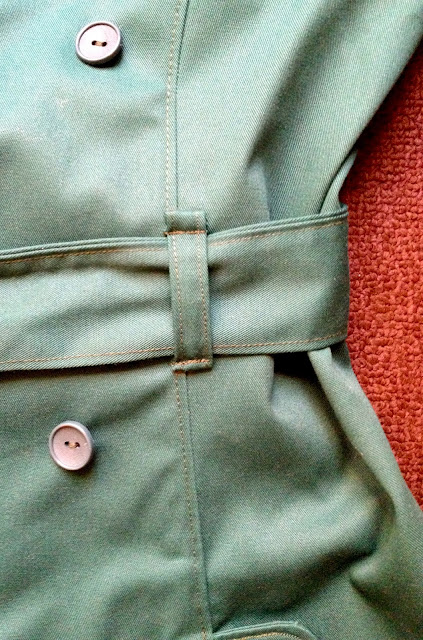
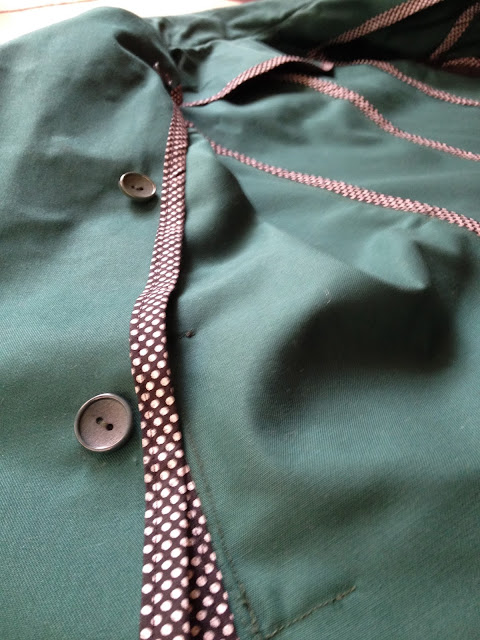
The buttons were from the haberdashery stall at my local market and I used medium weight black iron on interfacing from Minerva Crafts. I chose to use their budget version as it was my first attempt at a coat and you need quite a lot for this. I was a bit concerned about the interfaced pieces being a bit like cardboard to begin with but once pressed and handled as the rest of the coat came together they've softened up nicely.
I was torn between cutting a size 4 or 6 (Sewaholic size) but in the end opted for a 4 as looking at the finished garment measurements they included a lot of ease, particularly around the waist where I like things to be fitted. I made the right choice as I feel like this fits comfortably and I can move easily, even with it done up over a jumper, and I don't feel like I'm being swamped by a coat which I hate. In case it's useful to know I'm 5ft 3" and I took 2.5" off the length and didn't shorten the sleeves at all. The length out of the envelope hit just below my knee which you might like but I prefer this style of coat to be shorter as I know I will wear it a lot with jeans.
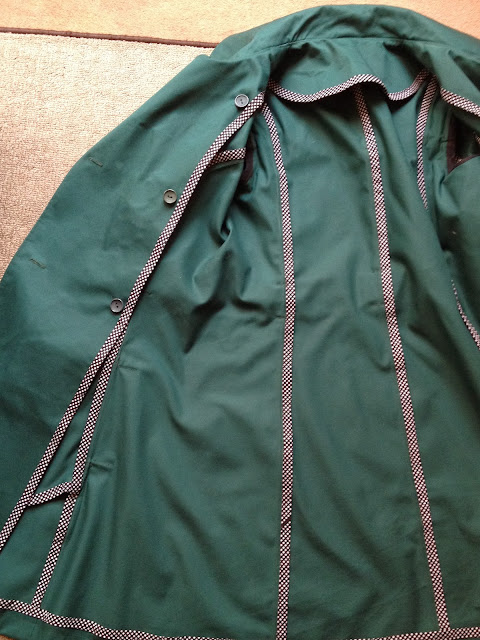
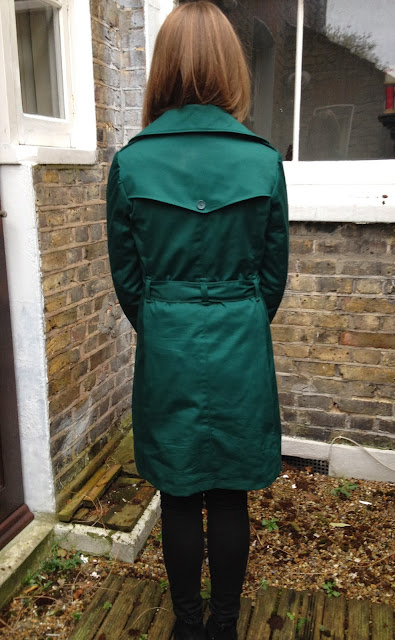
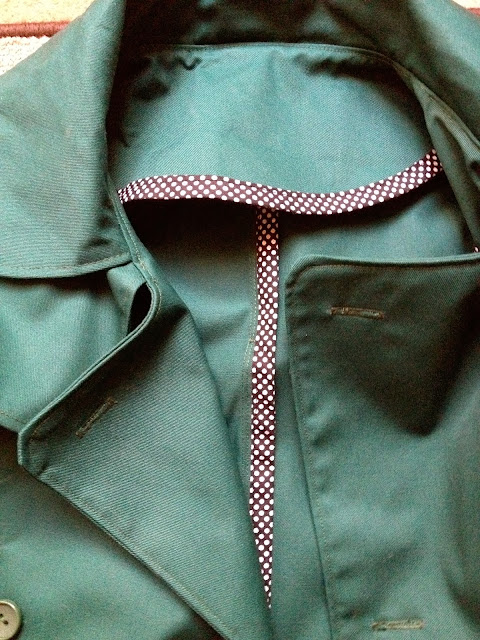
The inside is all finished with bias binding. I love this element of the pattern as it's another aspect that you get to be a bit creative with. I used this polkadot cotton binding, again from Minerva Crafts. It's wider than the pattern calls for (25mm instead of 13mm) but it worked out fine and I'm pleased that it's a bit more visible than the narrow tape would have been. It was great to work with as it held a crease nicely once I'd pressed it to fold it in half. I could then sandwich the raw edge inside it and stitch it on just once rather than sew on one side, fold it over, then sew it down again. A great time saver. One thing to mention about this though is that the pattern calls for 11 metres and as a couple of other bloggers have mentioned, I used way more than that! I had to order more (which I didn't mind as it meant I ordered a tailors pressing ham as well which is a revelation!) and still didn't have quite enough so I ended up binding the arm holes in plain black binding which worked out fine.
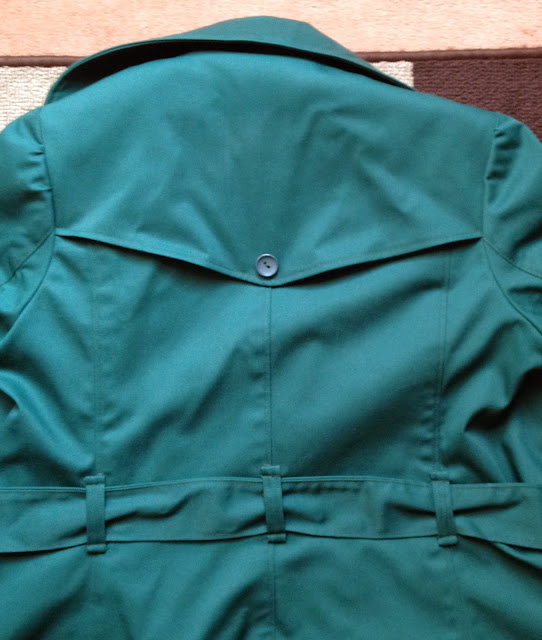
 |
| I love the buttons inside which keep everything sitting nicely when worn |
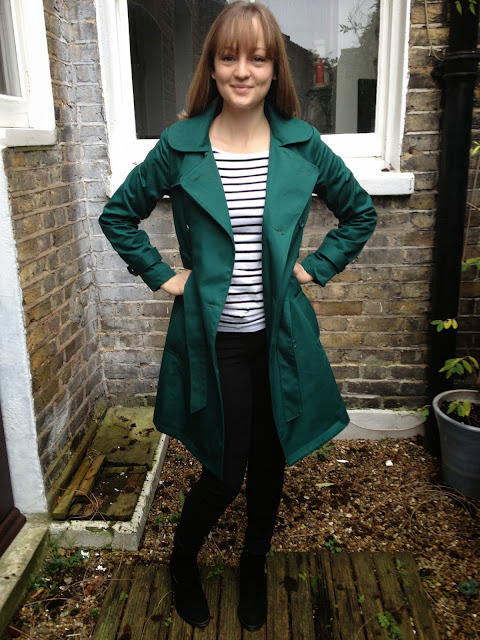
I was initially thinking about making this up in black as I thought I would get more wear out of it but I'm so pleased I went for one of my favourite colours instead as it looks great with most of my wardrobe! I've never had a coloured coat before and it makes such a difference to your mood on a cold and wet morning on a train platform full of commuters in black. The strange thing is about this fabric is that (as well as looking wrinkly when it's not!) it seems to come out a different colour in nearly every photo! It's actually a gorgeous forest green, I think this photo is the closest colour wise:

I learnt SO much making this coat. Looking back now I'm not sure why on earth I thought this project was suitable for me to try as there were so many techniques involved that I had never attempted before, I'd never even sewn a buttonhole! Ha! (F.Y.I. So much easier than I thought!) But I'm so glad I went for it because I've made something I'm really proud of and it's spurred me on to set myself some more sewing challenges. I've also crossed off quite a few techniques on my Technique Checklist which was exciting!
As I went along I was so pleased with what I had already done that I was terrified of messing up the next part and ruining all my hard work! I think the coat sat ready for belt loops and button holes for about 3 weeks, partly because I didn't have much time to sew but also because I was terrified of doing those parts! The seam ripper did come out quite a lot (particularly around the collar area) but I learnt to be patient and took time to look up techniques and reread instructions to make sure I was getting things just right.
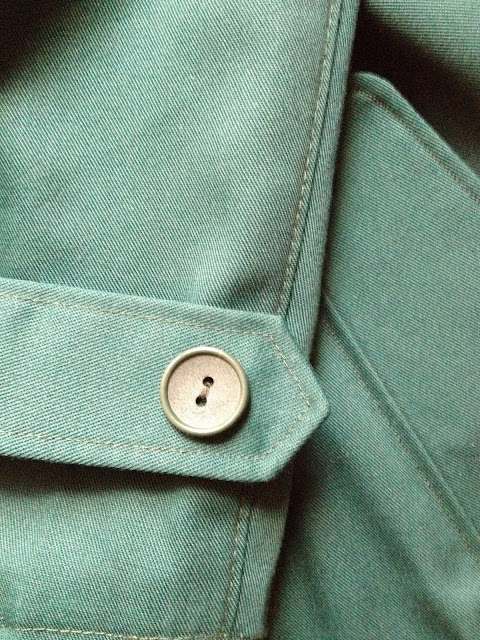 |
| I'm most pleased with my topstitching; is it weird that I really enjoy that part?! |
I thoroughly enjoyed every single step of this make, even the cutting out! I knew it was going to take some time (there are pattern pieces!) so it was great to be able to just accept that and go nice and slowly with all these new techniques to make sure everything turned out just right. I think I can sometimes have a tendency to set myself unrealistic silly deadlines with my sewing and trying to speed through things can often result in there being a few things I'm not 100% happy with about the garment. I knew this would be a piece I could get a lot of wear out of if done right so I wanted to put the time and effort in to every element.
 |
| See what I mean about the colour looking different?! |
Even though it's a huge time consuming project when I finished this one I wanted to start another! I'm holding off for the time being but you may see another appear in the Spring. Next time I'd like to try using a patterned fabric for the pocket linings and undersides of the storm flaps and now I know I love the style I'd splash out on some fancy interfacing. The only other change I would make is to shorten the coat and sleeves at the 'lengthen/shorten here' lines on the pattern rather than cutting it off the hem. I only did that this time as I couldn't decide at the cutting stage what length would look right and if I would need to shorten the sleeves at all. I'm happy with how it looks this time but the pockets are perhaps just slightly too low to be the perfect resting position for hands and the sleeves could maybe do with being just an inch shorter.