A couple of week's ago I was delighted to be invited to take part in the John Lewis Sewing Bee to celebrate their 150th year of trading. I headed along to their Oxford Street store one Saturday morning and spent an amazing day making a mess of their haberdashery department sewing up dresses alongside some new and some very familiar faces. I've got another post coming up to give you more of an insight into the day, today I wanted to take a look at my completed dress!
![Diary of a Chain Stitcher: Vogue 1392 in John Lewis 1950s reproduction fabric]()
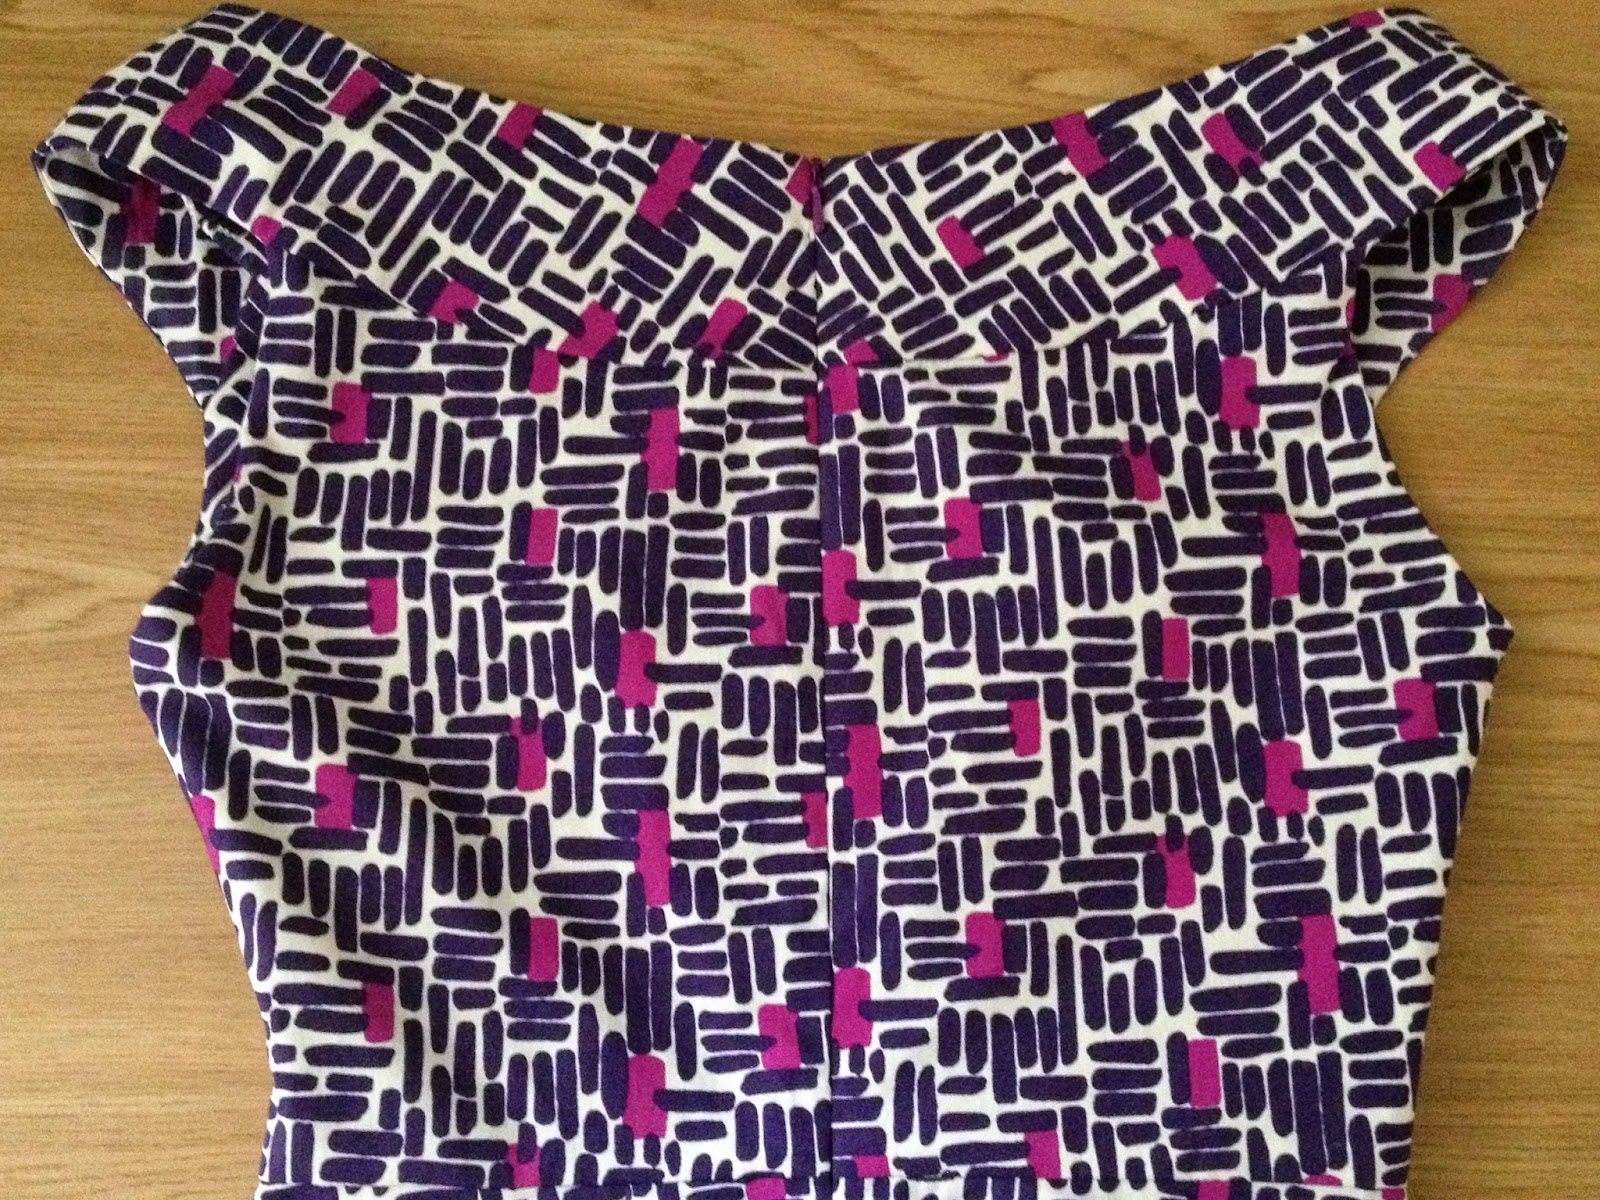
To celebrate their anniversary John Lewis have released a special edition collection of cotton prints which they've brought back from their archives. We were challenged to sew up a dress with one of these fabrics during the day (which with the amount of gossiping and chatting to customers we did was not a successful mission FYI!). It was a seriously tough choice but in the end I settled on the purple colour way of the reproduced 1950s design which Roisin and Clare also picked in different colours and nicknamed the 'bacteria' print!
The fabric definitely played a huge part in my enjoyment of the project as it was so nice to sew with. It's top quality cotton, super soft and really lovely to wear. I don't work with or wear cotton prints very often as I prefer the drape and feel of a viscose but for this design something a little crisper was perfect.
![Diary of a Chain Stitcher: Vogue 1392 in John Lewis 1950s reproduction fabric]()
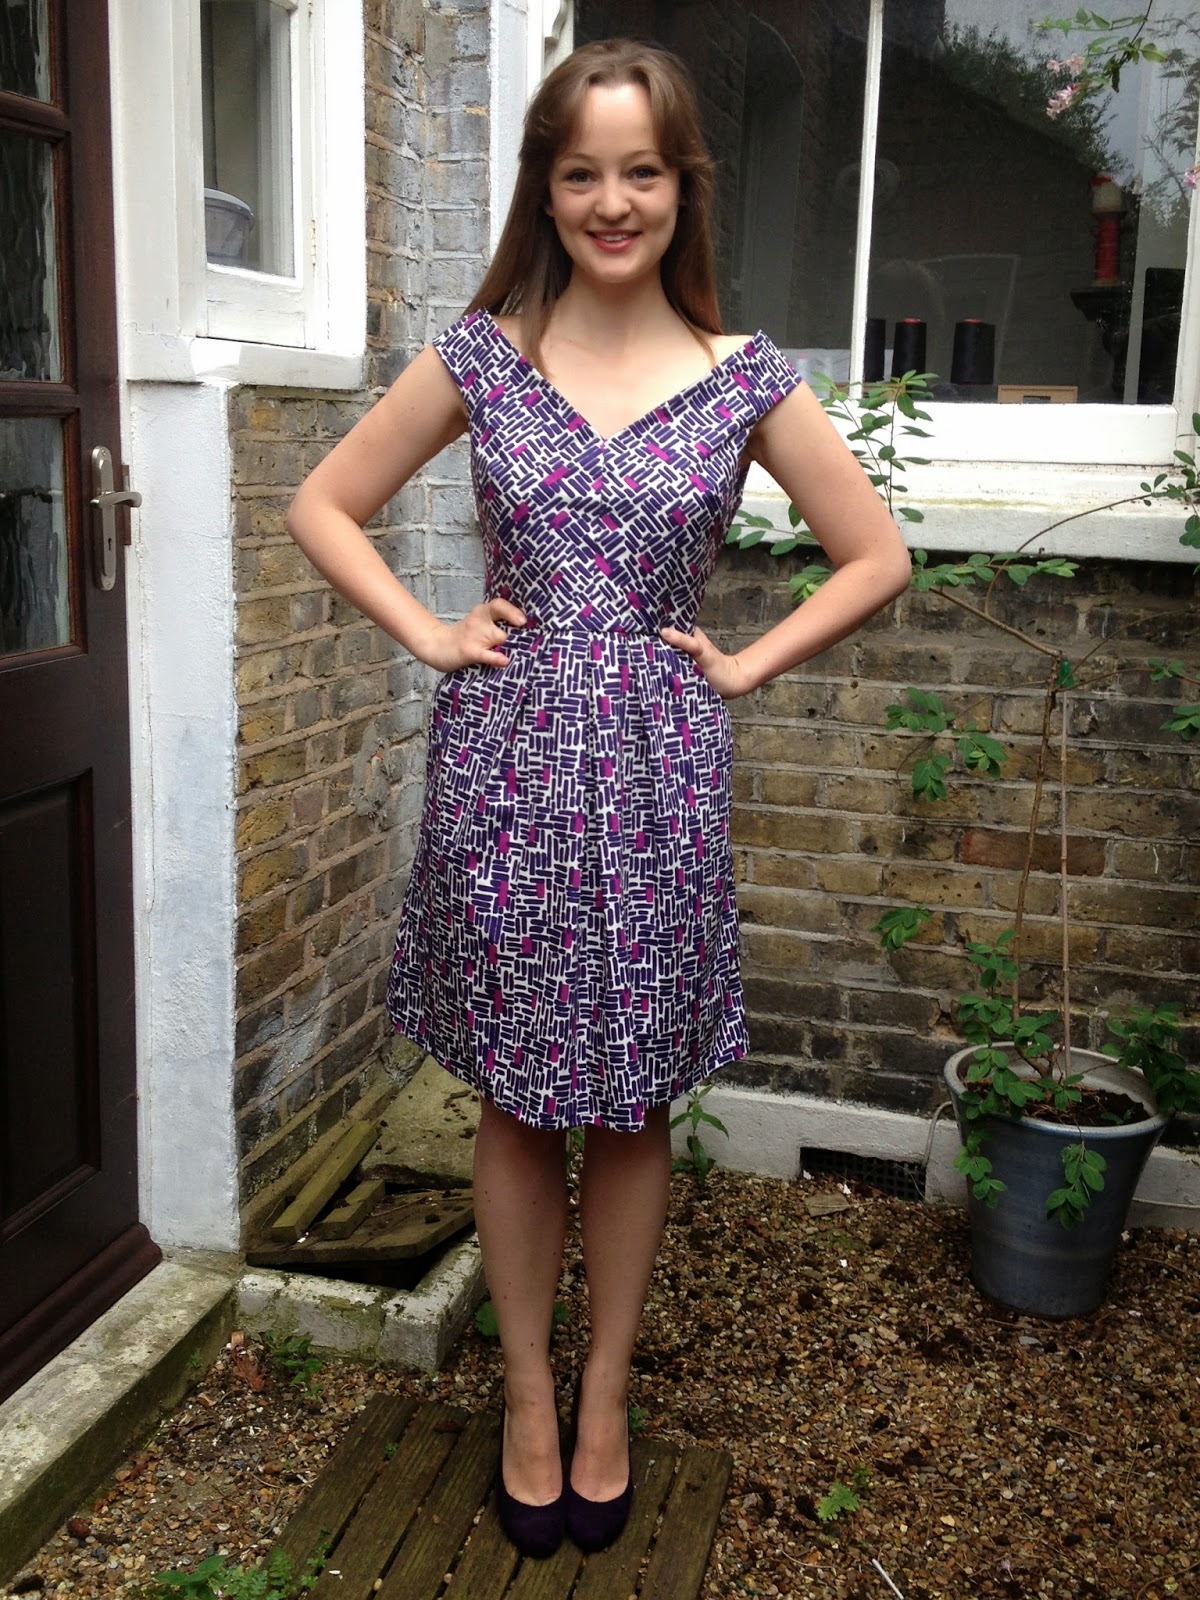
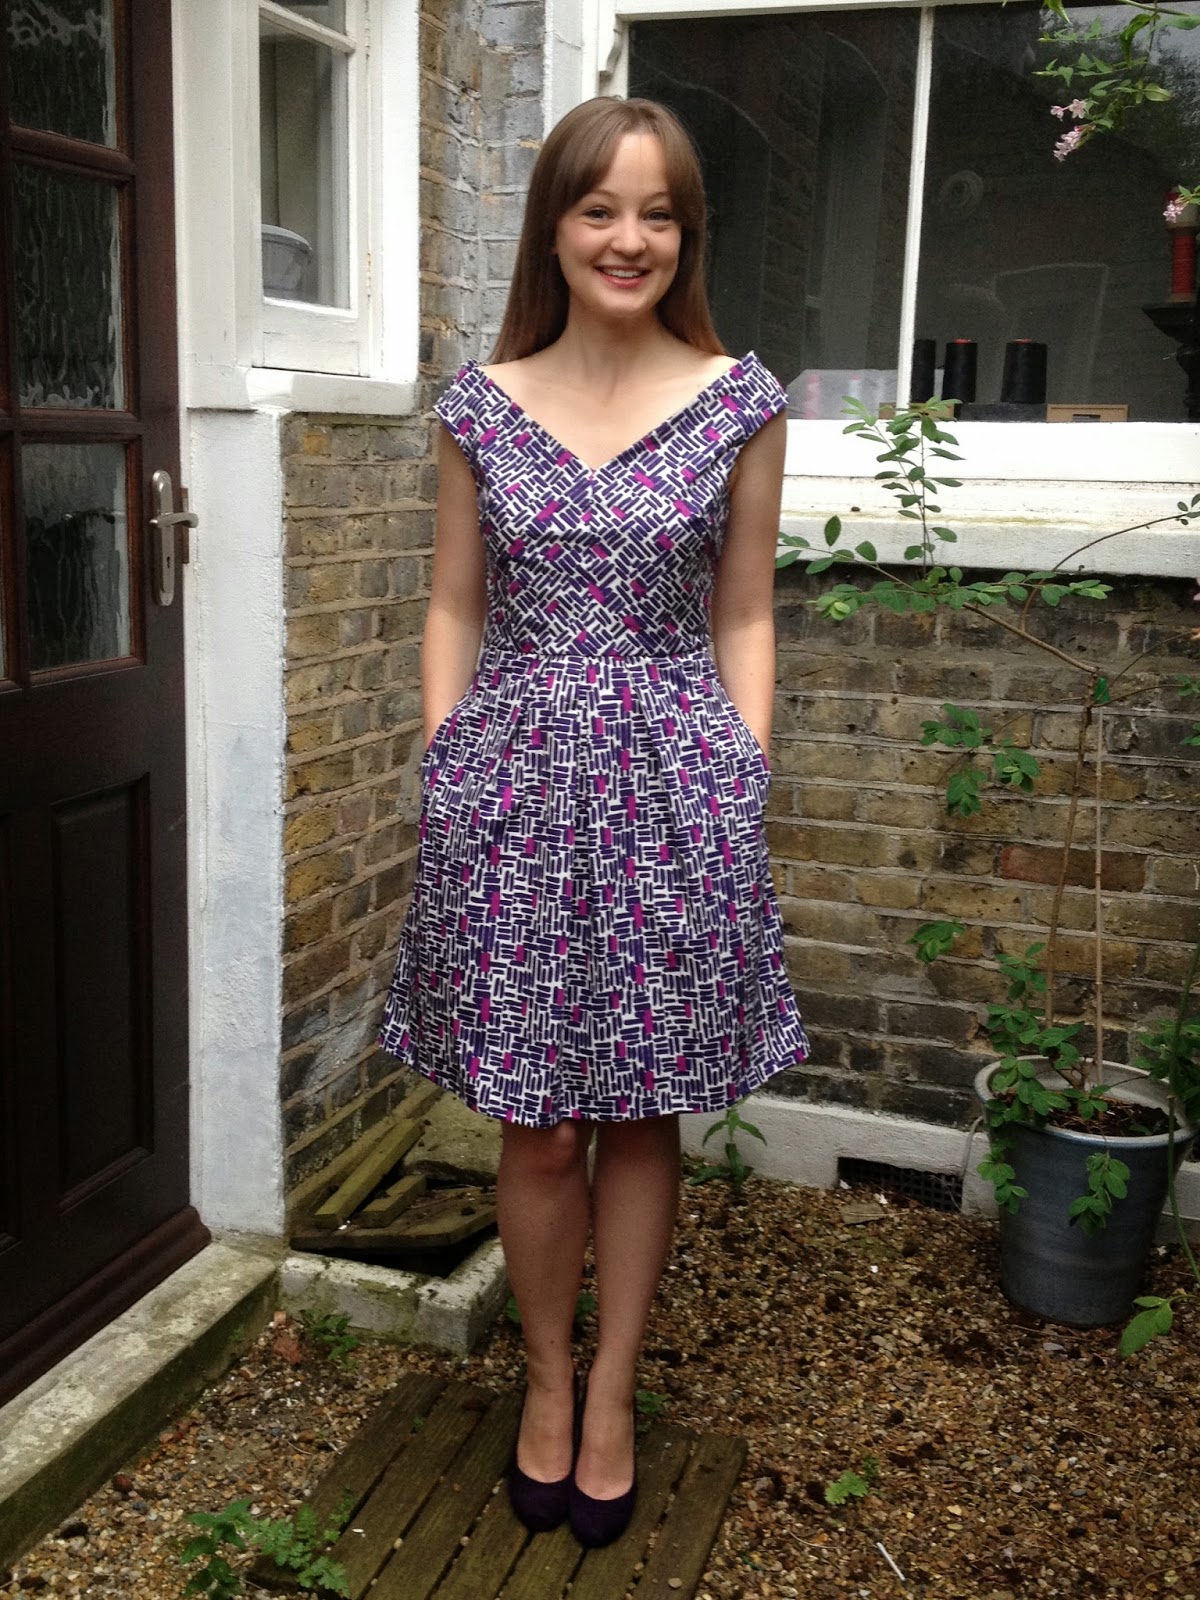
Lisa Comfort of Sew Over It fame was there with her talented assistant Freia to keep things running smoothly and help us out with tips and advice. She'd chosen a selection of dress patterns for us to use and (after much deliberation again!) I picked V1392 which is a Kay Unger design for Vogue as I fell in love with the unusual neckline.
![]()
I don't often sew with patterns from the big 4 as I tend to find it takes much more faffing about to get them to fit. From previous experience I knew I would need to size down as they tend to include so much ease so I cut the size 10 instead of the size 12 recommended by the envelope. I was wary of going down by more than one size in case it ended up too small but I definitely could have got away with the 8 as I nipped it in further down the side seams and some areas could still do with being a smidgen tighter. I do think that this would be a good pattern for petites as I am verging on that sizing, particularly in the body, and feel that everything sits well lengthwise out of the envelope. Even the hem length.
![Diary of a Chain Stitcher: Vogue 1392 in John Lewis 1950s reproduction fabric]()
Apart from the sizing dilemmas I absolutely loved sewing this up. The instructions were excellent, really detailed and thorough. I was delighted to discover some extra construction details in there which step this dress up a level. Well maybe delighted isn't exactly the word to describe how I felt when half way through cutting out and already an hour down on our deadline I spotted there was boning involved but it certainly made for a fun project!
![Diary of a Chain Stitcher: Vogue 1392 in John Lewis 1950s reproduction fabric]()
Included were instructions for fully lining the dress, making your own petticoat to add fullness and for hanging loops. Looking at the cotton print I had chosen I felt like my dress would be more of a day dress so I opted to leave out the petticoat and the skirt lining too, partly because I didn't have the fabric for either! I did chose to line the bodice in my fashion fabric as I wanted a nice clean finish plus the lining is really important for creating the garment shape in this particular case.
![Diary of a Chain Stitcher: Vogue 1392 in John Lewis 1950s reproduction fabric]()
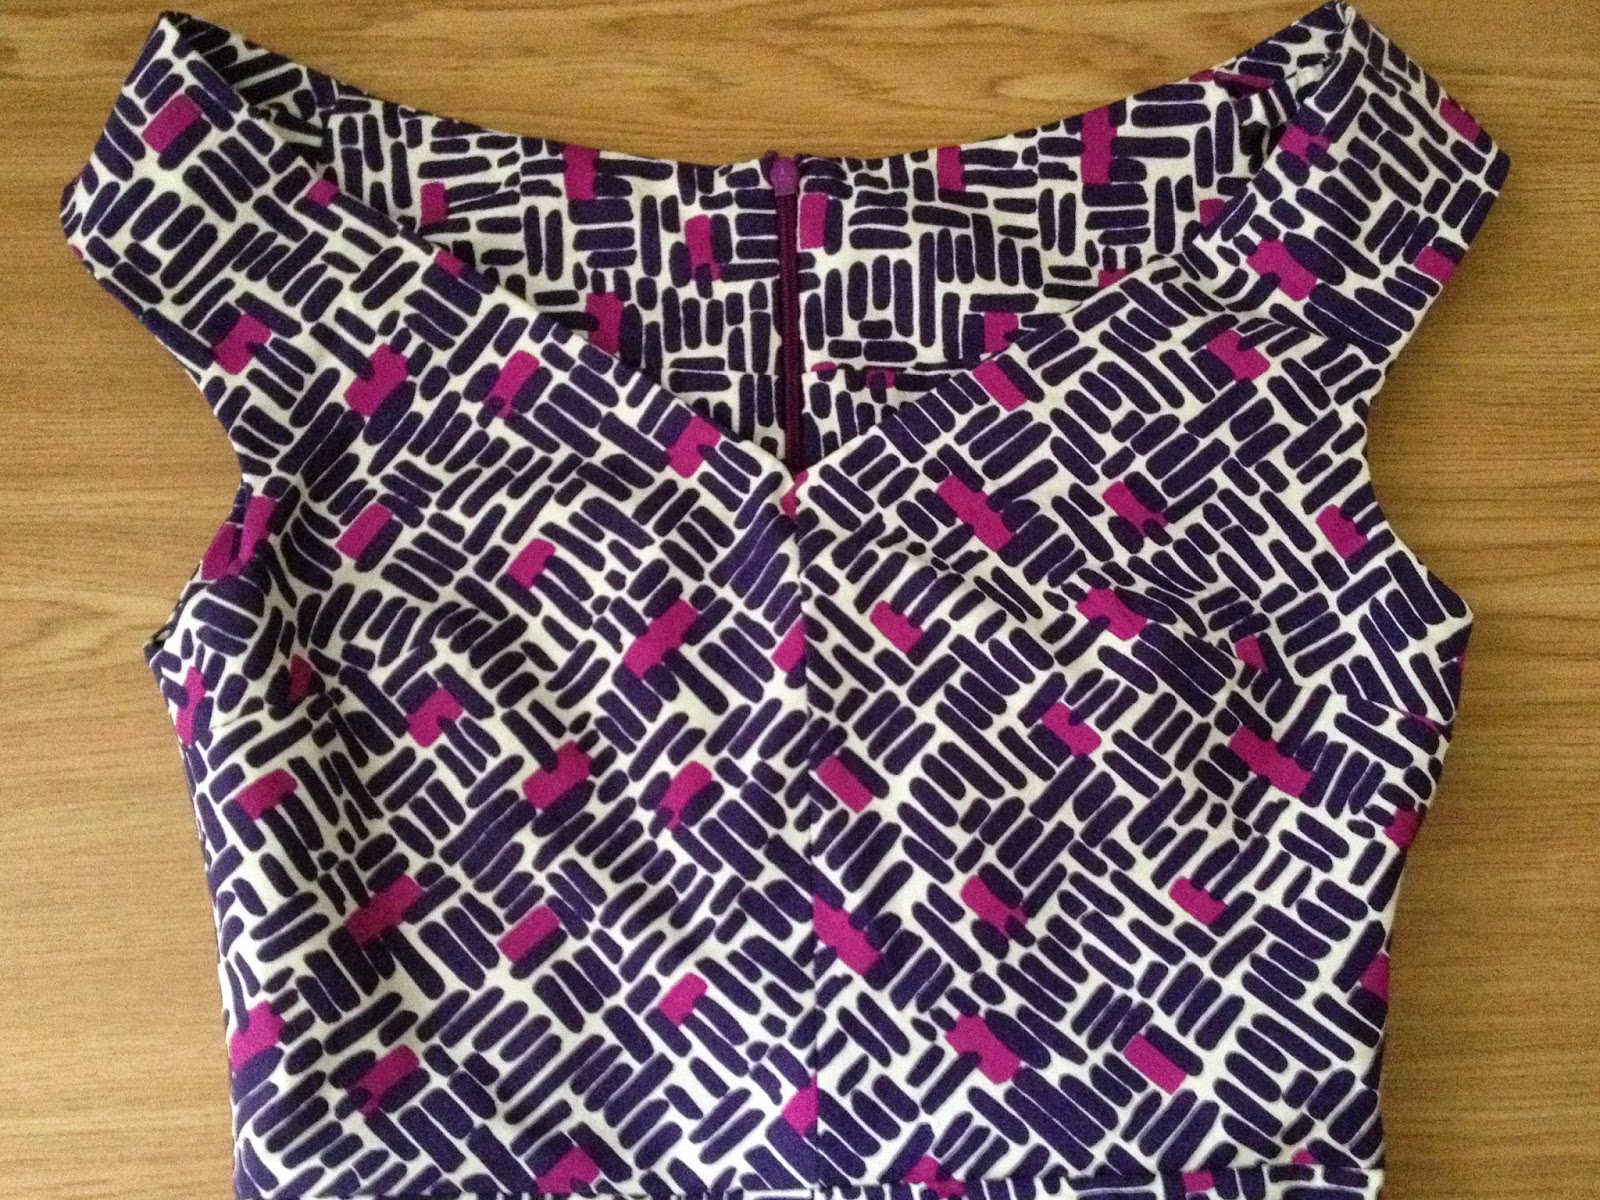
I really enjoyed following the slightly unusual construction method for the bodice of this dress. As you can see the neckline sits slightly off the shoulder. To help this stay comfortably in place elasticated straps are concealed inside the dress which 'cling' to the top of your shoulders. The elastic is concealed within tubes of your lining fabric (or in may case the fashion fabric) and then sewn into the seams of your lining which creates a clean and professional finish. The picture below explains this much better than I can with words! I really love this technique and will keeping my eye out for other opportunities to put it to good use.
![Diary of a Chain Stitcher: Vogue 1392 in John Lewis 1950s reproduction fabric]()
If you are tempted to try this pattern out I will recommend that you do some fairly major grading and notching of your seam allowances around the neckline and arm holes. There are lots of intersecting curved seams in these areas which needed a lot of steaming into shape to lay nice a flat despite my aggressive clipping. As the lining was all slipstitched down and this cotton was nice and tightly woven I didn't finish any of the bodice seams but I did overlock the seams of the skirt. The zip went in beautifully first time (another treat this cotton provides) and I machine stitched my hem with the matching purple thread I was provided with.
![Diary of a Chain Stitcher: Vogue 1392 in John Lewis 1950s reproduction fabric]()
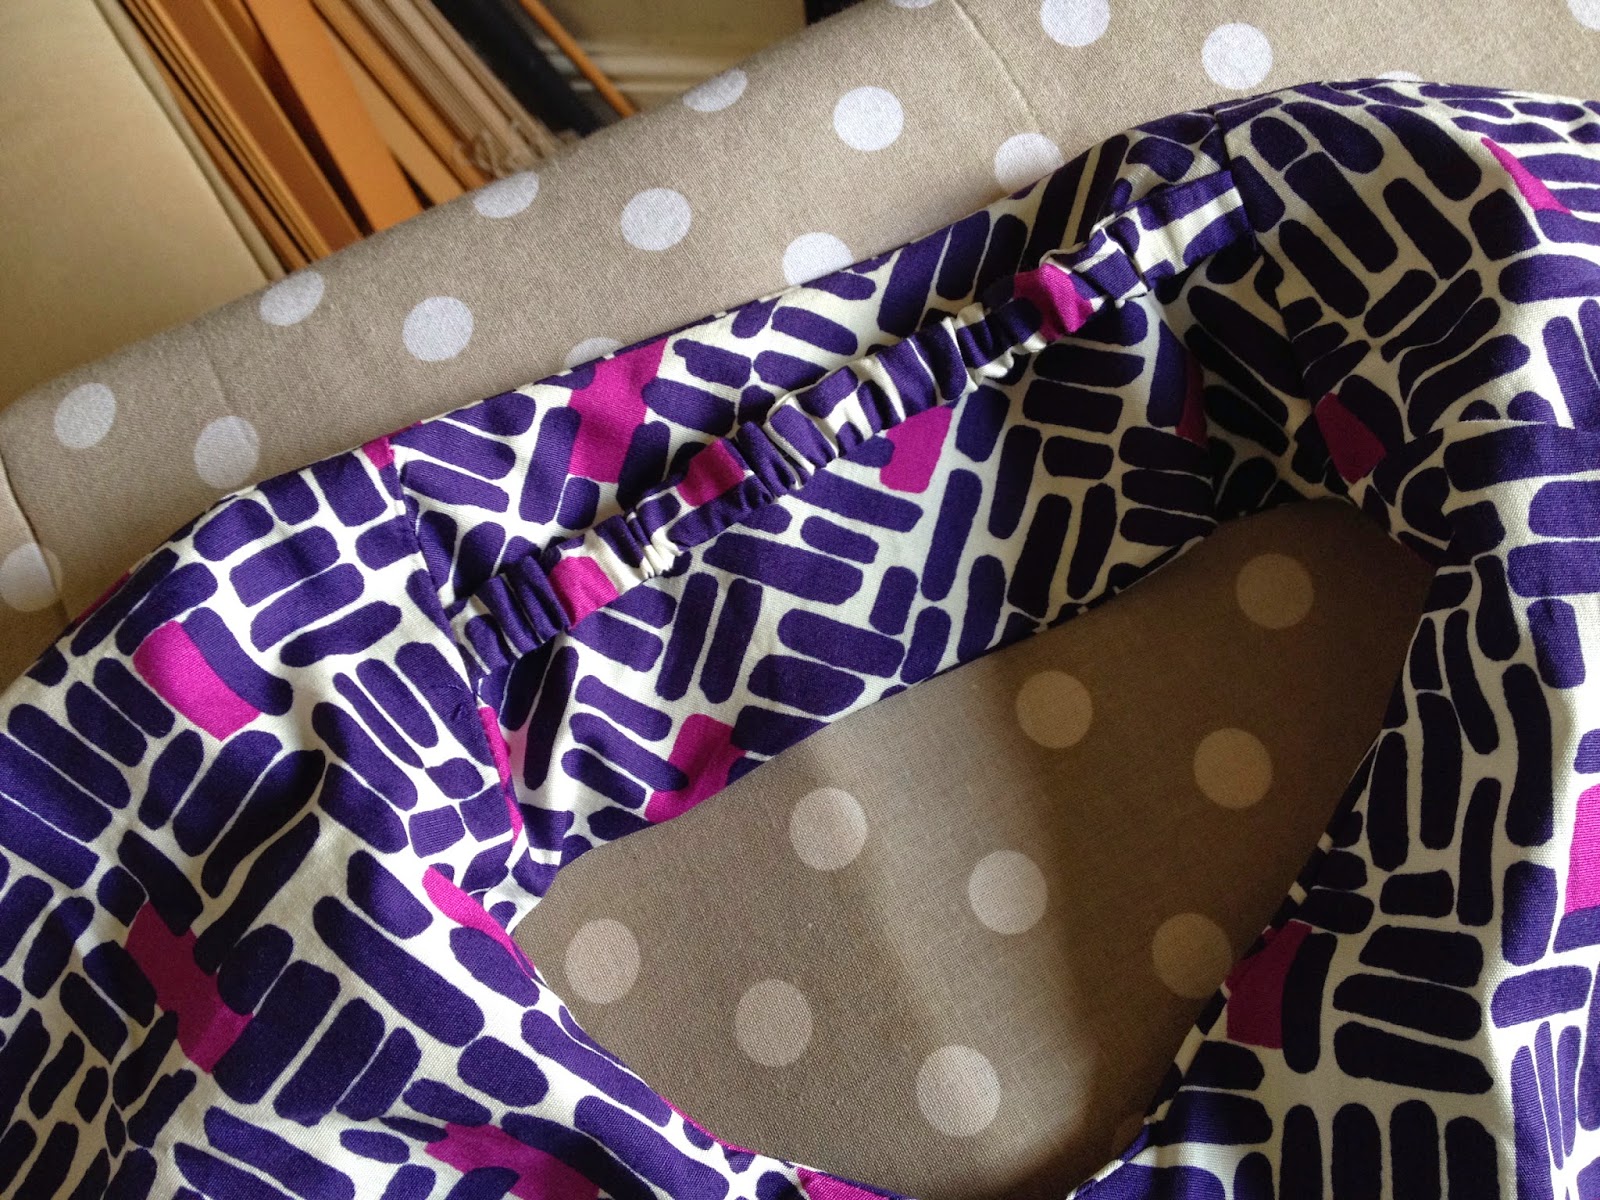
On the day of the sewing bee I made a hasty decision to leave out the boning to save time. But as I've recently learnt a lot about different boning techniques on my tutu construction course when I got home I decided this would actually be a lovely element to include. Boning may seem like a daunting prospect, I know it used to be for me, but actually the way I added it to this dress is super easy! As you can see below I used some of the cotton covered sew-in type boning (admittedly it is black which is not ideal but it's hidden away inside so who can tell?!). It's basically boning secured within a channel of tape. You simply cut the boning to the lengths you need and then sew it to the wrong side of your lining by machine stitching down each edge. Done! You could also use the plastic Rigilene boning for this which can be sewn straight in or you can create your own channels from bias tape. This pattern included really clear markings for placement, one either side of the centre front and then down each side seam. I'm really pleased I added this in as it gives some structure and shape to the soft cotton but I think would have been more effective if I had gone for a closer, more formal fit.
![Diary of a Chain Stitcher: Vogue 1392 in John Lewis 1950s reproduction fabric]()
O and last but not least one of my all time favourite design elements is included in this pattern too...inseam pockets! With facings!
![Diary of a Chain Stitcher: Vogue 1392 in John Lewis 1950s reproduction fabric]()
Make sure to check out the dresses the other ladies made, there are some beautiful combinations of fabrics and patterns:
I'll be back soon with some behind the scenes photos of the Bee and my thoughts about some of the equipment we got to use on the day!
To celebrate their anniversary John Lewis have released a special edition collection of cotton prints which they've brought back from their archives. We were challenged to sew up a dress with one of these fabrics during the day (which with the amount of gossiping and chatting to customers we did was not a successful mission FYI!). It was a seriously tough choice but in the end I settled on the purple colour way of the reproduced 1950s design which Roisin and Clare also picked in different colours and nicknamed the 'bacteria' print!
 |
| Photo from Brian Doherty Photography |
The fabric definitely played a huge part in my enjoyment of the project as it was so nice to sew with. It's top quality cotton, super soft and really lovely to wear. I don't work with or wear cotton prints very often as I prefer the drape and feel of a viscose but for this design something a little crisper was perfect.
Lisa Comfort of Sew Over It fame was there with her talented assistant Freia to keep things running smoothly and help us out with tips and advice. She'd chosen a selection of dress patterns for us to use and (after much deliberation again!) I picked V1392 which is a Kay Unger design for Vogue as I fell in love with the unusual neckline.

I don't often sew with patterns from the big 4 as I tend to find it takes much more faffing about to get them to fit. From previous experience I knew I would need to size down as they tend to include so much ease so I cut the size 10 instead of the size 12 recommended by the envelope. I was wary of going down by more than one size in case it ended up too small but I definitely could have got away with the 8 as I nipped it in further down the side seams and some areas could still do with being a smidgen tighter. I do think that this would be a good pattern for petites as I am verging on that sizing, particularly in the body, and feel that everything sits well lengthwise out of the envelope. Even the hem length.

Apart from the sizing dilemmas I absolutely loved sewing this up. The instructions were excellent, really detailed and thorough. I was delighted to discover some extra construction details in there which step this dress up a level. Well maybe delighted isn't exactly the word to describe how I felt when half way through cutting out and already an hour down on our deadline I spotted there was boning involved but it certainly made for a fun project!

Included were instructions for fully lining the dress, making your own petticoat to add fullness and for hanging loops. Looking at the cotton print I had chosen I felt like my dress would be more of a day dress so I opted to leave out the petticoat and the skirt lining too, partly because I didn't have the fabric for either! I did chose to line the bodice in my fashion fabric as I wanted a nice clean finish plus the lining is really important for creating the garment shape in this particular case.
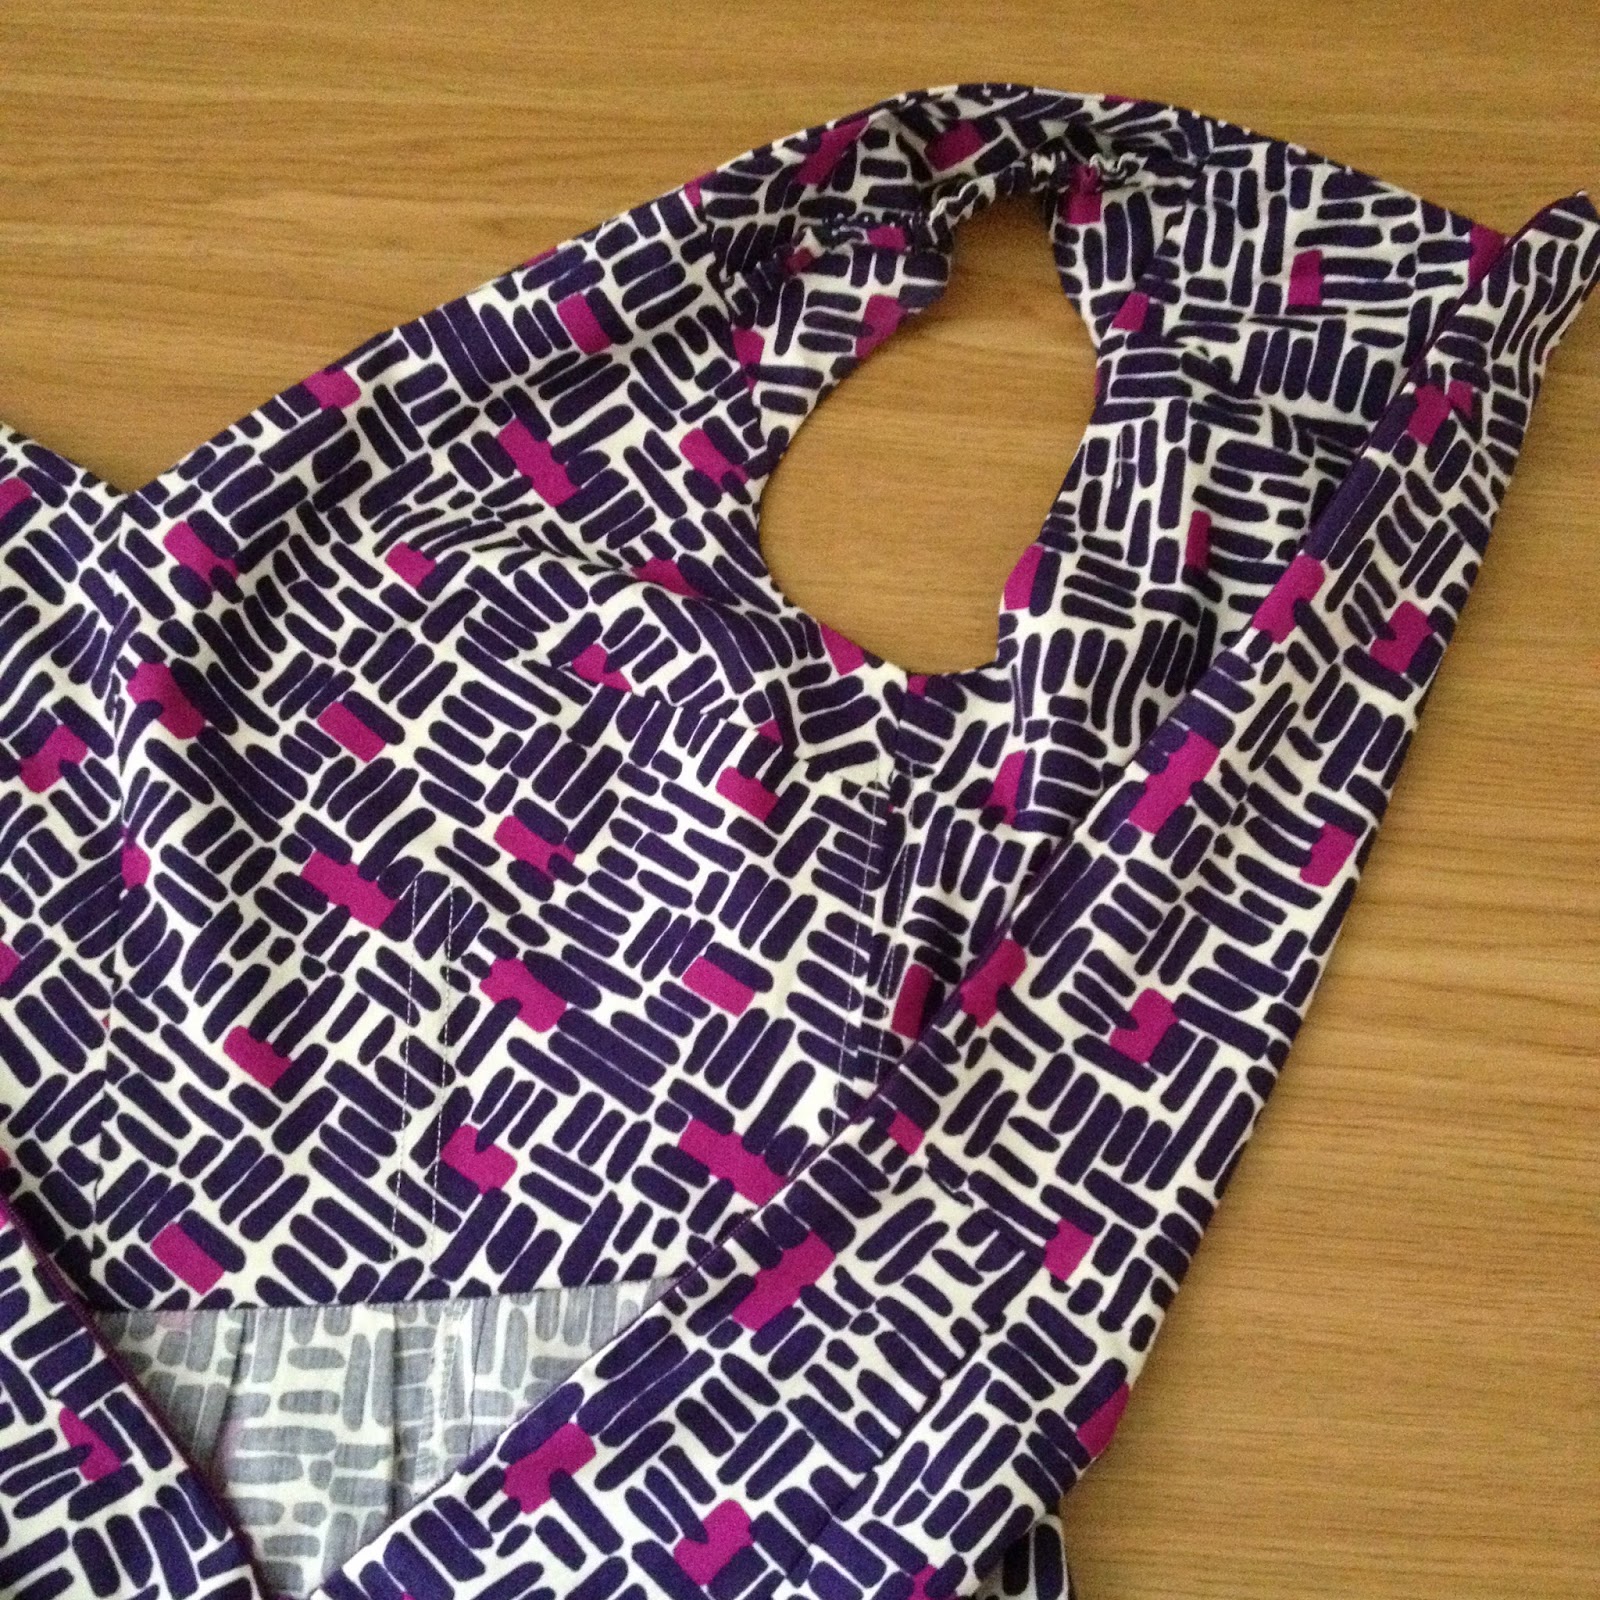
I really enjoyed following the slightly unusual construction method for the bodice of this dress. As you can see the neckline sits slightly off the shoulder. To help this stay comfortably in place elasticated straps are concealed inside the dress which 'cling' to the top of your shoulders. The elastic is concealed within tubes of your lining fabric (or in may case the fashion fabric) and then sewn into the seams of your lining which creates a clean and professional finish. The picture below explains this much better than I can with words! I really love this technique and will keeping my eye out for other opportunities to put it to good use.
If you are tempted to try this pattern out I will recommend that you do some fairly major grading and notching of your seam allowances around the neckline and arm holes. There are lots of intersecting curved seams in these areas which needed a lot of steaming into shape to lay nice a flat despite my aggressive clipping. As the lining was all slipstitched down and this cotton was nice and tightly woven I didn't finish any of the bodice seams but I did overlock the seams of the skirt. The zip went in beautifully first time (another treat this cotton provides) and I machine stitched my hem with the matching purple thread I was provided with.
On the day of the sewing bee I made a hasty decision to leave out the boning to save time. But as I've recently learnt a lot about different boning techniques on my tutu construction course when I got home I decided this would actually be a lovely element to include. Boning may seem like a daunting prospect, I know it used to be for me, but actually the way I added it to this dress is super easy! As you can see below I used some of the cotton covered sew-in type boning (admittedly it is black which is not ideal but it's hidden away inside so who can tell?!). It's basically boning secured within a channel of tape. You simply cut the boning to the lengths you need and then sew it to the wrong side of your lining by machine stitching down each edge. Done! You could also use the plastic Rigilene boning for this which can be sewn straight in or you can create your own channels from bias tape. This pattern included really clear markings for placement, one either side of the centre front and then down each side seam. I'm really pleased I added this in as it gives some structure and shape to the soft cotton but I think would have been more effective if I had gone for a closer, more formal fit.

O and last but not least one of my all time favourite design elements is included in this pattern too...inseam pockets! With facings!
Make sure to check out the dresses the other ladies made, there are some beautiful combinations of fabrics and patterns:
I'll be back soon with some behind the scenes photos of the Bee and my thoughts about some of the equipment we got to use on the day!