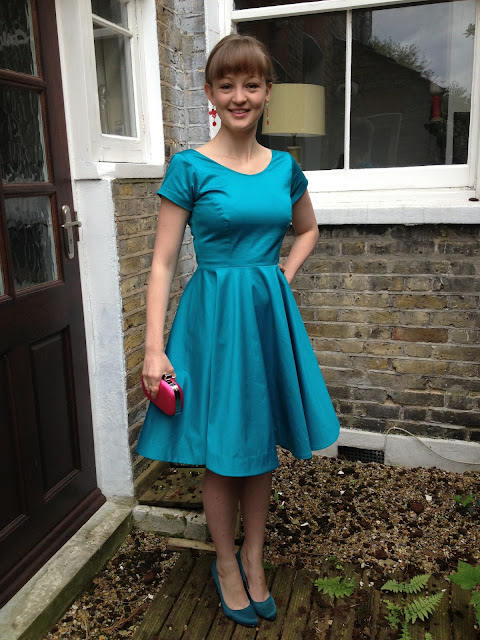
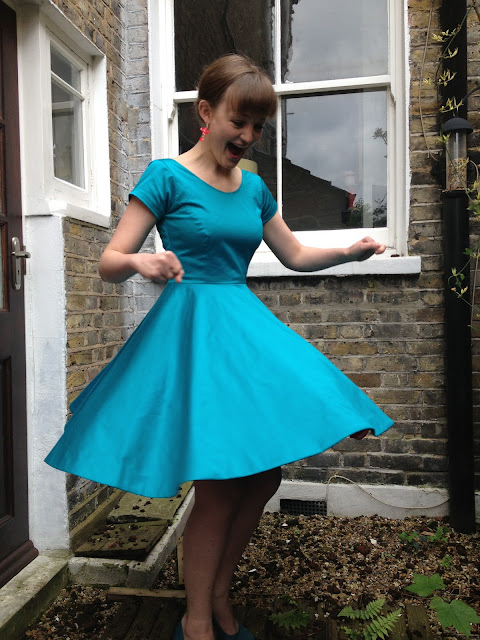
This dress is special for three reasons: 1. It was made to be worn to my boyfriend's brother's wedding last Friday, 2. It was made using fabric from Mood NYC purchased on my recent trip of a lifetime, 3. It's AWESOME!
I've been mega excited about sharing this make on the blog but had such a good time on the day I completely forgot to get any photos of me in it (and this was not top of my fella's priorities either being a best man and all!) and it's taken me a while to get my act together this week and recreate my outfit for you.
 |
| Shoes: M&S (years ago!) Bag: TK Maxx Earrings: V&A Museum Shop |
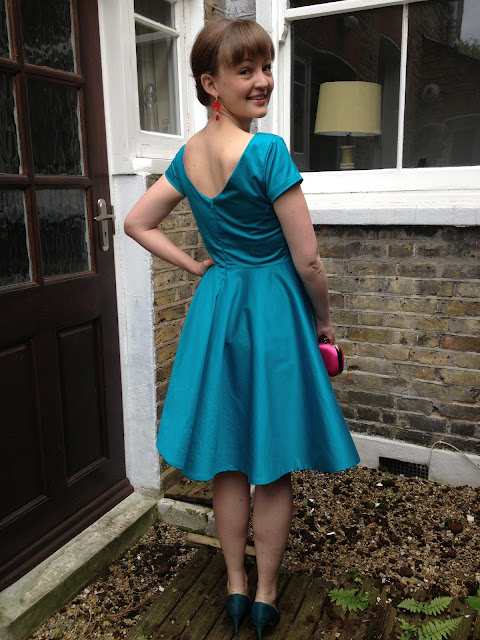
I knew right away that I wanted to make my dress to wear on Richard and Nicola's big day, and I worked out quite quickly that I wanted it to be an Elisalex dress from By Hand London. I made up a muslin (which I haven't had chance to blog yet) in a bargain fairly heavyweight fabric from A1 on Goldhawk Road. I was fairly happy with it but wasn't loving the shape of the skirt on me and don't think using a cheapo fabric was doing it any favours. I love the idea of the skirt and think it looks fantastic on other people, just look at Dibs and Roisin's gorgeous versions. I don't think there's anything wrong with it on me, but it's really not a shape I'm used to so I wasn't feeling very comfortable in it.
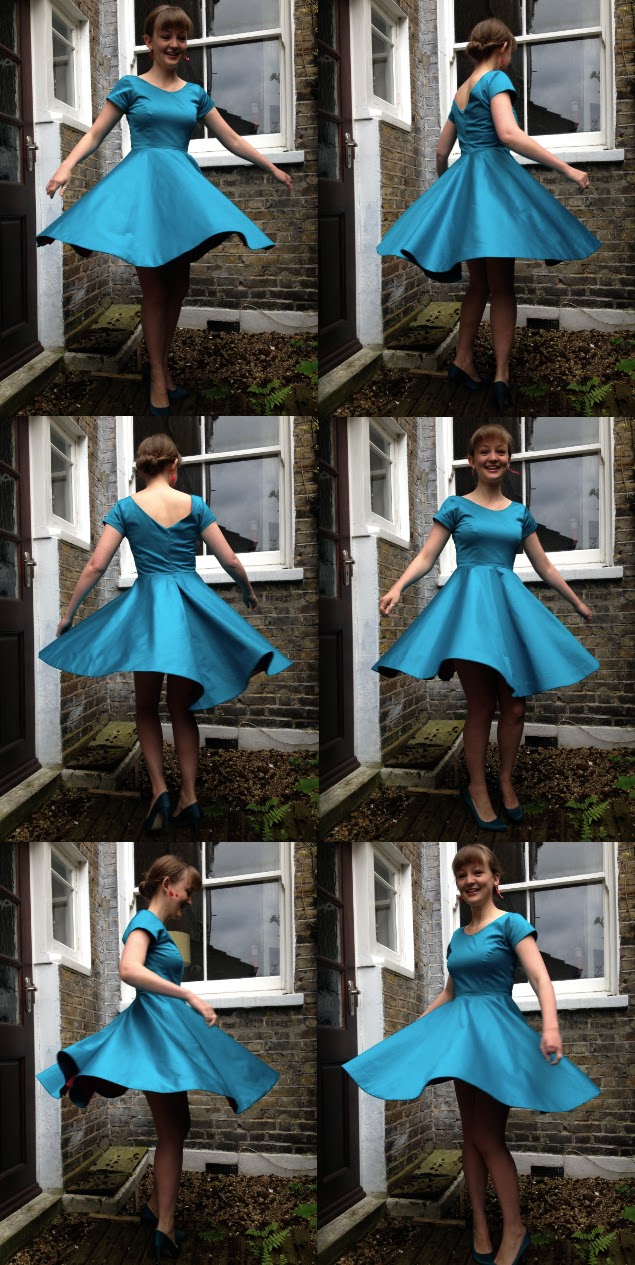
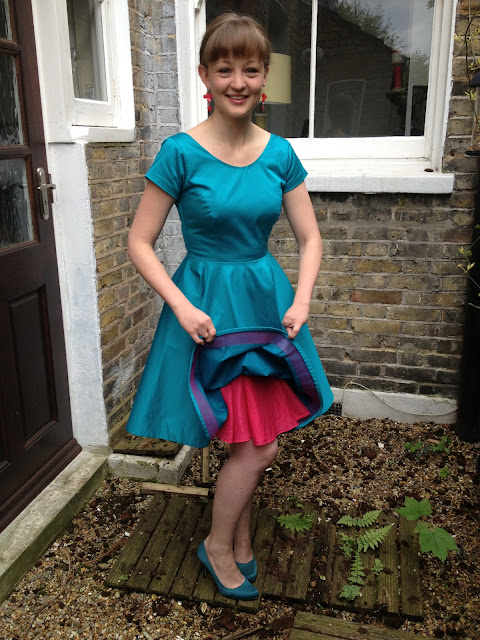
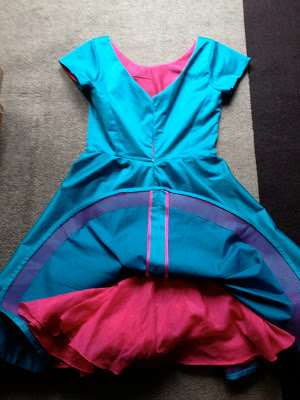
So I decided to switch in a circle skirt, which I think has been a fairly common change for other bloggers to make when working with a lighter weight fabric that wouldn't hold the shape of the skirt so well. I was slightly apprehensive as I'd never done a circle skirt before but I followed a combination of Casey's Circle Skirt Sew-Along and the tutorial on Circle Skirts from the girls at By Hand London themselves and can't believe I've never tried it before! They are so simple to draft and put together (with the exception of the huge hem!), flattering and of course fun. Perfect for twirling at a wedding disco! I think I'll be making up some more lighter weight cotton circle skirts for summer.
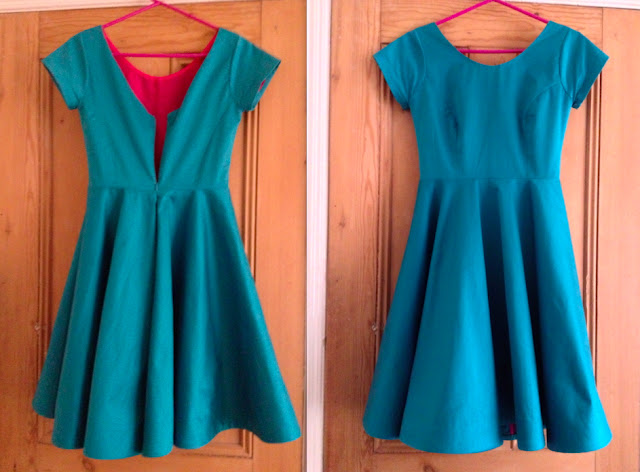
Fabric-wise I really wanted to get something special so I decided to make this my aim for my trip to Mood in New York. There were so many gorgeous fabrics there I thought I would never decide! But with the assistance of my wonderful sister who somehow managed to help me make a decision I settled on this gorgeous turquoise cotton sateen at $14 a yard. I could not be more pleased with my purchase. I was questioning my choice right up until the moment I started sewing with it and then I just got happier and happier from there! It is very reasonably priced when I think about the quality; an dream to cut and sew with, my machine loved this stuff. I didn't want anything too satin like (I was very wary of looking too much like a bridesmaid) and the sateen has the perfect sheen which in this beautiful colour just glows. I was worried it would be too heavy for the circle skirt but actually it's fantastic as it gives it body and shape. It also works fantastically well for the bodice; it holds the structure of those lovely princess seams and also has a teeny bit of stretch which makes it super comfortable to wear.
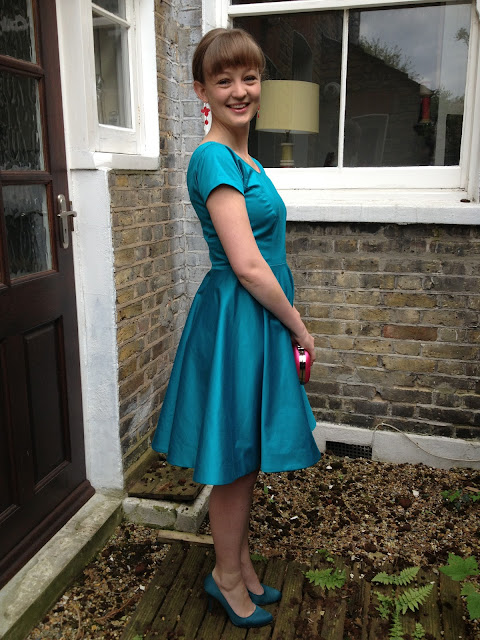
Apart from how lovely and 50s and fun it looks I'm most pleased with how wearable it is. I was honestly so comfortable in this all day (with the exception of dealing with the circle skirt in some fairly major wind outside the church!). I didn't feel like I needed to tug it about to make it sit right when I stood up or down, I could almost forget I had it on and for an occasion dress I think that's quite an achievement! The fit is so nice and that's all down to the drafting skills of the By Hand London girls.
Anyway on to the construction details. This was the longest it has ever taken me to put together a garment, but I really took my time and put in the effort to make this extra special. Plus I was slightly slowed by the fact that I have just discovered Project Runway and had it on constantly in the background; I had to keep stopping so I could properly watch the runway shows!
 |
| Lining! |
I wanted to fully line my dress, the first time I had ever attempted a lining. As I had gone for a plain fabric I really wanted to add a little bit of interest to the dress and with the help of Charlotte and Elisalex themselves at Rachel's meet up a few weeks ago I chose a hot pink! It's a lawn like silk and cotton blend from Classic Textiles on Goldhawk Road. I highly recommend it as dress lining because it's so lightweight and gorgeously soft on the skin. Plus for the quality it's a bargain at £4 a metre. I love the pop of pink that peeks out as the skirt moves and was so please with the colour combo I decided to go for hot pink accessories with the exception of the shoes which I already had and are the almost exact same colour as the sateen.
 |
| Didn't realise how awful this photo was until I uploaded it! |
There were a lot of sewing firsts involved in the making of this dress for me; first lining, first circle skirt and first time sewing princess seams. Despite this it came together quite easily, I actually think it helped as I was so careful with every step! It was also my first time using horsehair braid. I added this to the hem after Casey recommended it in her sewalong and followed Gertie's tutorial to do so. I was very excited to find some 2" wide hot pink horsehair braid on eBay. It gives such a lovely neat finish and really helps with that round hem, though at 4 metres catch stitching the braid up by hand took a fair bit of time! It's well worth the effort though, I felt like a princess in that full skirt! To hem the lining I used the rolled hem foot on my machine.
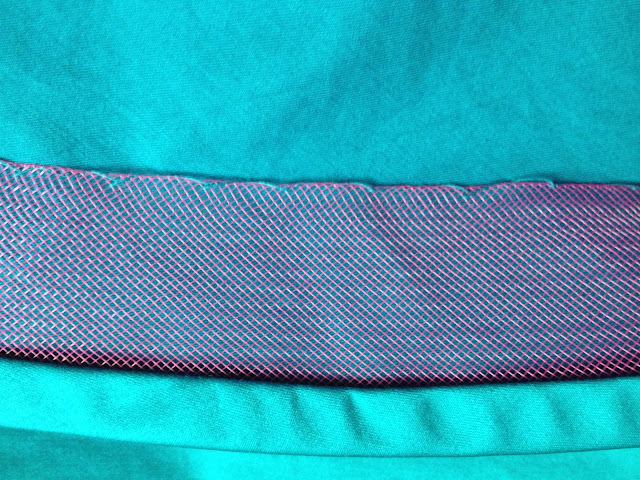 |
| Hot pink 2" horsehair braid around the hem |
As I was lining the dress I just pinked most seams to finish them. This worked particularly well on the sateen, that stuff does not want to fray and when pinked had a lovely crisp finish. I used hot pink bias binding to do a hong kong finish on the centre back seam and waist seam. I loved getting a bit more of the turquoise and hot pink colour combo going on! I was tempted to bind all the seams but as the bodice is so close fitting I wanted to keep all those seams as bulk free as possible to keep a smooth finish on the outside.
 |
| A mid-construction shot showing the bound waistband seam, pinked seams and stay tape around the neckline |
The only two parts that I found a little tricky and troublesome were the neckline and the zip. I think I was a little cocky about the zip as I've never had trouble with them before and this was the first time ever that I've had to unpick one and redo! It wasn't too bad, just the two sides of the bodice weren't lining up quite right so I unpicked one side and pinned more carefully the second time around.
 |
| I'm pretty proud of the finished zip result! |
I initially found it difficult to get the front neckline to sit flat to he body. It took a bit of fiddling with but I managed to sort it out using a combination of techniques. I wanted to prevent the beautiful shape of the front and back neckline stretching out so I used stay tape along the seam allowances (F.Y.I. It was some amazing sticky stay tape from Pacific Trimmings). I stuck this on then under-stitched the lining to the seam allowances as I really wanted to keep the clean outside finish and not topstitch. I ended up clipping the seams right through the stay tape as the stiff stay tape was preventing the curve from turning back completely smoothly. It still wasn't sitting quite right so rather than give up and topstitch I went back and catch stitched the seam allowances to the fashion fabric to pull everything back flat. This did the trick and it's barely visible from the outside.
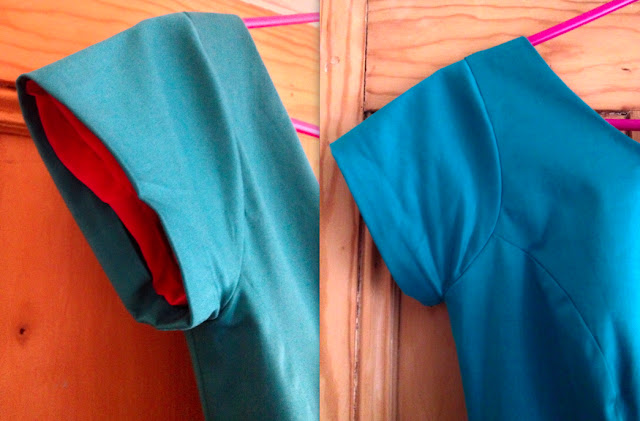 |
| I'm also pretty proud of the setting in of that lined sleeve! |
I'm sure there's more I could say, but I'm aware that this has turned into a super long post, I just love this dress so much I couldn't help myself! Overall this is the most proud I have felt of anything I have made. I felt great in it and was really pleased with the quality I achieved; it even survived a Dirty Dancing 'Time of my Life' lift related accident!! As we came out of the church a lady I didn't know came up to me and said she absolutely loved my dress and wanted to look at it up close. I got to say 'Thank you! I made it!' for the first time and the look of disbelief on her face made me feel SO good!
 |
| Haha! |