The first garment I have to share with you this year is actually one of the last things I made in 2015. I've been speeding through all the delicious fabric I picked up during my trip to California in September and I couldn't wait to sew up my gorgeous merino wool any longer! I arranged a meet up with Christine, Cathy and Pam while I was in LA and we visited Mood Fabrics and The Fabric Store, both on La Brea Avenue. I fell in love with The Fabric Store at first sight. It's a beautiful spacious, bright and clean space with a well curated collection of quality fabrics at very reasonable prices; there were so many unique and wearable prints my mind boggled. I wish there was somewhere like it in London. Thank you ladies for showing me around and introducing me to such a wonderful store, you're so lucky to have it on your doorstep. Some of you are lucky too as just this week they have launched an online store but they currently only ship to NZ, AUS and the USA.
![Diary of a Chain Stitcher: Black Merino Wool Sew Over It Ultimate Wrap Dress]()
The Fabric Store originated in New Zealand (and now has stores in Australia as well as the LA branch) and as well as their beautiful range of dress fabrics specialises in New Zealand merino knits. I've read a lot about it online and seen other sewing bloggers sing it's praises but never thought I'd be able to get my hands on some; The Fabric Store is one of very few places that supply it to home sewers. Therefore some merino yardage was top of my US fabric shopping list. The LA branch has an amazing range of colours and weights, plus a few in stripes and patterns. I thought it was going to take me all day to decide but fairly quickly decided I was going to make something classic that I could get a tonne of wear out of and settled on a colour that never goes out of style...black!
![Diary of a Chain Stitcher: Black Merino Wool Sew Over It Ultimate Wrap Dress]()
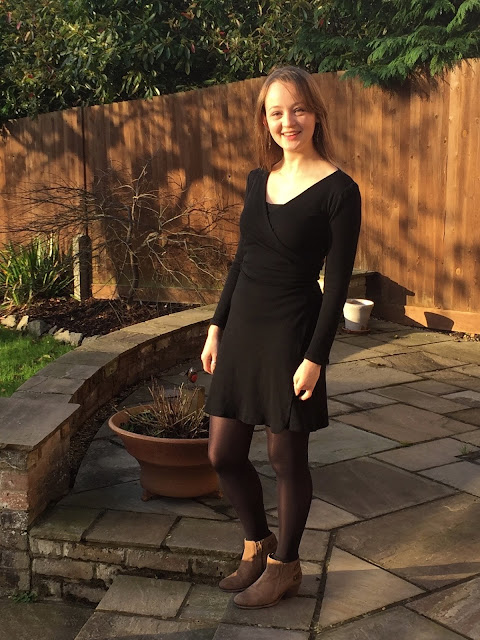
The piece I picked is mid weight with a decent stretch; any weight it going to be super warm anyway so it's ideal for the bleak UK winter. It's not cheap but it's totally worth it. Due to the expense I wanted to find the perfect pattern for it. I wanted something simple and timeless and settled on a wrap dress when I realised that all I wanted to do was literally wrap myself up in this soft, snuggly fabric! I looked at an absolute tonne of wrap dress patterns and even considered adapting the Coppelia Cardigan from Papercut Patterns as I love the fit of that but then saw the Ultimate Wrap Dress from Sew Over It and my mind was made up. It was just what I wanted; simple clean lines, slim long sleeves and a skirt with a bit of flare. Plus I've used their patterns a lot so should have been a safe bet. It was absolutely the right choice style-wise but although I'm really pleased with how this dress finally turned out it did give me a bit of trouble!
![]()
I usually adore Sew Over It patterns but have to say I'm a little on the fence about this one. I think it's partly due to the fact that I still feel quite inexperienced handling knits and lack a bit of confidence, if I'd known better I would have tackled this project a little differently. It took me so long to decide on a pattern that once I was sure I'd found the perfect thing I launched full steam ahead into cutting and sewing and I perhaps should have given my construction methods a little more thought. I've sewn a lot of Sew Over It patterns (see here, here, here and here) and always find the fit to be great for me when I cut between the size 8 and 10 so that's what I did. The fit is great apart from some odd length things going on which may have had something to do with how I handled the fabric. I lost track of what was my error and what might have been poor fit so I'll make sure to sew up a practice in some cheap jersey to check my changes before snipping into anything special next time!
![Diary of a Chain Stitcher: Black Merino Wool Sew Over It Ultimate Wrap Dress]()
I was really happy with how this was sewing up (they don't lie when they say Merino sews beautifully, the stitches sink in and it presses and shapes like a dream) but encountered my main issue when I first put it on after attaching the facing to the neckline. Major gapeage. On reflection I wish I'd had the foresight to apply some clear elastic along the front wrap edges to stop things stretching out as I sewed. I usually go google crazy reading blog posts about a pattern before I get started and if I had I might have done this! However part of the gaping issue was definitely to do with the length of the pattern in this area. I'm quite short in the body plus narrow through the shoulders and upper chest so next time I'll fold some length out of the pattern pieces to combat the gape. On this occasion it was too late for this though and I don't want to waste my precious merino!
![Diary of a Chain Stitcher: Black Merino Wool Sew Over It Ultimate Wrap Dress]()
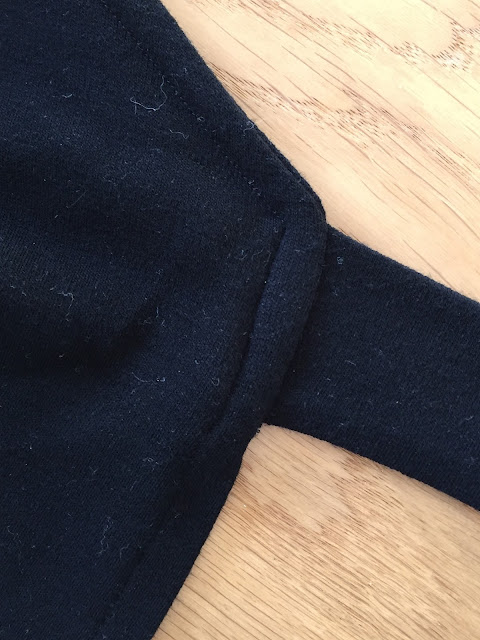
I put the dress on and pinched and pulled to see what changes I could make to get things to sit flat. The only viable option seemed to be taking it up through the shoulder which I did but then of course ran into all sorts of problems with the sleeve head as I was changing the size of the armhole slightly. I'm no expert on fitting or inserting sleeves (come to think of it that's one thing I would like to try and understand more this year) so I just fiddled about until something looked right. It's not perfect and the process was all a bit of a mess but at least it fits properly now! There is a bit too much bulk in the sleeve head for a jersey dress still but I quite like how they sit a little proud. I rejigged those shoulders multiple times and and let me tell you, unpicking black thread out of black spongy merino in winter light is not fun! If this hadn't been such a special piece of fabric I doubt I would have stuck with it but in the words of Tim Gunn I was determined to make it work.
![Diary of a Chain Stitcher: Black Merino Wool Sew Over It Ultimate Wrap Dress]()
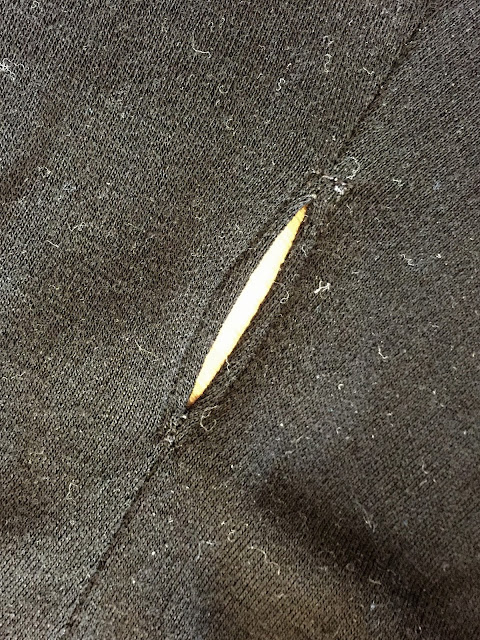
However much of the construction process I did enjoy and the pattern is what I wanted, it just needs a little tweaking to make it perfect for me. I love the facing finish of the neckline and am really pleased with my even topstitching in this area. I will make my facing either wider or narrower next time though as I think one or the other will help keep it tucked away; mine has a tendency to escape to outside when I first put it on at the moment. I think the area where the ties join the bodice has the potential to get a little messy with some wrap patterns but you get a really clean finish here. The ties do seem unnecessarily long though; I like that they wrap around your waist once rather than just tying at the back but bow is too big for me personally. I do love how neat my slot for the tie at the side seam ended up by following the simple method explained in the instructions. no seam allowances peeking through here!
![Diary of a Chain Stitcher: Black Merino Wool Sew Over It Ultimate Wrap Dress]()
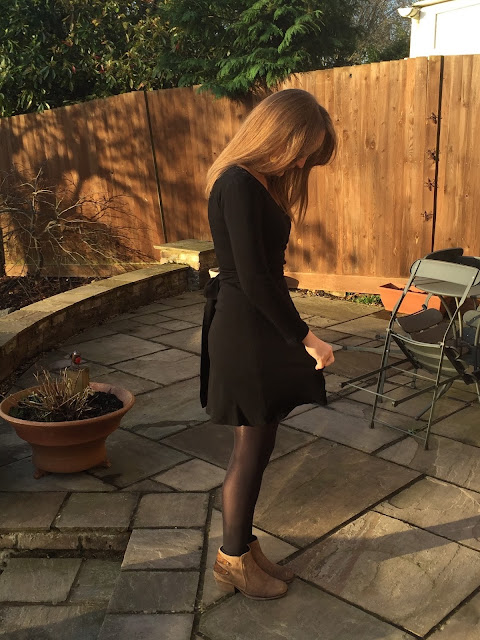
The wrap neckline sits fairly low; not so low that I feel self conscious about the amount of cleavage on display but I am wearing it with a little black cami here. I'm used to everything turning out too long so was supersede when I didn't take any length off the hem and it still turned out shorter than I expected. This may have something to do with how much I took it up through the shoulder but the waist ties still sit at the right point. The skirt has a lovely flip and bounce to it because of the spring in the merino and I think this probably effected length.
![Diary of a Chain Stitcher: Black Merino Wool Sew Over It Ultimate Wrap Dress]()
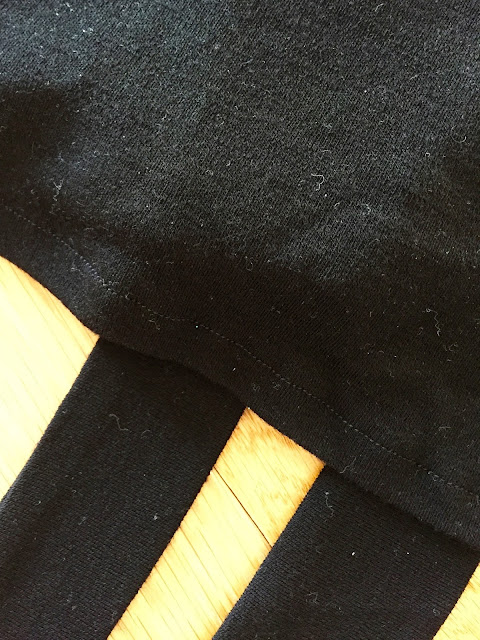
I used my usual method for knits of constructing the garment with a narrow zig zag stitch on the machine and then finishing seam allowances on my overlocker. You need to do this on the side seam with the slot for the tie at least as this seam allowance is best pressed open. I applied twill tape to the shoulder seam for strength and used a straight stitch for the hem as that area doesn't need to stretch. The hem was really straightforward as it's just turned up and stitched and the merino presses well. I'm not sure about how this looks though as you are left with a visible raw edge. I like the professional look of having them all concealed. I'll give this some thought next time, it's a little tricky as the two front edges curve at the hem but maybe I could simply overlock the edge before I turn it in?
![Diary of a Chain Stitcher: Black Merino Wool Sew Over It Ultimate Wrap Dress]()
Big thanks to my brilliant sister for taking some great pictures for me over Christmas! It was such a treat not to have to use the self timer! I'll definitely make this again, but will have a good sit down and a think about the pattern and construction techniques in combination with the fabric I choose before delving in next time. In a more stable knit (the merino is very stretchy) I think this would be a lot easier to put together. Anyway I finally triumphed with my precious merino wool but it looks like the Colette Guide to Sewing Knits is going to be my bedtime reading for the foreseeable future!

The Fabric Store originated in New Zealand (and now has stores in Australia as well as the LA branch) and as well as their beautiful range of dress fabrics specialises in New Zealand merino knits. I've read a lot about it online and seen other sewing bloggers sing it's praises but never thought I'd be able to get my hands on some; The Fabric Store is one of very few places that supply it to home sewers. Therefore some merino yardage was top of my US fabric shopping list. The LA branch has an amazing range of colours and weights, plus a few in stripes and patterns. I thought it was going to take me all day to decide but fairly quickly decided I was going to make something classic that I could get a tonne of wear out of and settled on a colour that never goes out of style...black!

I usually adore Sew Over It patterns but have to say I'm a little on the fence about this one. I think it's partly due to the fact that I still feel quite inexperienced handling knits and lack a bit of confidence, if I'd known better I would have tackled this project a little differently. It took me so long to decide on a pattern that once I was sure I'd found the perfect thing I launched full steam ahead into cutting and sewing and I perhaps should have given my construction methods a little more thought. I've sewn a lot of Sew Over It patterns (see here, here, here and here) and always find the fit to be great for me when I cut between the size 8 and 10 so that's what I did. The fit is great apart from some odd length things going on which may have had something to do with how I handled the fabric. I lost track of what was my error and what might have been poor fit so I'll make sure to sew up a practice in some cheap jersey to check my changes before snipping into anything special next time!

I was really happy with how this was sewing up (they don't lie when they say Merino sews beautifully, the stitches sink in and it presses and shapes like a dream) but encountered my main issue when I first put it on after attaching the facing to the neckline. Major gapeage. On reflection I wish I'd had the foresight to apply some clear elastic along the front wrap edges to stop things stretching out as I sewed. I usually go google crazy reading blog posts about a pattern before I get started and if I had I might have done this! However part of the gaping issue was definitely to do with the length of the pattern in this area. I'm quite short in the body plus narrow through the shoulders and upper chest so next time I'll fold some length out of the pattern pieces to combat the gape. On this occasion it was too late for this though and I don't want to waste my precious merino!
I put the dress on and pinched and pulled to see what changes I could make to get things to sit flat. The only viable option seemed to be taking it up through the shoulder which I did but then of course ran into all sorts of problems with the sleeve head as I was changing the size of the armhole slightly. I'm no expert on fitting or inserting sleeves (come to think of it that's one thing I would like to try and understand more this year) so I just fiddled about until something looked right. It's not perfect and the process was all a bit of a mess but at least it fits properly now! There is a bit too much bulk in the sleeve head for a jersey dress still but I quite like how they sit a little proud. I rejigged those shoulders multiple times and and let me tell you, unpicking black thread out of black spongy merino in winter light is not fun! If this hadn't been such a special piece of fabric I doubt I would have stuck with it but in the words of Tim Gunn I was determined to make it work.